
Disassembling a round solar light involves a series of steps that require careful attention to detail, particularly to avoid damaging the components. 1. Gather necessary tools and materials, 2. Identify the types of screws used, 3. Carefully remove the outer casing, 4. Disconnect the internal components. Moreover, it is crucial to ensure that the light has been turned off and is not exposed to sunlight when initiating disassembly. Each component, such as the solar panel, LED lights, battery, and housing, can typically be taken apart with a systematic approach.
1. TOOLS REQUIRED FOR DISASSEMBLY
To embark on the journey of disassembling a round solar light, specific tools need to be gathered beforehand. A precise screwdriver set, appropriate for the screws typically used in these devices, is essential. Often, manufacturers opt for either Phillips or flathead screws, making it critical to have both types available. Alongside this, a soft cloth or cushion can safeguard the outer casing against scratches or damage during the process. Moreover, a pair of pliers may also come in handy if there are any stubborn screws that resist removal.
Beyond these basics, it may be beneficial to use a multimeter to test the battery and ensure it is still functional. If it is faulty, safe removal and replacement are paramount. Having a well-lit workspace is equally important, as it allows for better visibility of small screws and components. An organized workspace helps in keeping track of the parts removed during the disassembly, preventing any confusion during reassembly. Ultimately, possessing the right tools is paramount in ensuring a smooth disassembly process.
2. UNDERSTANDING COMPONENTS OF A SOLAR LIGHT
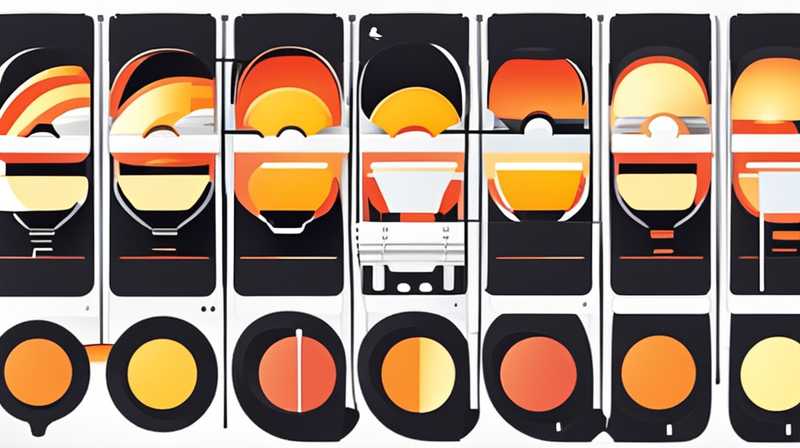
A round solar light typically encompasses several key components that collectively enable it to function efficiently. The solar panel, which captures sunlight, converts it into electrical energy. This energy is subsequently stored in a rechargeable battery. The battery powers LED lights, which illuminate when it gets dark. Understanding how these parts work together is vital before disassembly; it ensures that every piece is handled with care.
The outer casing, usually made from durable plastic or metal, serves to protect the intricate inner components from environmental elements like moisture or dust. Additionally, wiring connects these components to facilitate energy transfer. Different models may have unique designs or additional features like motion sensors, which may complicate the disassembly process. Familiarity with these parts empowers an individual to execute the task methodically, subsequently protecting the integrity of the solar light.
3. IDENTIFYING SCREW TYPES AND ACCESS POINTS
Recognizing the screw types used in the construction of a round solar light can greatly ease the disassembly process. Typically, these devices feature screws recessed within the housing or secured with weatherproof sealants. Examining the outer casing carefully allows one to spot screw access points before attempting to remove them. A magnifying glass may be helpful in identifying smaller screws or intricate assembly points.
Once the screw types are identified, using the correct screwdriver becomes essential in preventing stripped screws, which can complicate disassembly. Some models incorporate clips or tabs in addition to screws, requiring a gentle touch to release these fasteners without causing damage. Patience and diligence during this phase will significantly enhance the likelihood of a successful disassembly without damaging any components.
4. REMOVING THE OUTER CASING
To access the interior components of the solar light, the outer casing must be removed systematically. Start by unscrewing all visible screws, ensuring that they are placed in a designated area for easy retrieval. If the light has been subjected to outdoor elements, a heated tool may assist in loosening any adhesive used in securing the casing. Carefully prying apart the casing should be performed with a plastic pry tool to minimize damage.
Once the screws and clips are removed, gently lift off the outer casing. Inspect the surface for any remaining attachments that might still be holding the casing in place. If resistance is encountered, it may be indicative of a hidden screw or attachment. Following meticulous attention to these details will ensure that the outer casing is removed without compromising the integrity of the internal components.
5. DISCONNECTED INTERNAL COMPONENTS
Upon successfully removing the outer casing, the next phase involves disconnecting several internal components. Begin with the solar panel, which may be soldered or attached with connectors. If soldered, careful desoldering utilizing a soldering iron becomes necessary to detach it from the circuit board without damaging it. If connectors are present, gently pulling them apart ensures that no wires are torn.
Following the panel, move on to the battery, which is often secured within a designated compartment. It is essential to take note of the battery orientation and connections to ensure proper installation during reassembly. Removing the LED lights follows, which might involve unscrewing or unclipping them from their positions. During this disassembly phase, documenting each step can prove beneficial, particularly when reassembling the device.
6. REPLACING COMPONENTS
After disassembling the solar light, it might become evident that certain components need replacement. The solar panel may have become degraded, losing its ability to capture sunlight efficiently. Similarly, the rechargeable battery often has a limited lifespan and may need a new one. When replacing these parts, sourcing high-quality components is crucial to ensure optimal performance.
Another component that might require attention is the LED lights, particularly if they are not functioning correctly. Replacement should match the specifications of the original bulbs in terms of voltage and wattage for compatibility. Utilizing components from reputable manufacturers guarantees durability and performance, ultimately enhancing the overall functionality of the solar light.
7. REASSEMBLING THE SOLAR LIGHT
Reassembly of the solar light is a critical stage where careful attention is necessary to restore the device to its original state. Begin by reconnecting the internal components, ensuring that wires are not pinched and that battery orientation is correctly set. Secure each piece back into position, following the instructions or notes taken during disassembly.
Once all components are reconnected, carefully place the outer casing back onto the assembled parts. Secure it with screws, taking care not to over-tighten, as this may cause damage. A final inspection involves checking for any loose connections or parts before testing the light. Following this systematic reassembly process ensures that the solar light remains functional and operational after disassembly.
FREQUENTLY ASKED QUESTIONS
WHAT KIND OF LIGHT CAN BE ASSUMED TO BE BROKEN WHEN IT WON’T TURN ON?
Multiple factors may indicate a malfunctioning solar light. The first step is to inspect the solar panel; if it is cracked or dirty, it may not capture sunlight. The battery also plays a significant role; a dead or damaged battery can impede functionality. Additionally, internal wiring issues can lead to power loss. An effective troubleshooting method involves testing the battery with a multimeter. If it fails to hold a charge, replacement is advisable. Similarly, if the solar panel is the culprit, replacing it is the best course of action.
CAN YOU REPLACE THE BATTERY IN A SOLAR LIGHT?
Yes, the battery in a solar light is typically replaceable. First, ensure that the light is turned off and has been disassembled to access the internal components. Locate the battery compartment, which may be secured with screws. Remove the old battery while taking note of the connections and orientation. Insert the new battery, ensuring it matches the specifications of the original to guarantee compatibility. After securing the compartment and reassembling the light, give it an opportunity to charge in the sunlight before testing its functionality. Doing so allows for a smooth transition and restores the light’s performance.
WHY DOES MY SOLAR LIGHT TURN OFF AFTER A SHORT PERIOD?
When solar lights exhibit behavior of turning off prematurely, several causes might be at play. The most common issue often stems from a depleted or malfunctioning battery, which may no longer hold a charge effectively. Accumulation of dirt on the solar panel can also obstruct sunlight, resulting in inadequate energy production. Additionally, some models have built-in timers or sensors that may not be functioning properly if exposed to bright artificial lights or reflective surfaces. To troubleshoot, clean the solar panel, test the battery’s health, and adjust the location of the solar light away from external light sources, thereby enhancing its performance.
REASSEMBLY AND TESTING
Upon completing the disassembly and replacement of necessary components, the reassembly phase begins. As previously illustrated, this requires utmost care to ensure all parts are correctly fitted. Utilize a methodical approach, retracing steps taken during disassembly to avoid missing any components. After reassembling, test the solar light in an appropriate environment, providing enough exposure to sunlight to recharge. The success of this project lies in attention to detail and adherence to the systematic approach discussed.
FINAL THOUGHTS
Mastering the disassembly of a round solar light involves a blend of precision and knowledge regarding the components involved. The successful execution encompasses an understanding of the necessary tools, identification of key parts, and systematic methodology during disassembly and reassembly. Moreover, recognizing potential pitfalls, such as battery degradation or faulty wiring, assists in ensuring optimal functionality. Each step carries significant weight, and meticulous care yields satisfactory results, ultimately extending the lifespan of solar lighting solutions. By emphasizing the importance of reusing quality components and adhering to safe practices, anyone can successfully navigate the disassembly process. Following this structured guideline provides the groundwork for effectively handling solar lights, opening opportunities for upgrades or replacements that enhance energy efficiency and performance.
Original article by NenPower, If reposted, please credit the source: https://nenpower.com/blog/how-to-disassemble-a-round-solar-light/
