
When it comes to disassembling a mobile solar light with a pole, the process requires careful attention and methodical steps to ensure safety and preserve the components. 1. Gather necessary tools, 2. Identify parts, 3. Disconnect power source, 4. Remove the light from the pole, 5. Disassemble the light casing, 6. Separate solar panel, 7. Organize parts for reassembly. Among these points, disconnecting the power source is crucial, as it prevents any electrical hazards during disassembly. This usually involves disengaging batteries or unplugging any connected wiring, which safeguards the individual handling the device. Proper precautions should be taken throughout the procedure to avoid damage to the components or injury to oneself.
1. GATHERING NECESSARY TOOLS
Disassembling any device entails specific tools tailored to the task. The initial step in this intricate process involves identifying the appropriate instruments for the disassembly of a mobile solar light. Common tools may include screwdrivers, pliers, a multi-tool, and possibly a soldering iron. Acquiring the right set of tools enhances the efficiency of disassembly and mitigates the risk of damaging any parts.
In addition to the standard tools, other items such as a flashlight can prove beneficial, especially if the workspace has limited lighting. Proper illumination may be necessary for viewing small screws or intricate components within the light. A workbench or flat surface is ideal for organizing items as they are removed, allowing for a streamlined process. An organized workspace can prevent the loss of small pieces that are essential to reassembling the unit.
2. IDENTIFYING PARTS OF THE MOBILE SOLAR LIGHT
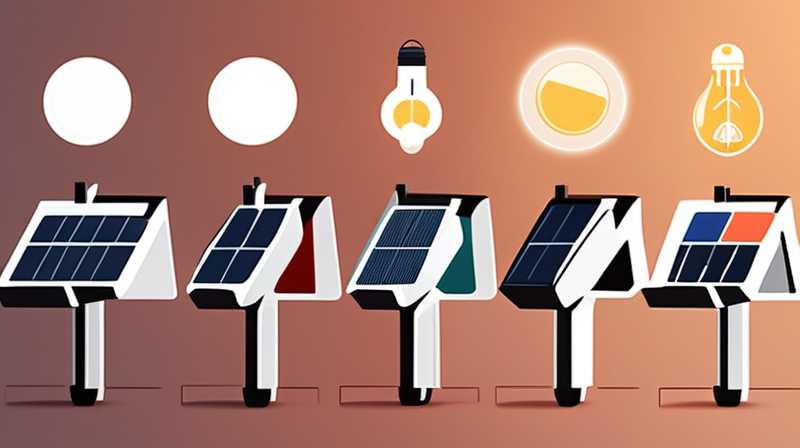
Before plunging into the hands-on aspect, it is imperative to understand the various parts of a mobile solar light. Typically, the device consists of a solar panel, light-emitting diode (LED) bulb, battery compartment, plastic or metal housing, and the pole itself. Understanding these components helps in identifying how they connect and interact with one another.
Various manufacturers may have different configurations and designs, making it essential to consult an owner’s manual or online resources that highlight the particular model’s layout. This inspection allows for familiarity with the components that require disassembly and assists in discerning any proprietary elements that may hinder straightforward separation. Awareness of the various attachments, such as screws or clips, also aids in efficient disassembly.
3. DISCONNECTING THE POWER SOURCE
Safety is paramount in any disassembly task, particularly when dealing with electrical components such as those found in solar lights. Before proceeding with the disassembly, it is crucial to disconnect the power source. This generally involves removing batteries stored within the battery compartment and ensuring that there is no active electricity flowing to the bulb or solar panel.
Different models utilize different battery types, including rechargeable lithium-ion or nickel-metal hydride. If present, unscrewing the battery cover enables access to the batteries, which should then be safely removed. Employing protective gloves during this step can provide additional safety, especially if any corrosion is evident. It often mitigates the risk of direct contact with any potentially hazardous materials.
4. REMOVING THE LIGHT FROM THE POLE
The next significant step in the disassembly process involves separating the solar light fixture from the pole supporting it. This step is crucial because many models secure their fixtures through screws or clamps. It is essential to locate these points of attachment before attempting to remove the light.
Once identified, one can use an appropriate screwdriver to loosen and remove the screws. Care should be taken to handle the light fixture gently, as undue force could damage delicate connections or the housing itself. In instances where the light is firmly secured, employing a rubber mallet to gently tap the pole can help free the light without excessive force. Ensuring the area is clear and that no additional support is needed during removal facilitates a safer process.
5. DISASSEMBLING THE LIGHT CASING
With the light fixture detached from the pole, attention can now shift to the casing of the solar light itself. Many solar lights feature a casing made from either hard plastic or metal, which encases the LEDs and wiring inside. This casing usually consists of screws or clips securing it in place, and identifying these attachment points is essential for a successful disassembly.
Using the previously utilized screwdriver, one can methodically go around the light casing, removing necessary screws. In situations where clips are present, a gentle pry can free the casing without damaging it. Once the casing is removed, the internal components such as the LED bulb and circuit board can be easily accessed for inspection or further disassembly.
6. SEPARATING THE SOLAR PANEL
Having disassembled the light casing, the subsequent task involves analyzing and carefully removing the solar panel. The solar panel allows the device to convert sunlight into energy, making it a vital component. Most models will have wires connecting the solar panel to the circuit board or battery compartment, which may require unsoldering to fully detach.
If soldering is necessary, having the right tools, such as a soldering iron, becomes imperative. Ensure that the iron is heated adequately to melt the solder and allows for a seamless connection removal. Additionally, recognizing the configuration of the wires is beneficial, as documenting or taking pictures before removal will assist with reassembly later on.
7. ORGANIZING PARTS FOR REASSEMBLY
As disassembly progresses, maintaining an organized workspace becomes increasingly important to avoid a chaotic collection of removed components that may confuse the reassembly phase. Using small containers or labeled compartments can help keep parts separated and easily identifiable. It also enables the efficient storage of screws, housing parts, and electrical components.
Further, keeping the original manual or documentation available for reference serves as a practical guide during reassembly. Upon completion of the disassembly, a meticulous review of the components can ensure no parts are missing or damaged. This structured approach can substantially aid the eventual reassembly process, allowing for a smoother transition back to operational status.
FREQUENTLY ASKED QUESTIONS
HOW CAN I SAFELY REMOVE THE SOLAR LIGHT FROM ITS POLE?
To safely detach the solar light fixture from its pole, ensure the power source is completely disconnected first. Identify any screws or clamps securing the light to the pole. Using an appropriate screwdriver, gently unscrew these fixtures. If securing clips are present, carefully pry them away using a non-metallic tool to avoid damage. A cautious approach prevents unnecessary damage to delicate connectors and ensures safety throughout the process.
WHAT SHOULD I DO IF I CAN’T IDENTIFY THE COMPONENTS?
If you encounter difficulty in identifying the various components of your mobile solar light, consulting the user manual can be advantageous. Online resources, including manufacturer websites, may provide diagrams or guides to assist in recognizing each part. An alternative option is to search for tutorial videos, as visual aids can clarify how different elements interact, facilitating a better understanding of the assembly.
WHAT TOOLS DO I NEED FOR DISASSEMBLY?
When planning disassembly of a mobile solar light, gather essential tools such as screwdrivers, pliers, a multi-tool, and if necessary, a soldering iron. The inquiry into your specific model may reveal additional requirements, including unusual tools for proprietary fasteners. Investing in a basic toolset designed for electronics will ensure efficient task completion while safeguarding the device’s components.
Through the careful and systematic disassembly of a mobile solar light with a pole, one can ensure a comprehensive understanding of its components and operation. By adhering to safety protocols and employing the right tools, an individual can effectively separate and organize the light’s parts for future use or repair. Each stage plays a pivotal role, whether it’s gathering tools, disconnecting power, removing the components, or reassembling successfully. This meticulous attention to detail not only facilitates ease of disassembly but also promotes longevity in the lifespan of the device. Mastery over this disassembly process paves the way for enhanced knowledge in functioning and maintaining solar energy products. Engaging in this task encourages a sense of accomplishment while also contributing to environmental sustainability practices. Ultimately, such technical understanding can foster innovation and inspire new initiatives regarding the use and enhancement of solar technologies in everyday life.
Original article by NenPower, If reposted, please credit the source: https://nenpower.com/blog/how-to-disassemble-a-mobile-solar-light-with-a-pole/
