
1. To disassemble a fully sealed solar light, ensure safety by removing it from the power source, use appropriate tools like a screwdriver and gently pry apart the sections, and take care of the internal components to avoid damage. 2. These systems often have adhesive seals, making it crucial to apply steady pressure without forcing. 3. Once opened, replace or repair damaged parts carefully, and reassemble the unit, ensuring proper sealing for waterproof integrity.
1. INTRODUCTION TO SOLAR LIGHT DISASSEMBLY
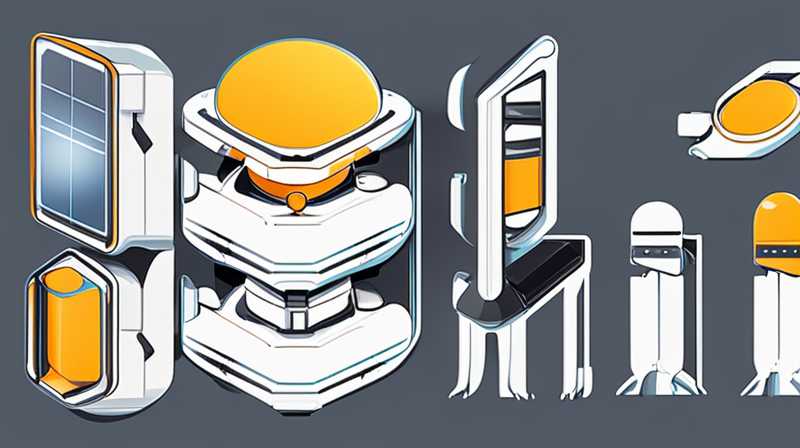
Disassembling a fully sealed solar light requires a methodical approach to avoid damage to its components and maintain safety throughout the process. Generally, these lights are designed to withstand outdoor conditions, integrating features such as waterproof casings and integrated circuits. Understanding the underlying structure of these devices will significantly ease the disassembly process, allowing for repairs or replacements of faulty parts.
The need to disassemble a solar light may arise for various reasons, including replacing a defective battery, repairing a broken LED, or cleaning internal components. Solar lights often feature tightly sealed joints that can be challenging to untangle. However, with the proper tools and techniques, an individual can safely access and troubleshoot the internal mechanisms effectively.
2. TOOLS REQUIRED FOR DISASSEMBLY
2.1. ESSENTIAL TOOLS
A successful disassembly process commences with the right tools, which ensure efficiency and minimize the risk of damage to the device. Typically, a basic toolkit consisting of a small screwdriver set, perhaps with both Phillips and flathead options, is vital. These types of screwdrivers come in varied sizes, allowing access into various small crevices and corners of the solar light’s assembly.
Additionally, having a pair of pliers handy can facilitate the manipulation of smaller components or help to pry apart especially stubborn seams. Using a plastic prying tool can also assist in opening casings without scratching the plastic or metal surfaces of the device. It is prudent to gather all necessary instruments beforehand, supporting a seamless experience during the disassembly operation.
2.2. SAFETY EQUIPMENT
In the pursuit of successfully dismantling solar lights, certain protective measures are advisable. Wearing safety goggles can prevent injury from any small debris that may become dislodged during the process. While not always essential, wearing gloves can offer an additional layer of protection against sharp edges within the device.
Setting up a clean and organized workspace is primordial to keep track of screws and components once separated. Utilizing a magnetic tray or a small container can efficiently manage the collection, ensuring that nothing vital is lost in the midst of disassembly.
3. PREPARATION STEPS BEFORE DISASSEMBLY
3.1. POWER DISCONNECTION AND ENVIRONMENT
Before delving into the disassembly, it is imperative to ensure that the solar light is disconnected from any power source. This precaution safeguards against accidental activation while working on the device. For solar lights, removing it from its installation spot can provide better visibility and workspace as well.
The environment in which disassembly takes place significantly influences the efficiency of the work. A clear flat surface, such as a table or workbench, is an ideal setup for securing the solar light. Ambient light is preferable but avoiding direct sunlight can make it easier to examine any intricacies of the light without glare impacting visibility.
3.2. IDENTIFYING JOINTS AND SEAMS
Once the workspace is ready, the next step involves inspecting the solar light to identify its seams and joints. Multiple solar lights utilize adhesive sealing or screws to keep components in place, and recognizing their layout can help develop a strategy for opening them.
Extensive observation prior to manipulation allows for planning the order of disassembly while considering the structural integrity of the light. Evaluate whether the seams appear glued or if screws are present; this insight will heavily influence how to proceed.
4. STEP-BY-STEP DISASSEMBLY PROCEDURE
4.1. REMOVING SCREWS
The first relevant task in the disassembly process involves locating and removing any screws affixed to the casing of the solar light. Depending on the model, this might include screws located at the bottom or around the sides. Using the right screwdriver, unscrew these fastenings, taking care to store them meticulously.
Once all screws are removed, gently lift the outer casing or separate the parts according to the model’s design. Employing the plastic prying tool can aid in loosening components without exerting excessive force, which might crack or distort the plastic casing.
4.2. PRYING OPEN THE SEALS
For models that feature adhesive sealing, carefully inserting a plastic prying tool into gaps will enable separation of the two halves of the casing. Applying an even consistent force, work around the perimeter ensuring that the unit does not break.
Should the adhesive be particularly robust, applying moderate heat from a hairdryer may soften the adhesive, making it easier to separate. Patience is paramount during this phase to avoid damaging any internal circuitry or components.
4.3. REMOVING INTERNAL COMPONENTS
As the outer casing opens, careful extraction of internal components such as the circuit board or LED panel will come next. Depending on design, wires and connectors may need to be gently pulled apart, ensuring to note how they are arranged for future reassembly.
Thoroughly assess each internal section for damage, corrosion, or dirt that may require cleaning or replacement. Messy soldering or burnt components may indicate a problem needing troubleshooting or resolve for the light to function optimally.
5. TROUBLESHOOTING COMMON ISSUES
5.1. BATTERY REPLACEMENT STRATEGIES
One prevalent task when disassembling solar lights is battery replacement. Faulty or depleted batteries can hinder the functionality of solar lights, rendering them ineffective. Typically, the battery pack will be located close to the solar panel, secured either by casing or clips.
After removing the necessary wires, carefully extract the old battery and replace it with a high-quality, compatible alternative. Ensure correct polarity when installing the new battery, as improper installation may damage the electrical system or lead to further malfunctions.
5.2. LED REPLACEMENT AND TESTING
Another complicating factor could be the LED itself, which may become dim or stop working altogether. Upon locating the LED component, double-check the connection to see if it can be fixed or if it requires replacement. Gently unclip or unsolder the old LED, and replace it with a functioning model.
Once new parts are fitted, testing the solar light before final assembly is prudent. This trial phase ensures that replacements were successful and will allow for immediate troubleshooting if required prior to sealing the device again.
6. REASSEMBLY PROCESS
6.1. INITIAL ASSEMBLY STEP
After repairs or replacements have been completed, reassembly begins with placing the internal components back in their original positions. Carefully connect any wires, ensuring they follow the previously noted arrangement. Ensure that parts are aligned correctly and that connectors fit snugly to maintain functionality.
During reassembly, retaining the alignment can facilitate easier final sealing. Avoid rushing this step, as precision affects the overall integrity and performance of the solar light once it is operational again.
6.2. SECURING THE UNIT
After all components are returned to their proper places, carefully place the outer casing back. If screws were part of the fixture, start tightening them gradually, ensuring even pressure is applied around the unit.
If adhesive seals were used, consider reapplying a suitable duct sealant or adhesive to maintain waterproof qualities. Applying consistent pressure until complete curing leads to longevity in outdoor conditions, keeping the internal mechanisms protected from moisture once more.
7. FINAL TESTING AND QUALITY CHECK
7.1. FULL FUNCTIONAL EVALUATION
Before getting the solar light back into operation, a thorough evaluation is necessary. Check if the lights activate and if the solar panel charges correctly. Adequate sunlight should be present prior to testing; it ensures accurate readings of the battery function.
Monitor the performance over a few hours to ensure that all newly replaced components operate effectively and that the light shines brightly throughout its duration. This last stage validates every preceding action taken and secures the unit for user satisfaction.
7.2. LONG-TERM MONITORING
Post-testing, observing the solar light’s performance in natural conditions serves as a method to anticipate future issues. Regular inspections and evaluations on any changes in functionality or operation are advisable for signaling potential future servicing and repairs.
Should problems arise, acknowledging these early allows for timely intervention and maintenance. Establishing a routine check-up can significantly prolong the effective lifespan of the solar light.
8. FREQUENTLY ASKED QUESTIONS
HOW OFTEN SHOULD I REPLACE THE BATTERY IN MY SOLAR LIGHT?
Batteries in solar lights typically require replacement every 2 to 3 years, depending on environmental conditions and how often the light is utilized. Factors such as exposure to elements, whether the light charges adequately each day, and the quality of the battery significantly affect its longevity. When a solar light starts to dim or fails to charge as expected, it is often a signal that the battery is no longer holding a charge effectively. Additionally, if the light fails to activate after numerous charging cycles, it might be due to battery degradation. It’s wise to replace the battery proactively to ensure the solar light functions optimally.
ARE SOLAR LIGHTS REPAIRABLE?
Yes, many solar lights are repairable, given that the individual is willing to disassemble and replace faulty components. Commonly, issues arise from damaged circuit boards, depleted batteries, or malfunctioning LEDs. Gaining access to internal parts through careful disassembly allows for potential replacements that can restore the unit to functional use. However, consider that some low-cost solar lights may be designed for disposal rather than repair; this should be taken into account before embarking on detailed disassembly efforts. Investing time in a proper repair can sometimes prove more beneficial than purchasing a new unit, especially if quality components are sourced.
WHAT SHOULD I DO IF MY SOLAR LIGHT NEVER TURNS ON?
If a solar light remains unresponsive, thorough troubleshooting will often reveal possible issues. Start by ensuring that the solar panel is clean and unobstructed, allowing adequate sunlight exposure for charging. If the panel is functional but the light continues to fail, inspect internal components by disassembling the casings for battery condition and wiring integrity. Should any circuit be broken or corroded, they may require replacement. Additionally, consider checking the functionality of the switch, as mechanical failures in the mechanism can also cause failure to activate. Setting conditions conducive to successful operation typically resolves any non-responsiveness.
Restoration of solar lights involves a systematic approach, ensuring that each stage of disassembly and reassembly is executed with care and attention to detail. Essential tools such as screwdrivers and pliers facilitate successful opening and repair, while preventive measures can guarantee the safety of the technician. Before commencing, exploring power sources and sealing techniques is vital to maintaining the device’s integrity. Regular inspections post-repair not only affirm proper functionality but also extend the lifespan of solar lights. Armed with knowledge and suitable resources, individuals can competently manage the disassembly and repair processes to ensure that these eco-friendly light sources continue to illuminate outdoor spaces effectively. Adopting a hands-on approach with regard to solar light maintenance fortifies sustainability efforts, transforming potential waste into functioning assets once more. Thus, a responsible management mindset alongside systematic repair can contribute to longer use of these beneficial devices.
Original article by NenPower, If reposted, please credit the source: https://nenpower.com/blog/how-to-disassemble-a-fully-sealed-solar-light/
