
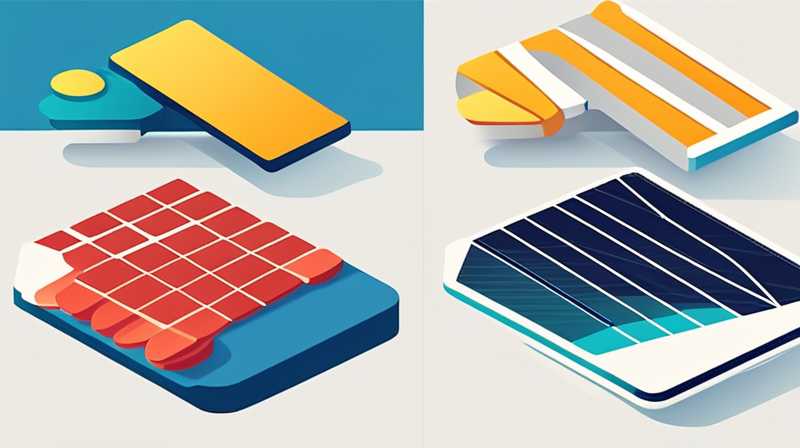
In order to effectively cut solar cells, one must adhere to specific procedures that ensure the integrity and functionality of the cells is not compromised. 1. Proper tools are essential, including a glass cutter or a diamond saw, as they provide the precision necessary for clean, straight cuts. 2. Precise measurement is crucial; one should accurately mark the cut line on the cell using a fine-tip marker to avoid any mistakes during the cutting process. 3. Safety precautions, including the use of protective eyewear and gloves, cannot be overlooked, as solar cells are made of materials that may shatter or cause injury. 4. Cutting techniques vary based on the type of solar cell, for example, monocrystalline or polycrystalline, and understanding these differences is vital for achieving the best results. Each of these points emphasizes the importance of care, precision, and safety in the cutting of solar cells, which are fundamental to successfully repurposing or installing solar technology.
1. TOOLS REQUIRED FOR CUTTING SOLAR CELLS
Achieving a successful cut on solar cells necessitates having the right set of tools. The primary tool is a glass cutter, which is specifically designed for scoring glass. It consists of a sharp wheel that effortlessly glides over the surface, creating a line that, when pressure is applied, allows the glass to break cleanly along that line. It’s essential to choose a cutter that is comfortable to hold and provides a steady grip, as controlling the pressure exerted is vital for an even score. Along with this, a diamond saw is another excellent option, particularly for those working with thicker or more durable solar cells. Though more cumbersome, this tool achieves precise cuts while minimizing the risk of damaging the cell.
Equally important is the measuring tape or ruler, which allows for accurate measurements. When cutting solar cells, even minor inaccuracies can lead to larger issues down the line, particularly in the overall efficiency and alignment of solar panel systems. Furthermore, fine-tip markers for marking cut lines offer an additional layer of precision. They should be water-resistant to prevent smudging during the cutting process and must produce a clear, visible line on the surface of the solar cells. In summary, the choice of tools significantly influences the quality of the cuts made, making this aspect critical for any solar cell project.
2. PREPARATIONS BEFORE CUTTING
Before proceeding with the actual cutting of solar cells, one must ensure that all preparations are meticulously completed. An essential preparatory step involves choosing an appropriate workspace. The cutting area should be clean, well-lit, and free of obstructions. A dedicated work surface, such as a workbench, equipped with a non-slip mat can prevent accidents. Additionally, ensuring proper ventilation is critical, especially when working with potentially hazardous materials. The workspace should be organized in such a way that all tools are within easy reach to avoid unnecessary movement, which could lead to errors during the process.
Next, it’s crucial to secure the solar cells correctly. If the cells are not properly anchored, any wiggle or movement during cutting can result in jagged edges or even complete breakage. One effective method is to use clamps or a vise to hold the cell in place. This not only provides stability but also allows the individual to focus solely on the cutting process without having to worry about handling the cell simultaneously. Moreover, understanding the specific type of solar cell being cut is vital. Different solar cells, such as monocrystalline or polycrystalline, possess unique properties and may require specific techniques for optimal cutting results.
3. CUTTING TECHNIQUE
Once all preparations have been finalized, it’s time to discuss the actual cutting technique. Successful cutting begins with marking the cut line with precision. A fine-tipped marker should create a clear, straight line that delineates where the cut will occur. It is advisable to double-check measurements; ensuring accuracy will save time and prevent the need for re-cuts. When using a glass cutter, the application of consistent pressure while scoring the glass is critical. Draw the cutter along the marked line in one smooth motion, avoiding interruptions which may result in an irregular score.
Following this, the actual break occurs. A common method involves applying gentle pressure from the underside of the score, allowing the glass to snap cleanly along the marked line. It’s beneficial to practice this technique on scrap pieces to develop a feel for the required pressure. For those utilizing a diamond saw, transition to this method involves mounting the solar cell securely and slowly guiding the saw along the marked path. The benefits of this method extend beyond just clean cuts; this alternative also minimizes the risk of shattering, particularly for cells that contain delicate components.
4. SAFETY MEASURES TO FOLLOW
Safety is an integral part of cutting solar cells, demanding careful attention to several practices. The most fundamental precaution is the use of protective eyewear. Since solar cells are composed of glass and other potentially hazardous materials, shards from breakages can pose a serious risk to the eyes. Proper attire, such as gloves and durable clothing, is also essential. Gloves not only protect against cuts, but they also offer insulation from sharp edges that may be exposed post-cutting.
Furthermore, it is prudent to maintain an organized workspace to mitigate the risk of accidents. Having tools and materials neatly arranged reduces the likelihood of mishaps, such as tripping or knocking over items while attempting to maneuver. Separate waste containers should be available for discarded shards and remnants, eliminating hazards created by leftover debris. If any chips or small fragments do fall, they should be promptly cleaned up to prevent injuries later.
Another significant aspect of safety involves being aware of one’s surroundings. Those nearby should be kept at a safe distance during the cutting process, thereby minimizing potential hazards for observers. By adhering to these principles, individuals can significantly reduce the risks associated with cutting solar cells while producing safe and precise cuts.
5. COMMON ERRORS TO AVOID
It’s essential to be aware of potential pitfalls during the cutting process to safeguard both the project and oneself. One prevalent error involves inaccurate measurements. Even a slight deviation can have lasting effects on the efficiency of the cell in its intended application. Double-checking measurements before marking the cut line can help mitigate this risk. Incorrect alignment of cuts can compromise how solar cells fit together within a panel and may even lead to a mismatch between cells, significantly impairing electrical performance.
Additionally, failing to apply consistent pressure while cutting often results in jagged edges or breaks that are difficult to manage. Understanding the delicate nature of solar cells is fundamental; therefore, exerting a steady hand while executing the cut is vital. Overly aggressive force can lead to unexpected breaks, making it difficult to salvage parts that may have significant value.
Lastly, neglecting to solidify the cutting surface leads to poor results. A moving or unstable cell can create serious issues with alignment and integrity. Using clamps or a stable apparatus to secure the cell in place is not just advisable; it’s crucial for achieving the best outcomes in the cutting process.
6. POST-CUTTING CONSIDERATIONS
Once the cutting of solar cells has been completed, several considerations must be addressed to ensure that the newly cut cells remain functional and intact. Inspecting the cuts is the first step; it’s crucial to examine each edge for any irregularities or fractures that may have occurred during cutting. Minor imperfections can sometimes be corrected through careful sanding or polishing, but significant damage may necessitate a complete re-cut. This particular assessment is crucial for determining the usability of the cells for their intended application, especially in a commercial panel installation.
Following inspection, it’s wise to store the cut solar cells in a secure manner. Proper storage involves utilizing protective padding or cases to shield cells from impact or environmental factors. Solar cells should never be piled haphazardly, as this can lead to unnecessary pressure on delicate edges and promote breakage. Ideally, they should be stored in an upright position, similar to how glass sheets are arranged, to minimize interaction between the cells themselves.
Furthermore, a proper cleaning regimen should be established post-cutting. Debris and dust can collect on the surfaces, potentially jeopardizing the performance when the cells are utilized in a solar panel system. Gently wiping the surfaces with a microfiber cloth ensures cleanliness without causing scratches or other superficial damage. Implementing these considerations post-cutting guarantees that the solar cells retain their optimal functionality and longevity.
FREQUENTLY ASKED QUESTIONS
WHAT IS THE IDEAL WAY TO MEASURE FOR CUTTING SOLAR CELLS?
Accurate measurement is a crucial aspect of cutting solar cells, and there are various methods available to ensure precision. The first step is to select the appropriate measuring tool, such as a ruler or measuring tape, ensuring it is in good condition. Mark the measurement with a fine-tip marker, ensuring the mark is visible without being overly pronounced, as this can impact the final cut.
A useful technique is to measure twice and cut once—this adage highlights the significance of verifying measurements before proceeding. It is also beneficial to measure each side of the solar cell to ensure symmetry, particularly when dealing with more intricate designs that require precision for effective grid alignment. Additionally, some prefer to create templates or use straight edges for guidance when marking, particularly for repetitive cuts. Practicing the scoring and cutting technique on test materials prior to actual cutting can increase confidence, thereby drastically reducing the chances of making errors. Taking these steps can dramatically improve the accuracy and quality of cuts made on solar cells.
ARE THERE SPECIFIC DIFFERENCES BETWEEN CUTTING MONOCRYSTALLINE AND POLYCRYSTALLINE CELLS?
The cutting of solar cells may vary significantly based on their type, particularly in distinguishing between monocrystalline and polycrystalline cells. Monocrystalline cells, recognized for their uniform dark color and high efficiency, possess a rigid structure that often necessitates more careful handling. When conducting cuts on these cells, a more delicate touch is recommended to prevent unintentional shattering. Using a glass cutter is typically regarded as the most effective method for scoring these cells, followed by minimal force during breaking.
Conversely, polycrystalline cells, characterized by their bluish hue and distinct patterns, generally display a greater tolerance to minor mishandling. However, they are still fragile, requiring a careful approach during the cutting process. Furthermore, cutting polycrystalline cells frequently results in challenges due to their varying thickness materials, thus making the use of power tools, such as diamond saws, a preferable option. Regardless of the type, understanding the unique properties of each solar cell is vital to achieving optimal cuts while maintaining the cell’s integrity and efficiency.
WHAT SAFETY EQUIPMENT IS NECESSARY WHEN CUTTING SOLAR CELLS?
When undertaking the task of cutting solar cells, prioritizing safety equipment is essential to prevent injuries and ensure a secure working environment. Foremost among safety gear is protective eyewear, designed to shield against glass shards which may become airborne during the cutting process. Opting for sturdy and impact-resistant safety goggles is advised to provide adequate protection. Additionally, wearing cut-resistant gloves made from durable materials can help prevent lacerations from sharp edges or fragments.
Footwear is another often-overlooked aspect of safety. Wearing closed-toe shoes with robust soles can protect against falling objects, particularly if cutting occurs at a height. Maintaining a clean workspace and using secure equipment, such as clamps or vises to hold the cell, also contribute significantly to safety. Lastly, it is advisable to ensure that any audience or bystanders maintain a safe distance from the cutting area. Adhering to these safety precautions can greatly reduce the risk of injury or accidents when cutting solar cells, promoting a more secure working environment.
It is essential to recognize that successfully cutting solar cells is not merely a technical task; it also embodies a significant commitment to safety and precision. The careful selection of appropriate tools, the establishment of an organized workspace, and adherence to effective cutting techniques all contribute to achieving the best results. Understanding the nuances between different types of solar cells enhances the effectiveness of the cutting process. Furthermore, avoiding common mistakes, implementing post-cutting considerations, and abiding by all necessary safety protocols will promote longevity and efficiency in solar cell usage. Each step in this process demands focus and diligence, reinforcing the importance of a well-thought-out approach to achieve the desired outcomes in solar energy technology.
Original article by NenPower, If reposted, please credit the source: https://nenpower.com/blog/how-to-cut-solar-cells/
