
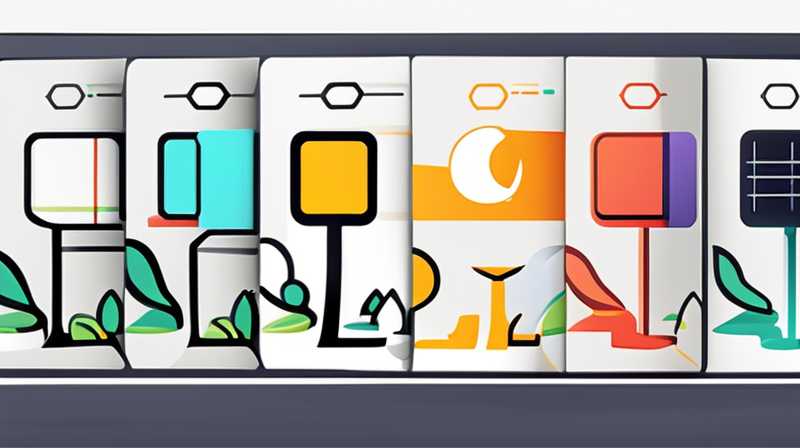
To successfully connect square solar lights, it’s essential to follow a systematic approach that ensures effective installation and functionality. Here’s how you can achieve this: 1. Acquire the necessary tools and solar lights, 2. Identify the ideal location for installation, 3. Assemble the solar lights according to the manufacturer’s instructions, 4. Connect the lights ensuring they receive ample sunlight. Among these steps, finding the right location holds significant importance, as positioning affects the overall efficiency of the solar lights. Before installation, it is vital to ensure that the selected area receives unobstructed sunlight for the majority of the day. This exposure allows the solar panels to charge effectively, thus enhancing the performance and longevity of the lights.
1. UNDERSTANDING SOLAR LIGHT COMPONENTS
To connect square solar lights effectively, it is crucial to grasp the various components involved in their design and operation. Solar lights generally consist of a solar panel, rechargeable battery, LED bulb, and a control circuit. The solar panel captures sunlight and converts it into electrical energy, which is stored in the rechargeable battery. When the sun sets, the control circuit triggers the LED bulb to light up, utilizing the stored energy.
First, it is important to consider the solar panel’s efficiency. The quality of the panel significantly influences how much sunlight is absorbed and converted into energy. Higher efficiency panels capture more solar energy in a shorter period, making them ideal for regions with limited sunlight. Additionally, the type of battery used is also paramount. Lithium-ion batteries are often seen in newer installations due to their longevity and efficiency, whereas lead-acid batteries might be more economical but come with a shorter lifespan.
The LED bulb represents a critical component as well, typically known for its elasticity and less energy consumption compared to incandescent bulbs. Many solar lights utilize LEDs because they can maintain brightness levels longer with lower energy usage, making them suitable for extended nighttime illumination. With a fundamental understanding of these components, one is better equipped to connect solar lights effectively.
2. PREPARING FOR INSTALLATION
Before commencing the installation process, thorough preparation is essential to ensure everything proceeds smoothly. Gathering tools and verifying product components is the first step. Essential tools typically include a screwdriver, measuring tape, level, and potentially a drill, especially if mounting fixtures are involved. Ensuring that all parts, such as the light fixtures, solar panels, and brackets, are present and in good condition helps prevent unnecessary delays.
Once the tools are gathered, the next step revolves around choosing the correct site for installation. This location should not only receive ample sunlight but also be practical regarding visibility and accessibility. When assessing potential spots, one should take note of nearby structures such as buildings and trees, which could block the sun. Moreover, checking for any cable obstructions is necessary if the lights require wiring. A well-thought-out location enhances the performance of the lights and contributes to a pleasing aesthetic in outdoor areas.
Understanding local climate conditions is also pivotal during the preparation stage. For instance, areas prone to prolonged cloudy weather may necessitate higher quality or additional solar panels. Additionally, considering seasonal changes in sunlight exposure will guide decisions about the type and number of lights to install.
3. ASSEMBLY OF SOLAR LIGHTS
Once preparation is complete, the assembly of square solar lights can begin. Following the manufacturer’s guidelines is crucial for successful assembly. Each product typically comes with an instruction manual outlining specific steps and requirements tailored to that model. Pay close attention to details regarding how to align solar panels and securely attach light fixtures.
During assembly, it is advantageous to test the rechargeable battery status before installation. Many solar lights are shipped with batteries that have been partially charged. Activating the light to check functionality not only ensures that the product is operational but also allows the installer to familiarize themselves with the features of the solar lights. Understanding such specifics facilitates a more effective installation process.
Another essential aspect during assembly is ensuring that all connections are secure. Loose fittings or cables can lead to functionality issues over time. Checking the tightness of connections around light fixtures and solar panels is crucial. If mounting brackets are involved, ensure they are oriented correctly and fit well as specified in the instructions. This diligence in assembly prevents winding up with faulty installations later on.
4. CONNECTING MULTIPLE SOLAR LIGHTS
In many scenarios, multiple square solar lights are connected to achieve a broader illumination area. Understanding the connection options available is vital in these cases. Depending on the model, solar lights may come with linking capabilities, allowing them to work together seamlessly. If such capability exists, it is essential to refer to the specific instructions provided by the manufacturer.
If lights do not have built-in linking features, a different approach is necessary. Installing separate fixtures at strategic locations while ensuring they receive sufficient sunlight is the next step. This technique may require a bit more planning, as ensuring synergy among all lights will promote a uniform lighting appearance throughout the area.
Properly spacing the lights is also essential. Common suggestions include placing them around 10-15 feet apart, but this can vary based on the power and brightness of the lights being used. Through thoughtful spacing, one can guarantee that the light beams overlap, eliminating dark spots and providing consistent coverage. Furthermore, once all lights are connected, verifying their performance during dusk provides assurance that the installation meets expectations.
5. TESTING AND MONITORING PERFORMANCE
After connecting square solar lights, the importance of testing their performance cannot be overstated. Monitoring their functionality during the initial days ensures they operate as intended. Observing how the lights behave at night provides insights into their efficiency, which can uncover any installation errors or potential deficiencies in sunlight capture.
During the testing phase, take note of how bright the lights appear, and assess their operation throughout the night. If certain lights fail to maintain brightness, reevaluate the positioning of their solar panels to maximize sun exposure. Furthermore, investigating obstructions that could hinder sunlight reaching the panels is necessary.
Regularly cleaning the solar panels is another vital aspect to maintain optimal performance. Dust, dirt, or debris can accumulate on the surface and hinder the charging process. Therefore, periodic cleaning ensures that the panels capture sunlight effectively. Additionally, checking and replacing depleted batteries ensures reliable nighttime functionality. Engaging in these maintenance practices prolongs the overall lifespan and efficiency of the solar lights.
FREQUENTLY ASKED QUESTIONS
WHAT ARE THE BEST LOCATIONS FOR INSTALLING SOLAR LIGHTS?
Choosing optimal locations for solar light installation affects their overall performance. Ideal spots are areas with direct sunlight exposure for most of the day. This ensures the solar panels can fully charge, enhancing the lights’ operational efficiency during nighttime. Look for areas away from shade provided by trees, buildings, or other structures that may obstruct sunlight.
Additionally, consider the purpose of installation. For pathways or driveways, spacing lights evenly is essential to ensure clear visibility. If the goal is decorative lighting for a garden or patio, positioning should emphasize aesthetics as well as functionality. Regularly assessing the effective light reach once installed can help ensure adjustments are made as needed. Always prioritize both functionality and aesthetic appeal during planning.
CAN SOLAR LIGHTS WORK IN CLOUDY CONDITIONS?
Solar lights can indeed function in cloudy conditions, although their performance does vary. During overcast days, solar panels receive less direct sunlight, which may lead to reduced charging efficiency. Many modern solar lights are designed to capture diffused sunlight, allowing them to still charge somewhat. However, in regions where cloudy weather prevails, investing in higher quality solar panels or additional panels may bolster performance.
Additionally, it is wise to consider battery capacity. Solar lights equipped with high-capacity batteries can store extra energy during sunny days, compensating for reduced charging on cloudy days. For areas with frequent weather fluctuations, proper planning regarding light selection and installation is integral to maintain consistent performance.
HOW LONG DO SOLAR LIGHTS LAST?
The duration for which solar lights remain effective is contingent on several factors, including the quality of the components, type of batteries used, and maintenance practices. On average, solar lights can last anywhere from 3 to 10 years. High-quality models with premium solar panels and lithium-ion batteries tend to have longer lifespans.
Environmental factors also influence longevity. Extreme weather, such as heavy rainfall or freezing temperatures, can affect battery life and overall performance. Regular cleaning and maintenance play a critical role as well. A cautious approach regarding upkeep can maximize a solar light’s life, ensuring that users receive reliable performance for years.
ASSESSING EFFECTIVENESS OF CONNECTION
The journey of connecting square solar lights concludes with an evaluation of their effectiveness within the chosen environment. Diligently observing their performance, assessing battery life, and monitoring brightness levels during various conditions demonstrates the success of the installation process. Observational insights into how well the lights fulfill their intended purpose ensure that adjustments can be made as necessary.
During nighttime operations, if maintained brightness levels or consistent operating times appear lacking, revisiting planning steps may reveal areas for improvement. Consider adjusting the placement of solar panels or integrating additional lighting sources. Carrying out these assessments fosters an environment where solar lights contribute positively to outdoor spaces.
The overall satisfaction from solar lights stems from their ability to enhance visibility, security, and aesthetics for outdoor areas. Through meticulous attention from preparation to installation and ongoing monitoring, users can fully leverage the advantages these sustainable lighting solutions provide. This dedication to excellence ultimately ensures a reliable and effective solar lighting experience.
In essence, connecting square solar lights presents an opportunity to enhance outdoor spaces sustainably and effectively. With proper knowledge of components and systematic installation strategies, one can ensure long-lasting performance. Following through with a conscious effort to monitor efficiency and cleanliness fosters conditions that allow solar lights to shine brightly. A proactive engagement ensures these lighting solutions remain dependable fixtures illuminating pathways, gardens, and outdoor exploration areas. By investing time and effort upfront, individuals can reap the benefits of efficient, cost-effective, and environmentally friendly lighting solutions for years to come.
Original article by NenPower, If reposted, please credit the source: https://nenpower.com/blog/how-to-connect-square-solar-lights/
