
1. EFFICIENT CONNECTION OF SOLAR MONITOR TO CHARGER, 2. UNDERSTANDING COMPONENTS INVOLVED, 3. STEP-BY-STEP INSTRUCTIONS FOR CONNECTION, 4. TROUBLESHOOTING COMMON ISSUES
The process of connecting a solar monitor to a charging system involves several critical steps and considerations to optimize performance and safety. 1. Properly assess the compatibility of your solar monitor and charge controller before attempting to connect them; 2. Follow specific wiring guidelines outlined in the user manuals to avoid damage; 3. Ensure correct settings on both devices for accurate measurement and functionality; 4. Regularly monitor the system after installation to safeguard against malfunctions. Among these points, understanding device compatibility is crucial, as using incompatible components can lead to inefficient energy transfer or even damage to devices.
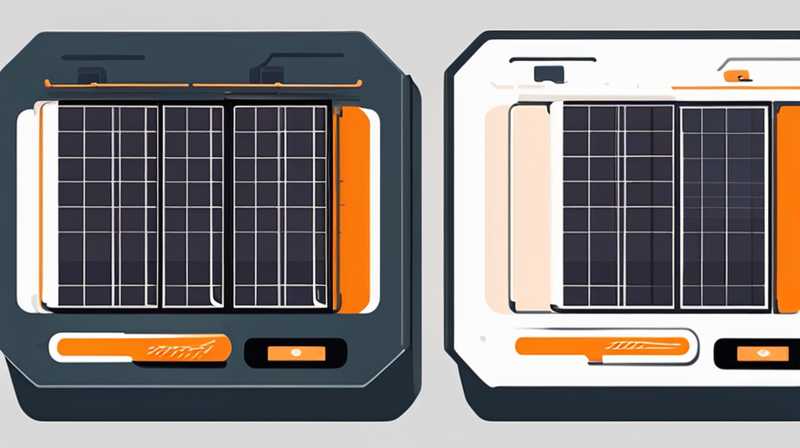
1. EFFICIENT CONNECTION OF SOLAR MONITOR TO CHARGER
Successfully integrating a solar monitor with a charger lays the foundation for an effective solar energy management system. Monitoring solar energy production and consumption provides crucial insights into overall system efficiency for both residential and commercial applications. The seamless connection between these components is equally vital to ensure that solar panels can effectively charge batteries or supply energy to the grid.
The relationship between solar monitors and chargers can be examined from both an application and a technical perspective. Solar monitors usually provide statistics such as energy production, energy consumption, temperature readings, and battery status. As these measurements are gathered, it becomes essential to connect the solar monitor to the charger to accurately reflect real-time data trends and optimize the system’s performance. Understanding how to establish this connection correctly ensures that energy generation and consumption are aligned harmoniously.
This connection typically occurs through communication ports and wiring interfaces specified in the product’s technical documents. Depending on the make and model, interfaces might include RS232 or USB ports, as well as proprietary connections. Establishing this interface demands careful attention and adherence to voltage requirements to maximize the operational lifespan of the components involved.
2. UNDERSTANDING COMPONENTS INVOLVED
The solar energy system consists of multiple components that must work in unison for optimized performance. Understanding the role of each component ensures effective and efficient energy management. Critical components include solar panels, charge controllers, inverters, batteries, and, of course, solar monitors. The interactions between these elements illustrate how energy flows from production to storage and consumption.
Solar panels absorb sunlight and convert it into direct current (DC) electricity. This generated electricity is then sent to a charge controller, which regulates the voltage and current coming from the solar panels. By doing so, the charge controller prevents batteries from overcharging or getting damaged—maintaining a delicate balance necessary for energy safety. Monitoring devices provide real-time feedback on production and consumption rates, allowing users to keep tabs on their energy needs and consumption patterns.
Understanding the nuances of operation among these components can highlight potential optimizations. For example, investing in a quality charge controller can enhance energy conversion rates and minimize losses due to mismatched voltages. Additionally, a well-integrated solar monitor can identify inefficiencies in the charging process, enabling users to adjust their habits accordingly.
3. STEP-BY-STEP INSTRUCTIONS FOR CONNECTION
Connecting a solar monitor to a charger involves several systematic steps to ensure data accuracy and device compatibility. First things first, consult the user manuals for both devices to ascertain compatibility and specific wiring requirements. After establishing this compatibility, proceed with the following detailed instructions.
1. Gather Required Tools and Materials: Before beginning the connection process, ensure access to essential tools, including screwdrivers, wire cutters, and insulated wires. Also, have your solar monitor and charge controller available, along with suitable batteries if applicable.
2. Power Down System Components: For safety, turn off all system components before proceeding. This includes disconnecting the solar panels from the charge controller and ensuring that the entire system is safe to interact with.
3. Wiring the Monitor to the Charger: Begin by identifying the appropriate terminals on the solar monitor and charge controller. If utilizing a multi-wire connection, understand which wire relates to specific functions—such as positive or negative connections. Use insulated wires to avoid any short circuits, connecting the solar monitor’s output to the designated input on the charge controller. Secure all connections, ensuring stability and safety.
When connecting pins, follow the protocol carefully and refer to the product documentation to identify voltage limits and wiring specifics. Properly aligned connectors will allow the system to run more efficiently and provide more accurate readings.
4. Finalizing the Connection: After completing the physical connection, recheck all wiring to ensure that connections are tight and secure. Ensure that no exposed wires are present that might lead to short circuits. Turn on all components sequentially, starting from the solar panels, followed by the charge controller, and then the solar monitor.
At this stage, monitor the inverter for indication lights or screens that provide feedback on its status. This information will confirm that the connection is functioning properly, and both devices are communicating effectively.
4. TROUBLESHOOTING COMMON ISSUES
Even after a careful installation, complications can arise from environmental factors, device settings, or outdated components. Identifying and addressing these issues is essential for maintaining system functionality. Several common problems can manifest during or after the connection process.
1. Charge Controller Failure to Recognize Monitor: If the charge controller does not recognize the solar monitor installation, check the wiring to ensure that each connection is secure and installed in the appropriate terminals. Reference the user manual for both devices as some charge controllers may require specific settings to recognize externally connected monitors.
If wiring is confirmed as secure, focus on software settings. Ensure that the communication protocol aligns across devices, as any discrepancies may prevent effective data transfer from occurring. If communication protocols differ or aren’t configured correctly, then the solar monitor might not relay information back to the charge controller.
2. Inaccurate Readings of Energy Production or Consumption: Accurate energy readings are essential for properly managing your solar system. If readings appear inaccurate after connection, double-check the configuration settings on both the solar monitor and charge controller. Calibration may be needed, and each device usually comes equipped with procedures to achieve this calibration that ensures it matches actual energy creation and usage rates.
Furthermore, environmental factors such as shading or dirt on solar panels can skew results. Regular cleaning and maintenance of panels can ensure that the system operates at optimal capacity, thus providing accurate performance data. Additionally, check the battery health to confirm it can adequately store the energy produced.
FREQUENTLY ASKED QUESTIONS
WHAT IS A SOLAR MONITOR AND HOW DOES IT WORK?
A solar monitor is a specialized device designed to track the performance of a solar energy system over time. Typically, affiliated with solar panels or charge controllers, the monitor collects data related to energy generation, consumption, temperature variations, and system health. It works by continuously analyzing multiple variables regarding energy production and usage. This information is either displayed in real-time via a digital interface, such as a screen or an app, or can be logged for later analysis.
The functionality of a solar monitor is facilitated through sensors that are integrated either directly within the solar electricity systems or via communication lines established with external devices. Monitors typically employ algorithms and thresholds to identify issues within the solar array, informing operators of possible defects or areas requiring efficiency improvements. Users can receive alerts concerning system performance, enabling proactive measures to maintain energy production at optimal levels.
HOW DO I TROUBLESHOOT MY SOLAR MONITOR CONNECTION?
Troubleshooting a solar monitor connection can often be approached methodically. Begin by confirming the physical connections between the solar monitor and the charge controller. Ensure that wires are secure and that all connections are made per the device manual specifications. Discrepancies in voltage or wire positioning can hinder communication and functionality.
If connections appear sound, proceed to evaluate the device settings. Verify that both devices are operating within compatible communication protocols and proper configurations. Each manufacturer provides proprietary settings that may require changes upon installation or might differ based on environmental conditions.
If issues persist and the monitor fails to relay data successfully, perform a reset on both devices as per user instructions. Simple resets are effective in clearing temporary errors or glitches, often allowing the connection to reset and function correctly.
WHAT BENEFIT DOES A SOLAR MONITOR PROVIDE FOR MY ENERGY SYSTEM?
Integrating solar monitoring systems into energy frameworks yields numerous advantages that enhance system efficiency. Primarily, these devices allow users to gain analytical insights into energy production and consumption patterns. By observing these metrics, users can optimize energy consumption, thus reducing waste and producing savings on energy bills.
Furthermore, solar monitors facilitate predictive maintenance by tracking performance indicators over time. This helps users identify potential problems early, allowing proactive interventions that can prevent costly breakdowns or repairs. Enhanced operational efficiency translates into longer-lasting equipment and improved overall system reliability, making monitoring a crucial ally in effective solar energy management.
MAINTAINING AN INTEGRATED SOLAR MONITORING SYSTEM
Engaging in regular maintenance of both the solar monitor and charge controller is vital for long-term efficiency and reliability of the entire solar energy system. By understanding how to set up, troubleshoot, and optimize connections between these devices, system administrators can ensure that solar energy continues to provide substantial benefits. Through appropriate practice and attention, beneficial insights can be harnessed, ultimately leading to more effective energy management.
Efforts spent on optimizing the interconnected devices transition the system from ordinary operation to an optimized machine that functions without problem. Through consistent monitoring, one can avert potential malfunctions that can lead not only to energy losses but also adversely impact financial returns. The ability, therefore, to effectively connect, monitor, and maintain solar energy systems becomes paramount to maximize the potential of renewable energy technologies in a sustainable future.
Original article by NenPower, If reposted, please credit the source: https://nenpower.com/blog/how-to-connect-solar-monitor-to-charge/
