To connect solar lights with wires, follow these steps: 1. Gather necessary tools and materials, 2. Understand the solar light’s components, 3. Identify the wiring process, 4. Perform the connection following safety protocols. In detail, the process begins by gathering appropriate tools such as wire strippers, connectors, and the solar lights themselves. Understanding the components involved is crucial, including the solar panel, battery, and LED bulb. The wiring process will vary depending on the light’s configuration, whether it utilizes a single light or multiple fixtures linked together. Each connection should be secure to ensure an effective flow of electricity, minimizing the chances of malfunction or fire hazards. Following prudent safety measures is vital to protect both the user and the components.
1. UNDERSTANDING SOLAR LIGHT COMPONENTS
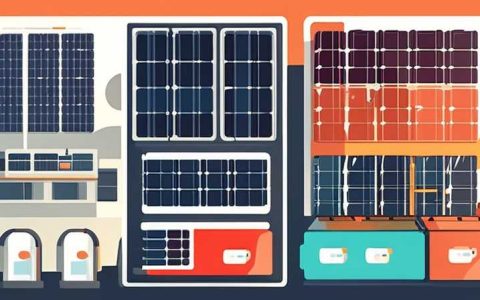
Solar lights consist of several key components, each playing a significant role in the overall functionality. At its core, the solar light features a solar panel that captures sunlight and converts it into electricity. This electricity charges a battery, which stores energy for use during nighttime or in the absence of sunlight. Most solar lights also include an LED bulb, which is responsible for illumination.
The solar panel typically comprises photovoltaic cells that generate direct current (DC) electricity when exposed to sunlight. This process allows the light to operate independently, eliminating the need for additional wiring to connect to the electrical grid. Understanding how these components work together is the first step toward successfully connecting solar lights with wiring.
Additionally, each solar light system might feature different battery types, such as lithium-ion or nickel-cadmium. These batteries dictate how long the light can operate once fully charged. Knowing the storage capacity and voltage rating of the battery can influence your wiring choices and help determine if additional modifications are necessary to enhance performance.
2. TOOLS AND MATERIALS REQUIRED
Before commencing any wiring activities, gather the essential tools and materials needed for the task at hand. A comprehensive toolkit typically includes wire strippers, connector clips, electrical tape, a screwdriver, and potentially a soldering iron if diligent soldering is necessary for connections. Ensure these items are easily accessible to streamline the connection process.
Selecting high-quality wires is equally essential, as they ensure optimal performance of the solar lights. Generally, using solar-rated wires, which can withstand outdoor environmental factors, is advisable. If the wiring is to be extended beyond the manufacturer’s specifications, consult guides or professionals to obtain the appropriate wire gauge for your setup. Investing in weatherproof connectors can also be beneficial, ensuring that connections remain intact and free from degradation due to moisture or temperature fluctuations.
Once all necessary items are gathered, familiarity with each tool’s function can significantly enhance your efficiency. For instance, wire strippers aid in removing insulation from wires without damaging the copper, while connectors securely join wires. The next step involves understanding how these tools will aid in connecting the solar lights to the wiring effectively.
3. PREPARING TO CONNECT THE SOLAR LIGHTS
Taking preparation steps before beginning the wiring of solar lights can significantly reduce the risk of error. Assess the installation location for optimal sunlight exposure throughout the day. Ideally, the solar panel should face south in northern hemispheres or north in southern hemispheres to maximize solar energy absorption. Not only does this impact the efficiency of the lights, but it also determines how much wiring may be needed to connect each unit to a power source.
It is also crucial to inspect the cables for any signs of wear or damage. Damaged cables can lead to power loss or shorts in the system, rendering the lights ineffective. If the cables appear compromised, consider replacing them before proceeding with the wiring process. Understanding your specific model’s manual can provide insights into the necessary wiring specifics, including voltage ratings and the configuration of connections.
Once the assessment of the area and equipment has been completed, creating a blueprint of where each solar light will be placed and how wiring will proceed can offer a clearer perspective on the operational design. Careful planning ensures that each light can function efficiently within its given power capacity, leading to better illumination results at night and enhanced performance over time.
4. WIRING SOLAR LIGHTS TOGETHER
The process of wiring can seem overwhelming at first, but following systematic steps will simplify the task. Start by stripping approximately half an inch of insulation from each wire end using wire strippers. Ensure that you handle wires carefully, avoiding nicking or damaging the conductive materials inside. Each connection necessitates secure and stable joints to perform optimally, making the stripping process an essential first step.
Connectors play a pivotal role in linking wires to each other and ensuring a secure connection. By inserting the stripped wire ends into the connectors and using a pair of pliers to crimp them snugly, you can facilitate effective electrical flow. If your installation involves multiple lights interconnected, repeat this crimping process for each wire, creating a series circuit that can share the input voltage. It’s essential to maintain the polarity while connecting wires, ensuring that the positive terminals match up correctly with the positive leads and negative with negative.
After completing the physical connections, it is crucial to insulate the joints using electrical tape. This safeguard protects connections from moisture, dust, and other environmental factors that might cause shorts or degradation. Once the wiring has been completed, exert caution by performing a test run. This showcases whether the solar lights are functioning properly and allows for timely adjustments, which are essential in achieving optimal operation.
5. SAFETY MEASURES DURING CONNECTION
Throughout the wiring process, adhering to comprehensive safety measures will mitigate risks associated with electrical components. Always handle all wires and connections with dry hands to prevent accidental electrical shocks. When working with solar lights, although DC systems are generally safer than AC, precautions should still be followed. Avoid working in wet conditions or during rainstorms, as water can compromise both safety and component durability.
Using protective gear, such as gloves and goggles, can further enhance safety when connecting solar lights with wires. These safeguards protect against potential hazards and minimize risks to personal safety. Also, ensure that any exposed wiring is properly insulated after completion, preventing stray currents that could lead to shocks or short circuits.
Incorporating an experienced individual when wiring solar lights might also be helpful. If inexperienced with electrical installations, learning from seasoned professionals can provide significant insight into best practices and troubleshooting issues that may arise during the process. Discussion with experts can yield unexpected yet invaluable tips regarding solar light operation, allowing you to make the most of your investment in sustainable energy.
6. EFFICIENT MAINTENANCE OF SOLAR LIGHTS
After connecting the solar lights, understanding maintenance practices is crucial for prolonging the longevity and efficiency of the entire system. Regular cleaning of solar panels eliminates dirt, dust, and debris that may obstruct sunlight from being absorbed effectively. Use a soft cloth and non-abrasive cleaning solution to maintain the panel integrity without scratching or damaging components.
Additionally, inspecting battery connections periodically ensures optimal performance. Corroded connections can lead to decreased charging efficiency or even total system failure. When corrosion is noticed, clean the connectors with a mixture of baking soda and water, gently scrubbing away the buildup before rinsing and drying thoroughly. Considering battery replacement every few years may also be necessary, especially for older systems or those that frequently undergo adverse weather irritants.
Some users may choose to automate maintenance by incorporating voltage or performance meters connected to the system. These devices provide real-time data on battery levels, potentially alerting users when batteries require charging or replacement. Continuous monitoring provides enhanced insight into the performance of the solar light system and identifies areas where improvements may be necessary.
7. TROUBLESHOOTING COMMON ISSUES
Becoming adept at identifying and resolving common issues can significantly enhance the reliability of solar lights. One prevalent problem is insufficiently charged batteries, leading to dim or non-operational lighting. Understanding the weather conditions impacting solar energy absorption can help ascertain whether solar panels are generating energy correctly during charging hours.
If lights flicker or intermittently turn off, existing connections may require inspection for damage or corrosion. A visual examination can reveal loose wires, frayed edges, or exposure to moisture. Correcting any faults and re-securing connections encourages improved performance.
On the other hand, if the fixtures do not illuminate at all, assessing the battery for proper voltage is crucial. A dead battery virtually halts the functional capacity of the solar lighting system, necessitating a replacement. By maintaining an organized response plan to troubleshoot issues effectively, any user can ensure continuous operation of solar lights, fostering satisfaction with their sustainable energy investment.
8. INFLUENCE OF ENVIRONMENT ON SOLAR LIGHT PERFORMANCE
Factors related to the environment can significantly impact solar light performance and overall effectiveness. Locations with consistent sun exposure will yield better results than shaded areas, where the solar panels struggle to absorb sufficient sunlight. Users in regions with prolonged cloudy or rainy conditions may notice diminished lighting duration, urging them to consider alternative arrangements or battery supplements.
Additionally, extreme weather conditions can impose serious consequences for solar lights. Very high or low temperatures affect battery performance and the integrity of materials used in manufacturing. When temperatures fluctuate, batteries may lose their ability to hold charge, collapsing their expected lifespan prematurely. Thus, selecting solar lights specifically designed for high performance in varied temperatures is advisable for outdoor installations.
Lastly, regions prone to sweltering heat or excessive humidity may warrant frequent maintenance checks to enhance longevity. Protective casings or weather-resistant materials might be necessary to ensure that the solar lighting remains operational despite the impact of local climate conditions.
FREQUENTLY ASKED QUESTIONS
1. HOW LONG DOES IT TAKE TO INSTALL SOLAR LIGHTS WITH WIRES?
The duration required for installing solar lights using wires can vary significantly based on several factors. Generally, one can expect the installation to take anywhere from one to three hours. This timeframe must account for the complexity of the wiring process, the number of lights being installed, and the experience of the individual undertaking the task. Seasoned professionals may work at a quicker pace, while beginners may require more time as they familiarize themselves with equipment and protocols.
Key stages in the installation process include assessing the environment for optimal placement, gathering all necessary tools and materials, preparing connections, and actually conducting the wiring. Additionally, any issues encountered during installation—for example, damaged components or unexpected weather conditions—could further slow progress. Thus, planning appropriately ensures that the installation proceeds smoothly without stress or interruptions.
Adequate preparation ultimately leads to more efficient assembly, reducing the overall duration of work. Users looking to maximize efficiency should consider rehearsing the connection process beforehand to streamline their skills.
2. CAN I USE REGULAR WIRING FOR CONNECTING SOLAR LIGHTS?
Utilizing standard wiring for connecting solar lights is generally not advisable if you aim to achieve optimal performance. Solar-rated wiring is specifically designed to withstand environmental stresses, while typical wiring may not offer the same durability. The unique conditions faced outdoors—such as moisture, extreme temperatures, and ultraviolet exposure—necessitate wires that can endure these elements without degradation and failure.
Solar-rated wires come with insulation that resists heat and cold, protecting the integrity of the wire and maintaining efficiency in energy transfer. They also provide resistance against erosion and UV damage, essential for outdoor lights intended to last over time. Using the designated wiring ensures that the solar lights operate effectively as intended, providing longer-lasting performance.
Furthermore, integrating mismatched components could lead to increased risks of malfunction, reduced energy efficiency, and ultimately degrade the performance over the device’s life span. Users should prioritize utilizing solar-rated wiring carefully to safeguard their investment and enjoy satisfactory results.
3. WHAT MAINTENANCE IS REQUIRED FOR SOLAR LIGHTS?
The care required for solar lights is relatively straightforward, but adherence to regular maintenance ensures improved longevity and efficiency. Essentially, maintaining solar lights involves cleaning components, inspecting connections, and monitoring battery health. Regularly wiping the solar panels to remove dirt and debris allows sunlight to penetrate, enabling efficient energy absorption and battery charging.
Users should periodically examine battery connections for signs of wear, corrosion, or damage, especially after severe weather events. Cleaning corroded terminals enhances conductivity, ensuring that energy efficiently transfers to the lights. Additionally, replacing batteries every few years is essential, particularly in older models or during frequent stressful conditions for the equipment.
Beyond generic maintenance, engaging with the system using performance monitors may enhance care practices. These devices can generate data on energy usage and alert you to readjust battery placement, notifications on battery failure, or efficiency recommendations. Utilizing performance-tracking technology can provide personalized guidelines to ensure optimal operational capacity over extended periods.
Ultimately, understanding and applying preventative measures keeps solar lights functioning efficiently while promoting a sustainable energy lifestyle.
In summation, connecting solar lights with wires involves a meticulous approach that encompasses understanding the components, tools required, and proper safety measures. Engaging in comprehensive planning facilitates a seamless installation process, eliminating future malfunctions and ensuring optimal performance. Moreover, routine maintenance and troubleshooting skills extend the lifespan of solar lighting systems, promoting sustainability in daily life. Those who value energy independence and eco-friendly practices will find their investment in solar lights worthwhile, provided they adhere to these outlined strategies. Such initiatives not only contribute to personal satisfaction but also play a significant part in supporting broader environmental goals, which can have far-reaching implications for community resilience amid climate challenges. Explore these practices to unlock the full potential of solar lighting today, automating outdoor spaces with clean energy solutions while reducing dependence on traditional energy sources.
Original article by NenPower, If reposted, please credit the source: https://nenpower.com/blog/how-to-connect-solar-lights-with-wires-2/


