
1. CONNECTION OF A SOLAR DISPLAY METER REQUIRES UNDERSTANDING OF VARIOUS COMPONENTS AND TECHNIQUES, 2. SELECTING APPROPRIATE WIRING OPTIONS IS ESSENTIAL, 3. CONFIGURING SETTINGS PROPERLY ENSURES ACCURATE READINGS, 4. FINAL INSTALLATION REQUIRES CAREFUL REVIEW OF MEASUREMENT OUTPUTS. The process involves multiple steps, including determining the correct environment for installation, ensuring the meter is compatible with existing solar inverters, and following manufacturer guidelines closely.
UNDERSTANDING THE SOLAR DISPLAY METER
The solar display meter plays a vital role in providing real-time data regarding solar energy production. It allows users to monitor the efficiency of their solar panel systems and make informed decisions regarding energy usage. Understanding its functions enhances the user experience and promotes better energy management. The meter provides crucial information such as power output, historical performance data, and alerts regarding system issues, making it an essential tool for both residential and commercial solar energy users.
Additionally, these meters can vary greatly in terms of features and specifications. Some models offer advanced capabilities such as integration with smart home systems, while others focus purely on basic data display. Familiarizing oneself with different models can help users select a meter that best fits their unique requirements and installation environment.
COMPONENTS OF A SOLAR DISPLAY METER
UNDERSTANDING ITS COMPONENT PARTS
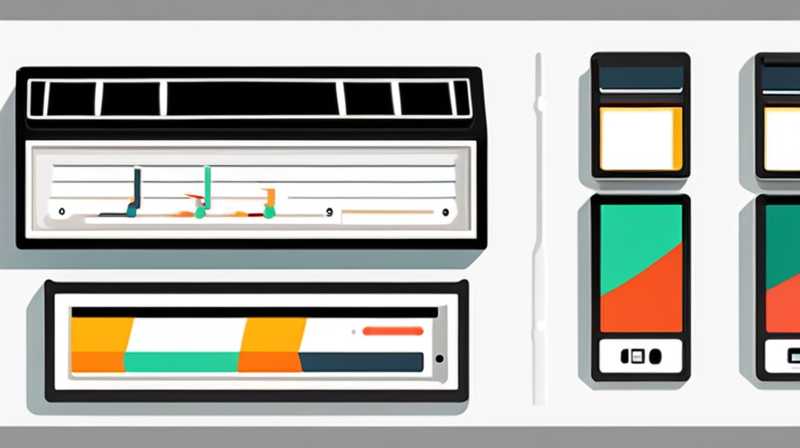
A comprehensive understanding of the various components of a solar display meter is crucial before executing any connections. The essential parts include the display screen, wiring ports, and communication interfaces. The display screen shows real-time data regarding energy generation, while the wiring ports enable connections to other devices, such as solar panels and inverters. The communication interfaces are vital for the meter’s interaction with software applications, providing users with remote monitoring options.
Additionally, some advanced models might include battery management systems and environmental sensors. These features are beneficial for ensuring optimal performance and longevity of solar systems. For effective connection and configuration, it is advisable to consult the specific manual provided by the manufacturer, as components and wiring requirements may differ significantly across brands.
IDENTIFYING CONNECTION POINTS
Identifying the correct connection points on the solar display meter is essential for seamless operation. Generally, the meter will have designated ports for connections to the solar inverter, battery, and display. Ensuring that these connections are made in the proper sequence prevents potential damage to the meter and attached systems. Following the manufacturer’s instructions closely is crucial for achieving a correct setup.
Furthermore, understanding polarity and ensuring correct wiring is critical. Incorrect connections may lead to inaccurate readings or system malfunctions. Users should double-check connections against diagrams provided in the installation guide to guarantee accuracy. If unsure, seeking the assistance of a qualified technician can provide additional assurance and expert guidance during the connection process.
SELECTING WIRING OPTIONS
DETERMINING WIRING TYPES
Choosing the right wiring type for connecting a solar display meter is fundamental for effective functionality. Two primary types of wiring will be involved: AC (Alternating Current) and DC (Direct Current). AC wiring is typically used for systems connected to the grid, allowing users to monitor power going into and out of their homes. DC wiring, on the other hand, is directly connected to solar panels and emphasizes the energy generated before it reaches an inverter.
In most cases, professionals suggest using outdoor-rated wiring for installations exposed to environmental elements. This ensures durability and prevents degradation over time. Understanding local electrical codes and regulations can also inform wiring decisions and ensure compliance with safety standards.
ENSURING PROPER GAUGING
The gauge of the wire plays a pivotal role in determining the overall effectiveness of the solar display meter installation. A wire gauge that is too thin for a particular application can lead to excessive voltage drop, causing inaccurate readings and potential heat buildup. In contrast, thicker wires may contribute to higher material costs without providing substantial performance benefits.
It is essential to consult gauge charts that correlate appropriate wire sizes with expected electrical loads. Using guidelines based on amperage ensures that the installation will be efficient and reliable. Adequate grounding should also be incorporated into the setup, as it helps to ensure safety and promote proper functionality.
CONFIGURATION OF SETTINGS
ADJUSTMENTS FOR ACCURATE MONITORING
Once the solar display meter is connected, configuration settings must be adjusted to guarantee accurate monitoring of energy production. Many meters come with default factory settings that may not align with specific installation requirements. A careful review of these settings is necessary to make adjustments based on the type of solar system, inverter specifications, and user preferences.
The most common configuration settings include the input voltage, current, and system totalization values. This can affect how data is displayed and reported. Properly configuring these settings prevents misleading information from being presented on the display and enhances the user’s ability to optimize solar energy usage.
UTILIZING ADVANCED FEATURES
Many sophisticated solar display meters include additional features, such as data logging, performance analytics, and alerts for system malfunctions. These features can provide critical insights into overall system performance and help identify issues before they escalate. Setting these features up during the installation process ensures that users can maximize the potential of their entire solar energy system.
Ensuring that the solar display meter is connected to a stable internet connection can further enhance its functionality. This allows access to solar monitoring applications, enabling users to view data from anywhere and make informed decisions regarding energy usage patterns. Monitoring apps may also provide historical performance data, contributing to better energy management strategies over time.
INSTALLATION AND FINAL CHECKS
PROCEDURE FOR PROPER INSTALLATION
The installation procedure for a solar display meter should follow a logical sequence for optimal performance. Start by placing the meter in a location that receives adequate sunlight and is easily accessible for maintenance. Ensuring that the meter is mounted securely can prevent potential damage and connectivity issues down the line.
After securing the meter, ensure that all connections have been made following previous guidelines. Make sure each connection is tight and secure, reducing the risk of signal loss that can affect data transmission. For wireless meters, it may be helpful to test the signal strength after setup to confirm that the connection is strong and stable.
TESTING AND VERIFYING FUNCTIONALITY
Conducting tests to verify the functionality of the solar display meter is essential. Checking the display for any error messages or unusual readings helps determine whether the meter is operating correctly. If the display shows values significantly different from expectations, retracing steps to confirm connections and settings is advised.
Additional tests may include monitoring output over a specified period to ensure consistency in readings. Comparing the data with energy production estimates from the solar panels can help validate the accuracy of the solar display meter. If discrepancies persist, consulting with a professional electrician or technician may be necessary for further diagnosis and troubleshooting.
COMMON QUESTIONS
HOW LONG DOES IT TAKE TO INSTALL A SOLAR DISPLAY METER?
Installation time for a solar display meter can vary depending on several factors, including the complexity of the system, prior experience of the installer, and the specific requirements associated with different models. Typically, for an experienced installer, the setup process can range from 1 to 3 hours. Preparatory work, such as gathering necessary tools and materials, should be considered as additional time before installation.
The duration can increase significantly if assistance is required to configure advanced features or to troubleshoot any issues arising during setup. Additionally, if upgrades on existing solar systems are needed, such as rewiring or incorporating new components, the installation could take longer. However, even inexperienced individuals can complete the setup in a day if they follow detailed installation manuals and are willing to learn basic principles related to solar meter connections.
WHAT ARE THE BENEFITS OF USING A SOLAR DISPLAY METER?
Implementing a solar display meter presents various advantages to users aiming for enhanced energy management. Among the most notable benefits include real-time monitoring, performance insights, and cost-saving opportunities. Users can observe energy production as solar energy is generated, promoting awareness and encouraging energy-saving behaviors.
Moreover, these meters often allow users to analyze historical performance data, enabling comparative insights into energy efficiency under different environmental conditions. By identifying trends, users can optimize their energy usage patterns for increased savings on electricity bills. Additionally, if the meter is connected to an online platform, functionality such as remote monitoring and alerts can be leveraged to stay informed about system performance.
HOW DOES A SOLAR DISPLAY METER INTEGRATE INTO A SMART HOME SYSTEM?
Integration of a solar display meter into a smart home system can dramatically enhance the user experience through advanced automation and control features. Smart home integrations allow users to monitor their solar energy production alongside other home energy activities. This creates a comprehensive view of energy utilization and management.
For example, users can set parameters where specific appliances run during peak solar production hours. By doing so, they can maximize solar energy used within the household, which directly correlates to savings on those electricity bills. Additionally, some smart home systems may allow users to remotely control devices based on energy availability. This holistic approach not only improves efficiency but also encourages sustainable energy practices.
FINAL REMARKS ON CONNECTING A SOLAR DISPLAY METER INVOLVE A COMMITMENT TO ACCURACY AND EFFICIENCY. THE EXPERIENCE OF USERS WILL GREATLY BENEFIT FROM A DETAILED UNDERSTANDING OF THE CONNECTION PROCESS, DEVICE CONFIGURATION, AND FUNCTIONALITY OF THEIR SYSTEM. PROPER INSTALLATION AND CONFIGURATION WILL NOT ONLY OPTIMIZE PERFORMANCE BUT ALSO ENHANCE THE USER EXPERIENCE THROUGH REAL-TIME MONITORING CAPABILITIES. IN SUMMARY, A SOLAR DISPLAY METER provides the tools for monitoring and managing solar energy efficiently, promoting strong engagement with renewable energy systems and potentially leading to significant cost savings. AS SOLAR ENERGY GROWS IN POPULARITY, KNOWLEDGE ABOUT THESE METERS BECOMES ESSENTIAL FOR USERS LOOKING TO HARNESS THE FULL BENEFITS OF THEIR ENERGY SYSTEMS.
Original article by NenPower, If reposted, please credit the source: https://nenpower.com/blog/how-to-connect-solar-display-meter/
