
1. Connecting a solar display involves several essential steps: 1) Proper positioning for optimal sunlight exposure, 2) Understanding the electrical components required for setup, 3) Installation of the solar panel and display unit, 4) Connecting wiring for seamless operation.
In detail, proper positioning is significant; directing solar panels toward the sun allows for maximum efficiency. If the panels do not receive adequate sunlight throughout the day, the performance of the solar display will be severely hindered. Additionally, understanding the electrical components necessary for this connection is vital; components like inverters, batteries, and wiring play crucial roles in converting and storing solar energy efficiently.
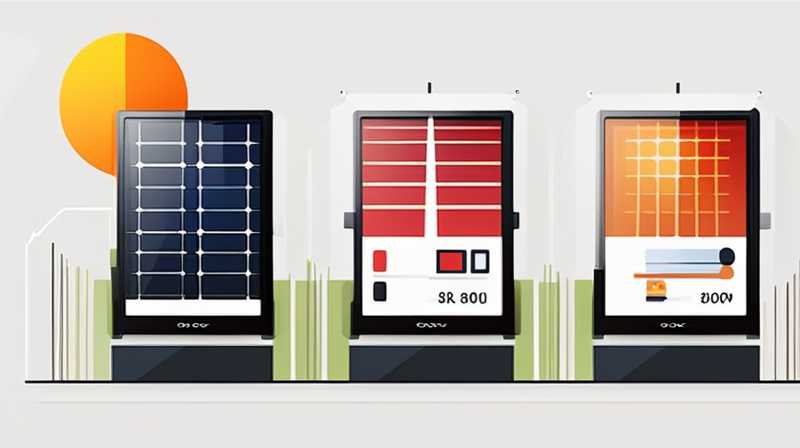
1. INSTALLATION OF SOLAR DISPLAY
The procedure to integrate a solar display into an energy source consists of several calculated measures. To commence, one must identify an area that is strategically positioned to receive ample sunlight. This part of the process can significantly influence the overall performance of the display because if the solar panel is shaded or poorly placed, the energy it harnesses will be substantially reduced. Calculating the angle and orientation is critical. For instance, positioning panels facing south in the Northern Hemisphere can enhance energy absorption.
Furthermore, considering variables such as seasonal changes in the sun’s trajectory and local obstructions (trees, buildings) constitutes good practice for optimal placement. Beyond initial positioning, the aspect of installation comes into play. Different mounting systems, such as roof mounts, pole mounts, or ground mounts, offer various benefits based on the environment; selecting the right one influences long-term efficiency and aesthetics.
2. UNDERSTANDING ELECTRICAL COMPONENTS
A connection to a solar display requires an understanding of electrical components such as inverters, batteries, and wiring. Inverters are crucial devices that convert the direct current (DC) generated by solar panels into alternating current (AC), which is usable for most appliances. The choice of inverter can often depend on the specific needs of the solar display system; for example, string inverters might be useful for series-connected panels, while micro-inverters can cater to systems with shaded panels.
Batteries serve as energy storage units allowing excess energy to be stored for use during periods without sunlight. Different types of batteries, such as lead-acid and lithium-ion, provide varied performance characteristics, impacting cost and efficiency. Selecting the appropriate inverter and battery combination is paramount for creating a robust solar display system. Wiring should not be overlooked as well; using the right gauge can prevent energy loss and potential hazards.
3. INSTALLING SOLAR PANELS
After preparing the site and gathering essential components, the actual installation of solar panels can commence. The mounting brackets or frames must be securely affixed to ensure stability against wind or other natural elements. Utilizing a level during the installation process helps maintain an even setup, optimizing energy collection.
Once mounted, the solar panels should be connected to the inverter appropriately. This connection is driven using designated wiring guaranteed to handle the capacity and current produced by the solar panels. It is advisable to refer to the manufacturer’s guidelines at this stage to avoid any errors that might impact the system’s performance.
When the panels are hooked up, the next step encompasses connecting the inverter to the battery and the main electrical supply. This phase may require a professional electrician’s assistance to conform to local codes and regulations and ensure safety.
4. CONNECTING THE DISPLAY UNIT
Once the solar panels and inverter have been successfully connected, the focus shifts toward integrating the display unit into the system. Most solar displays have specific requirements for connections, depending on their design and intended functionality. Typically, they are connected through a designated terminal or cable that connects both the inverter and the display unit.
Power management software or monitors may also accompany the display, enabling users to visualize solar output and monitor efficiency. These monitoring tools can offer valuable information on energy generation, usage patterns, and overall system performance.
Integrating these components accurately lays the groundwork for smooth operation. Ensuring manufacturer specifications are adhered to is crucial for effective functionality.
5. TROUBLESHOOTING CONNECTION ISSUES
Despite meticulous planning and installation, complications might arise during operation. Common problems include insufficient energy production, faulty wiring, or equipment malfunctions. Regular checks on the connection can mitigate potential issues.
For instance, checking voltage readings and ensuring all wiring connections are tight can prevent performance dips. If readings are consistently low, further inspection might be necessary to identify potential shading issues or panel damage. Addressing these factors promptly can prolong the lifespan of the solar display and ensure continual efficiency.
6. MAINTAINING SOLAR DISPLAY
Consideration for maintenance cannot be overlooked in the realm of solar displays. Ensuring cleanliness over the solar panels often maximizes energy absorption; dirt and debris can significantly hamper performance. Annual inspections of the entire system should include checking all electrical connections, fasteners, and panel integrity.
Additionally, users must keep an eye on the battery’s health, as batteries can lose capacity over time. Regular monitoring of the system enables early detection and rectification of potential issues before they escalate into significant problems.
FREQUENTLY ASKED QUESTIONS
HOW LONG DOES IT TAKE TO INSTALL A SOLAR DISPLAY?
The installation duration for a solar display varies considerably based on several factors including the system’s complexity and the number of components involved. For a simple setup, which may encompass a few solar panels connected directly to a basic inverter and display unit, the process can typically be completed in a day.
However, if the system is more complex, includes multiple solar panels, battery storage, or advanced monitoring systems, the project may require several days, especially if multiple technicians are needed for safety and efficiency. Additionally, pre-installation tasks like site assessment and securing permits can contribute to extending this timeline. It is advisable to always discuss expectations and timelines with the installation contractor to ensure an understanding of the project.
WHAT TYPE OF SOLAR DISPLAY SHOULD I CHOOSE?
The selection of a solar display will primarily rest on your specific needs. Those interested in real-time power generation data and performance statistics can opt for advanced systems offering detailed analytics.
On the other hand, individuals seeking straightforward solar energy utilization might find basic solar displays sufficient. Factors including budget, desired features, and installation space will guide your choice. Consulting with a professional installer can assist in determining the optimal display that accounts for processing power requirements and atmospheric conditions.
IS IT NECESSARY TO HIRE A PROFESSIONAL FOR INSTALLATION?
While it is feasible to undertake solar display installation independently, seeking professional assistance is highly recommended. Hiring a certified installer ensures safety and compliance with local regulations. Professionals possess the expertise necessary to navigate potential issues and adhere to best practices that increase system longevity and efficacy.
Moreover, expert installers can often procure components at a lower price, making the overall project economical. The assurance that the job is performed correctly is invaluable, offering peace of mind for years to come. Engaging professionals increases the chances of achieving optimal performance from your solar display.
Completing an installation of a solar display involves significant attention to detail and considerations encompassing positioning, electrical components, and maintenance. The decision to integrate solar technology ultimately provides various benefits, from reducing energy costs to minimizing one’s carbon footprint. Solar displays harness renewable energy, illustrating a commitment to sustainable practices while offering the prospect of energy independence. Installation may seem daunting initially; however, detailed preparation and knowledgeable application can streamline the process effectively.
By understanding how to connect different components and ensuring regular maintenance, individuals will be equipped to maximize their solar display systems’ potential efficiently. As global concerns regarding energy consumption and environmental impacts continue to escalate, embracing solar technology calls for proactive endeavors toward a cleaner future. Therefore, integrating solar displays is not merely a practical measure but a pivotal step towards embracing sustainability and innovation. Individuals must remain informed about their systems, maintain them diligently, and consider professional assistance as necessary, reinforcing the idea of security against potential issues. Ultimately, investing in solar technology not only benefits the individual user but also contributes positively to society and the planet as a whole.
Original article by NenPower, If reposted, please credit the source: https://nenpower.com/blog/how-to-connect-solar-display-2/
