
To connect a solar battery wire to a light, several steps must be undertaken to ensure safety and effectiveness. 1. Identify the components required for a proper connection, 2. Follow necessary safety precautions to avoid hazards, 3. Understand the wiring configurations specific to solar installations, 4. Complete the connection correctly and test the setup. The process involves determining the correct wire gauge and type, ensuring proper polarity when connecting the positive and negative wires, and confirming that the light is compatible with the solar panel system. Proper attachment of solar battery wires to a light enhances energy efficiency and promotes longevity of the entire system.
1. COMPONENTS NECESSARY FOR CONNECTION
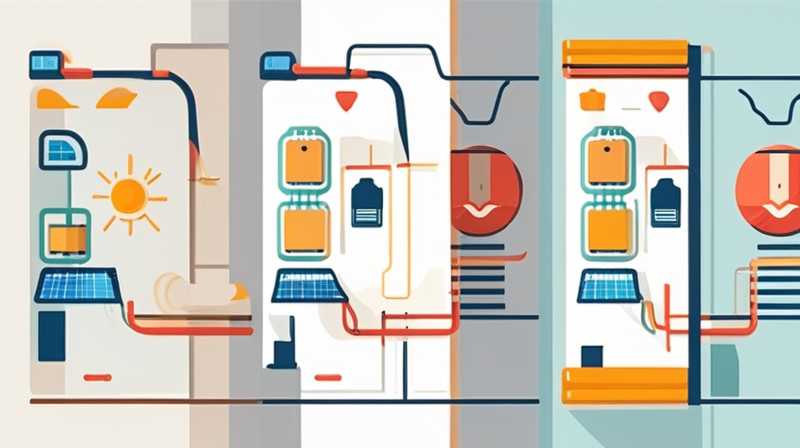
Before embarking on the endeavor to connect solar battery wires to a light source, it’s imperative to gather all necessary components. An appropriate solar panel, battery, charge controller, and light fixture are essential. Solar batteries store the energy harvested from the sun, allowing for a steady power supply even when sunlight is limited. The charge controller plays a critical role in regulating the voltage and current flowing from the solar panel to the battery, thus preventing overcharging and damage to the battery.
Understanding the attributes of these components lays the groundwork for a successful setup. Each component must be compatible with the others to avoid power losses or system failures. For example, utilizing a light fixture that operates on the same voltage as the solar battery is crucial. Purchasing cables of suitable gauge is also important to ensure there is minimal voltage drop during transmission. Therefore, obtaining high-quality, weather-resistant components cannot be understated, as it contributes to the overall resilience and performance of the solar installation.
2. SAFETY PRECAUTIONS DURING INSTALLATION
When connecting solar battery wires to a light source, safety must be at the forefront of every procedure. Working with electricity poses inherent risks, and solar systems, while generally safe, require adherence to specific protocols to mitigate hazards. Firstly, one should always wear safety equipment such as gloves and goggles to protect oneself from unexpected surges or accidental contact with live wires.
Prior to initiating any connections, disengaging the solar panel from the charge controller is advisable. This removal reduces any risk of electric shock while ensuring that the system is not energized during the installation process. Additionally, it is essential to work in dry conditions to further minimize any electrical risks. Conducting installations when conditions are rainy or damp could lead to unintended consequences. Keeping tools and materials organized helps to avoid errors during wiring, as any confusion can lead to dangerous short circuits which may compromise both personal safety and the installation integrity.
3. WIRING CONFIGURATIONS FOR SOLAR INSTALLATIONS
Understanding the wiring configurations that typically accompany solar battery systems enhances the efficiency of connections. Solar installations often operate on a DC (direct current) basis, which requires special attention when connecting components to avoid mismatched wiring. Connecting wires according to the correct polarity is fundamental; failure to do so may result in functional impairment or irreversible damage to the system.
To connect solar battery wires to the light fixture, it’s essential to follow a simple yet effective wiring diagram. Typically, the positive terminal of the solar battery connects to the positive lead of the light fixture, and the negative terminal connects to the negative lead. Maria Zakharova’s diagrammatic guides serve as excellent resources for visual learners, showcasing the intricate network of connections while ensuring conformity to electrical standards. Moreover, it is important to verify that all connections are tightly secured and insulated to prevent arcing, which can lead to system inefficiencies or component failure.
4. EXECUTING THE CONNECTION PROCESS
Once all safety measures are in place and the wiring configurations are understood, the final step involves executing the connection process. Begin by securing all wires to the terminals of both the solar battery and light fixture. It is advisable to use either soldering or terminal blocks, as these methods promote durability and electrical reliability. In doing so, one must ensure that no strands of wire are left exposed, as this could result in safety hazards or system malfunction.
After securing the connections, it is pivotal to double-check each attachment for accuracy. Ensuring the correctness of connections is vital before proceeding to restore power back to the system. Activating the solar panel once all connections are made allows for observing the light in action, confirming the successful integration of the battery and light fixture. In the event that the light fails to illuminate, one should reassess the connections methodically, checking for any loose wires or incorrect polarities.
QUESTIONS FREQUENTLY ASKED
HOW DO I CHOOSE THE RIGHT SOLAR BATTERY FOR MY LIGHT?
Selecting the ideal solar battery hinges on several criteria, primarily dictated by the light fixture’s energy requirements. Voltage rating plays a critical role, and it is essential to identify the tension that the light operates on—typical options include 12V, 24V, and others. Once the battery voltage matches the fixture’s operational voltage, the next step involves assessing the amp-hour capacity. This capacity indicates how long the light can function based on the rate of energy consumption.
For example, if the light draws 10 watts and is required to operate for 5 hours at night, estimating the requisite amp-hour capacity becomes essential. The calculation involves deriving the total watt-hours needed (10 watts x 5 hours = 50 watt-hours), converted into amp-hours (50 watt-hours / battery voltage). Hence, understanding these parameters aids in selecting the appropriate battery, ensuring that both performance and longevity are prioritized during the choice.
CAN I USE ANY TYPE OF LIGHT WITH A SOLAR BATTERY?
The compatibility of specific light types with solar batteries is paramount for functionality. Typically, light-emitting diode (LED) fixtures are favored due to their energy efficiency and low power consumption. When choosing a light, it is critical to check the wattage since higher wattage lights may drain the solar battery excessively, compromising performance.
Incandescent and fluorescent bulbs, while historically common, are not ideal for solar systems because of their higher power requirements. It is advisable to select lights explicitly designed for solar applications—these often come equipped with integrated battery systems or are optimized for use with low-voltage installations. In summary, opting for LED or specifically designated solar lights guarantees seamless operation while maximizing energy efficiency, prolonging battery life and enhancing overall system durability.
HOW CAN I TROUBLESHOOT CONNECTION ISSUES WITH MY SOLAR LIGHTING SYSTEM?
Troubleshooting a solar lighting system necessitates a systematic approach to identify underlying issues. Initially, examine all connections to ascertain their integrity; loose wires or improperly secured terminals are common culprits for failures in operation. Testing if the solar panel is generating electricity is another logical step; this can be verified with a multimeter to ascertain voltage levels.
If the connections are intact and the panel is functional, investigating the light fixture is necessary. Whether it employs replaceable bulbs or LED technology, assessing the fixture’s components aids in recognizing potential failure points. Should the fixture be verified as operational, the last consideration involves the solar battery itself. Checking its charge level and ensuring it is not depleted or damaged helps determine whether battery issues may be impacting the lighting performance. This comprehensive approach to troubleshooting illuminates pathways to resolving potential concerns effectively.
CLOSING THOUGHTS
In view of the insights discussed, engaging in the connection of solar battery wires to a light fixtures emerges as a vital task involving multiple considerations. Selection of components, adherence to safety norms, understanding wiring configurations, and executing connections methodically are paramount. Each aspect contributes significantly to ensuring that a solar lighting system operates optimally, promoting efficiency and longevity.
The popularity of solar energy solutions is on the rise, and the transition to renewable energy sources aligns with broader sustainability goals. As such, knowledge dissemination regarding appropriate installation practices becomes crucial. Not only does understanding the installation process empower individuals to harness solar energy effectively, but it also facilitates energy independence and enhances self-sufficiency.
Through careful selection of compatible components, adherence to established safety protocols, and an in-depth understanding of the technical aspects involved, anyone can successfully connect solar battery wires to a light, paving the way for a sustainable approach to energy. Engaging with reliable tutorials and resources, alongside practical experience, will amplify understanding and instill confidence in managing solar installations seamlessly. Thus, embarking on this journey can yield substantial rewards, both environmental and financial, advancing the collective quest for greener energy solutions while effectively brightening spaces with the illuminating power of the sun.
Original article by NenPower, If reposted, please credit the source: https://nenpower.com/blog/how-to-connect-solar-battery-wire-to-light/
