
To connect a six-wire solar power cable effectively, it is essential to follow specific procedures to ensure safety and efficiency. 1. Identify the correct wire configuration for your solar system, 2. Strip the wire ends properly to maintain integrity, 3. Use appropriate connectors that match your cable’s specifications, 4. Perform tests after connections to ensure functionality. The most critical aspect is to understand the wiring diagram of your solar panel system, as this guides the connection process. Proper identification of wire functions—such as positive, negative, and grounding—is crucial. Once the wires are prepared, connecting them securely prevents voltage drop and potential hazards. Using connectors that are compatible with your equipment enhances the reliability of the connections. Finally, routinely testing the connections ensures the solar system operates efficiently, providing maximum power production.
1. UNDERSTANDING SOLAR POWER CABLES
Solar energy harnesses sunlight, converting it into electricity for residential and commercial applications. This process involves multiple components, including panels, inverters, and wiring. Solar power cables play a vital role in transmitting electrical energy from solar panels to inverters and subsequently to the electrical grid or home circuits. Understanding the significance of these cables is essential for anyone working with solar installations.
When setting up a solar energy system, cable selection and configuration require careful consideration. A six-wire solar power cable typically consists of positive and negative connections, often segregated into different groups. Identifying these connections aids in establishing a reliable electrical circuit. Moreover, selecting cables with suitable insulation and conductive material ensures durability and reduces energy loss.
2. WIRE CONFIGURATION
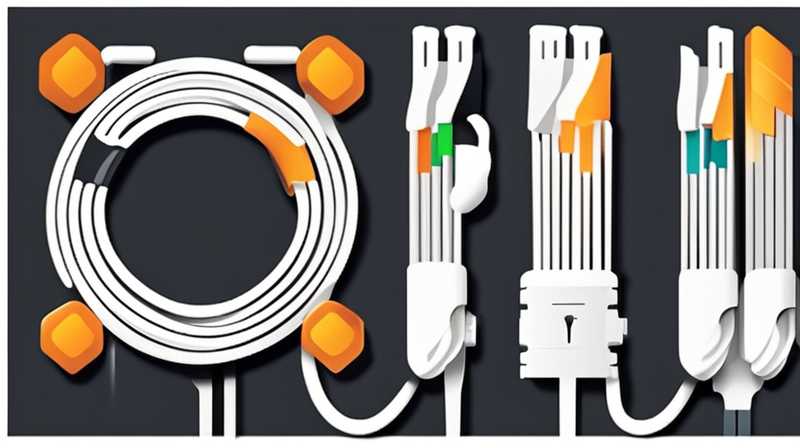
Identifying the wire configuration is essential in establishing connections safely. Six-wire solar power cables typically comprise three pairs of wires, where each pair serves a specific function: positive, negative, and ground connections. Understanding which wire corresponds to each function helps in avoiding dangerous miswiring.
The positive wires carry the current generated by solar panels to the inverter, while the negative wires complete the circuit by returning current back. Grounds ensure safety by preventing electrical shocks or fires if a fault occurs. Each wire’s function directly impacts the performance of the entire solar energy system, making this step critical for efficiency.
This initial identification sets the foundation for the connection process, ensuring that the subsequent steps can be performed without confusion. It is prudent to refer to wiring diagrams specific to the solar system in question. A misconnection at this stage can lead to diminished output or, worse, damage to the solar components.
3. PREPARATION OF WIRE ENDS
Properly preparing the wire ends is a crucial stage that directly affects the quality of connections. Stripping wire ends requires precision to ensure that sufficient conductive surface area is exposed while also preventing insulation damage. Insulation maintains safety by protecting the wires from environmental elements and potential shorts.
Strip about half an inch of insulation from each wire end, making sure not to cut into the copper strands. This length is usually sufficient for secure connections while ensuring that the remaining wire is adequately insulated. Utilizing wire strippers designed for the gauge of the wire can help achieve clean cuts, ensuring that strands remain intact.
After stripping, it is imperative to check the wire for any damage. Inspecting the insulation also contributes to the overall quality of the solar energy system’s performance. Damaged wires have the potential to compromise electrical efficiency and pose safety risks. Taking the time to prepare wire ends correctly not only facilitates better connections but enhances the longevity of the solar power system.
4. CONNECTORS AND TERMINATIONS
Integrating the right connectors is fundamental to the effectiveness of solar power installations. Connectors serve to firmly attach wires together, conducting electricity without loss or overheating. There are various types of connectors on the market, including MC4, Andersson, and SAE connectors, among others. Choosing connectors compatible with your solar system specifications is essential.
MC4 connectors are among the most common in the industry, particularly known for their durability and weather resistance. Once the wire ends are prepared, each wire must be inserted into the connector, ensuring a firm fit. Crimping, soldering, or using screws often secures the wires within connectors, providing a stable connection.
It’s also important to test the connectivity after connections. Utilizing a multimeter can aid in checking for continuity, verifying that connections are secure. Ensuring that the connections are intact not only prevents energy loss but also protects solar components from potential damage caused by loose attachments or electrical shorts. Taking great care in selecting and terminating connectors greatly enhances the reliability and safety of the entire solar power system.
5. PERFORMING FUNCTIONAL TESTS
After the connections have been made, conducting functional tests is of utmost importance. Testing provides insight into the efficiency of the system, identifying any issues that could hinder performance. Use a multimeter to assess the voltage and current flowing through the system. Verifying readings against expected values helps pinpoint any irregularities or faults.
In addition to voltage and current tests, inspecting the integrity of mechanical connections is crucial. Loose connections can lead to an increase in resistance, resulting in reduced efficiency. Rigorously checking every connection for tightness, along with inspecting for frayed wires, ensures long-term functionality.
Another critical aspect is ensuring the polarity is correctly aligned, as reversing connections can lead to equipment failure or hazardous situations. Testing each component in the circuit, including the inverter, can help verify the entire system operates within parameters. Investing time in thorough testing improves confidence in the system’s reliability and performance, ensuring optimal solar energy harvest.
6. MAINTAINING SOLAR POWER CABLES
Regular maintenance of solar power cables ensures sustained performance and safety over time. Environmental factors such as sun exposure, moisture, and temperature fluctuations can have an impact on cable condition. Inspecting cables periodically for signs of wear or damage aids in identifying potential issues before they become problematic.
Cleaning is also a fundamental aspect of maintaining solar power cables. Dust, debris, and other contaminants can accumulate on the cables and connectors, leading to a decrease in efficiency. Utilizing soft brushes or cloths to wipe down cables helps remove accumulated dirt, ensuring optimal electrical conduction.
Additionally, checking connections periodically assists in confirming their integrity. Vibration from wind or the shifting of solar panel mounts can yoke loose wires. Ensuring that all connections are tight prevents energy losses and enhances the overall performance of the solar energy system. Routine maintenance, therefore, serves as a preventive measure that guarantees the longevity and efficiency of solar power installations.
Q&A
WHAT TO DO IF A SOLAR CABLE IS DAMAGED?
If a solar cable is found to be damaged, immediate action is essential. First, disconnect power from the solar panels to prevent electric shock. Carefully inspect the damaged area to determine the extent of the damage. If only the insulation is compromised, applying heat-shrink tubing or electrical tape may suffice. If the inner wires are damaged, replacing the entire section of cable will likely be necessary.
After ensuring all safety precautions, cut the cable cleanly at both ends of the damaged area. Strip the wire ends to prepare for reconnection. Use connectors that are compatible with your specific solar system and follow proper termination techniques to secure the new cable. Finally, once the repairs are complete, it’s vital to conduct functional tests to verify that the system operates as expected.
WHAT ARE THE SYMPTOMS OF A POOR CONNECTION IN A SOLAR POWER SYSTEM?
Identifying symptoms of poor connections in a solar power system can prevent further complications. One common indicator is fluctuating power output. If the power generated by the solar panels is inconsistent or lower than expected, it may indicate loose or corroded connections.
Another symptom is overheating. Loose connections can lead to increased resistance, causing wires and connectors to heat up when the system is under load. Visible signs of damage, such as burnt connectors or melted insulation, also indicate connectivity issues.
Routine monitoring of performance metrics through relevant solar software can help detect anomalies early. If any issues arise, immediate inspection and troubleshooting are recommended to ensure optimal functionality and safety for the system.
HOW CAN I IMPROVE MY SOLAR SYSTEM’S EFFICIENCY?
Enhancing the efficiency of a solar power system can involve several strategies. Firstly, proper positioning and installation of the solar panels ensure maximum sunlight exposure. Panels should be angled correctly and ideally located in an area free from shading by trees or buildings.
Moreover, regularly cleaning panels can significantly improve energy absorption. Accumulation of dirt and debris can block sunlight, reducing the panels’ efficiency.
In addition, upgrading wiring and connectors to higher-quality components that minimize resistance can enhance overall performance. Investing in monitoring systems also provides real-time feedback on performance, allowing for prompt action to address any issues. Consistency in maintenance checks further protects the investment and guarantees sustained efficiency over time.
Crafting a reliable connection for a six-wire solar power cable involves numerous essential steps that are crucial for both safety and efficiency. The journey begins with a comprehensive understanding of the wiring configuration unique to each specific installation. By identifying which wire serves which purpose—positive, negative, or ground—individuals lay a solid foundation for subsequent procedures.
Preparation of the wire ends is no less critical; care must be exercised to remove insulation while maintaining the integrity of the conductive material. During the connection phase, selecting the appropriate connectors ensures a robust interaction between wires, leading to sustained energy flow. Equally important is conducting testing to confirm that connections are performing to specifications without compromise, further safeguarding both functionality and equipment longevity.
Beyond immediate connections, regular maintenance checks serve as a preventive measure, identifying potential issues rooted in wear and environmental impacts. Cleaning cables, inspecting connections, and periodically assessing performance metrics culminate in a seamless experience with solar power systems.
Conclusively, a methodical approach to connecting and maintaining solar power cables can lead to optimal energy production, longevity for the system, and enhanced user satisfaction. Investing time and care into these processes, while prioritizing safety, ultimately translates into a successful and efficient solar energy experience.
Original article by NenPower, If reposted, please credit the source: https://nenpower.com/blog/how-to-connect-six-wire-solar-power-cable/
