
To effectively connect a self-priming pump to a solar pipe system, it’s essential to follow several key steps. 1. Understand the pump requirements and specifications, 2. Prepare the installation site properly, 3. Execute the connection methodically, 4. Test the system thoroughly after installation. Among these points, understanding the pump’s specifications is particularly critical, considering factors such as flow rate, head pressure, and power requirements. Selecting a self-priming pump that matches the solar pipe’s specifications will ensure optimal performance and efficiency in extracting and transporting water.
1. UNDERSTANDING SELF-PRIMING PUMPS
Self-priming pumps represent a unique subset of pumping equipment designed to eliminate the need for manual priming. These pumps possess an inherent capacity to siphon liquid into the pump casing and subsequently draw it into the pump. Understanding the operational aspects of these pumps is essential before forming a connection. The mechanism of a self-priming pump involves a two-step process: evacuation of air from the pump during operation and automatic refill of the liquid being pumped.
These mechanisms allow such pumps to maintain functionality even when water levels fluctuate. Many self-priming pumps rely on centrifugal forces combined with specially designed impellers that create a vacuum effect, which aids in drawing water efficiently from a source. When connecting these pumps to a solar pipe, be aware of the impeller size and materials, as these factors will influence not only efficiency but also the durability of the pump in various conditions.
2. PREPARING THE INSTALLATION SITE
The installation site serves as the foundational aspect for connecting any pump. Preparation involves selecting an appropriate location that provides ease of access for maintenance while ensuring proximity to the water source. Look for an area that offers stable ground to prevent any movement that could disrupt the pump operation. Additionally, when connecting to a solar pipe, ensure the area receives adequate sunlight throughout the day for optimal solar energy absorption.
Another crucial aspect of preparation is ensuring the compatibility of materials used with those of the solar piping system. Inspect the pipe fittings, connectors, and hoses for appropriate size and resistance to weather conditions. Using incompatible materials might lead to leaks or failures that could compromise the system’s functionality. Pre-emptively gathering the necessary tools and equipment will streamline the installation process and facilitate an efficient workflow.
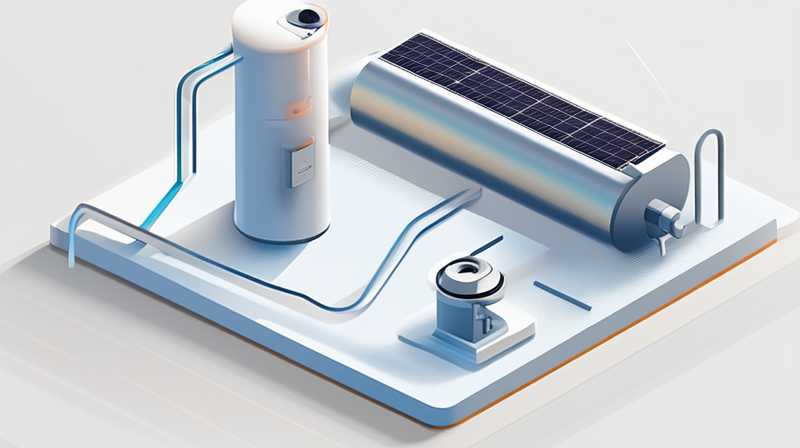
3. CONNECTING THE PUMP TO THE SOLAR PIPE
The actual connection process can vary based on the specific designs of the pump and the solar piping system. Identifying and preparing the appropriate fittings to facilitate this connection is paramount. Begin by ensuring that all preventive measures against contamination are in place, particularly if the source of water is not potable. This can include installing filters or strainers that intercept debris before it reaches the pump.
When connecting the pump’s inlet to the solar pipe, ensure that all connections are tight and secure to prevent leaks. The use of plumber’s tape on threaded connections can enhance sealing and minimize the chances of voids that might allow air into the system. It’s important to avoid using excessive force that could damage the threads or connectors.
After securing the inlet, proceed to connect the outlet of the self-priming pump to the distribution system ensuring that the flow direction is adhered to. Refer to the pump’s user manual for specifics. If your solar pipe system has variable flow paths, plans for bypass or check valves may be necessary to maintain consistent and controlled flow, even during system adjustments.
4. TESTING AFTER INSTALLATION
Conducting a thorough test following the installation is essential for ensuring that the system operates as intended. Start by checking all connection points for leaks. It is advisable to monitor the pump for any irregular noises or vibrations which could indicate misalignment or installation errors. If the pump is equipped with an automatic priming function, ensure this operates without malfunction.
Running the pump while observing the solar panel performance is also important. Monitor the power output directly from the solar panels, as fluctuations can affect pump operation. Should the pump fail to self-prime, identify potential issues such as air leaks, blockages, or inadequate power supply. Initially troubleshooting and addressing these concerns rapidly can avert prolonged down time and ensure optimal efficiency in fluid transfer.
FREQUENTLY ASKED QUESTIONS
WHAT IS A SELF-PRIMING PUMP AND HOW DOES IT WORK?
A self-priming pump is a tool designed to draw liquid into the pump without the need for pre-filling or manual priming. This process relies on a combination of centrifugal force and a vacuum mechanism established by the pump’s impeller. When activated, the impeller spins within a casing, which fills with liquid while simultaneously evacuating air from the system to create a vacuum. This happens in two distinct stages: the first stage involves removing air, and the second stage facilitates pulling the liquid into the system.
This design allows self-priming pumps to be particularly advantageous in situations where the water source may be at varying elevations, as they can adjust accordingly without needing user intervention. These pumps are commonly used in applications involving irrigation, pool filling, or even in residential settings for groundwater extraction. It is crucial to be aware of the limits regarding the maximum suction lift and flow rates of self-priming pumps to ensure they function effectively within their intended applications.
HOW DO I MAINTAIN A SELF-PRIMING PUMP AFTER INSTALLATION?
Maintenance is key to prolonging the lifespan and performance of a self-priming pump. The first step involves routinely checking for leaks or signs of wear at the connection points and hoses. Ensuring that joints remain secure can prevent water loss and ensure efficiency in operation. Additionally, monitor the pump’s impeller and casing for debris, scaling, or blockages, as build-up can hinder functionality.
Regularly inspecting the pump’s bearings and seals is vital for maintaining efficiency. Over time these components can wear down, which may lead to operational difficulties. During maintenance checks, consider flushing the pump with clean water to remove any contaminants that may have accumulated during operation. Oiling the moving components as per manufacturer recommendations can also prolong operational longevity.
Furthermore, monitor how the pump responds to varying environmental conditions, including changes in temperature or water source levels. Being proactive in understanding how these variables affect pump performance allows for timely adjustments and interventions, ensuring optimal operation of the entire system.
WHAT SHOULD I DO IF MY SELF-PRIMING PUMP FAILS TO PRIME?
If your self-priming pump fails to prime, the first step is to assess the system for potential air leaks. Check all fittings, hoses, and seals for tightness, as even a small gap can disrupt the vacuum necessary for priming. Inspect the inlet strainer and clear any debris that may hinder water flow into the pump. These quick checks can often reveal immediate solutions to priming issues.
Next, consider the water source itself. If the water level is too low, the pump may struggle to draw water. In this case, ensuring access to an ample water supply may resolve the issue. Evaluate the pump’s power supply to determine if adequate voltage is being provided, as insufficient power may prevent the pump from reaching its operational speed.
Should these initial checks not resolve the problem, it may indicate a malfunction or failure of the pump’s internal components, such as the impeller or seals. Consulting the manufacturer’s guidelines for troubleshooting can provide additional insights and potential solutions, including the need for repairs or replacement components that restore functionality and reliability to the pump system.
To summarize, the process of connecting a self-priming pump to a solar pipe involves a comprehensive understanding of the components involved, meticulous preparation for the site, careful execution of the connection, and thorough testing post-installation. Each of these steps is crucial in ensuring optimum performance, sustainability, and longevity of the system. Achieving a successful connection requires attention to detail at every phase, ensuring that the interdependent systems work seamlessly together to fulfill your water transfer needs. Regular maintenance and prompt troubleshooting of any issues that arise are equally vital for the system’s ongoing success, making it essential for users to remain engaged with their system and informed about its operation. This proactive approach fosters a highly efficient and resilient water transportation arrangement that capitalizes on available solar energy.
Original article by NenPower, If reposted, please credit the source: https://nenpower.com/blog/how-to-connect-a-self-priming-pump-to-a-solar-pipe/
