1. To connect a broken solar camping light, several steps must be followed: 2. First, identify the damage by examining the unit for physical defects, loose connections, or burnt components. 3. Next, repair or replace the components, such as the solar panel or LED light. 4. Finally, reassemble the light, ensuring all parts are securely fastened and test the device to confirm functionality.
UNDERSTANDING SOLAR CAMPING LIGHTS
Solar camping lights are an essential component for outdoor enthusiasts. They provide illumination without relying on traditional power sources, making them environmentally friendly. Solar lights harness the energy from the sun during the day, converting it into electricity to power LED bulbs at night. However, like all electronic devices, they can experience malfunctions that necessitate repair. Understanding what contributes to their functionality and identifying common issues can enhance your outdoor experience.
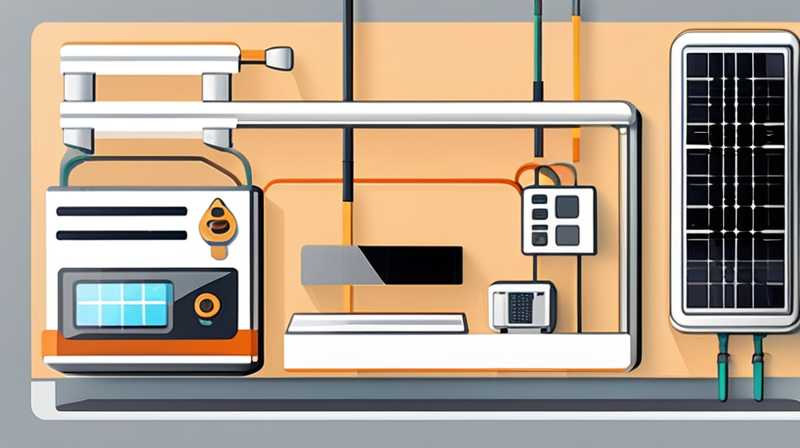
The design of a solar camping light typically includes a solar panel, a rechargeable battery, and LED bulbs. The solar panel collects sunlight and converts it into electrical energy, which gets stored in the battery. When evening arrives, this stored energy powers the LED lights. A malfunction at any stage of this process can lead to the failure of the entire system. Therefore, proper knowledge about these elements is crucial for anyone looking to troubleshoot a damaged light.
IDENTIFICATION OF COMMON ISSUES
Various problems can lead to the dysfunctionality of solar camping lights. Identifying these issues is the first step toward successful repair. Frequent problems include damage to the solar panel, issues with the battery, or defective LED lights. Each of these components plays a vital role and understanding their functionalities helps in diagnosing issues.
Solar panels can become dirty or damaged due to extreme weather conditions, significantly reducing their efficiency in converting sunlight into energy. Physical damage may include cracks or breaks in the glass surface, while dirt can obstruct light from reaching the cells. Both scenarios can lead to inadequate charging during the day, resulting in insufficient energy to power the lights at night.
Equally important is the battery, which stores electricity for later use. Over time, rechargeable batteries can degrade, leading to a diminished capacity to hold charge. Additionally, excessive exposure to unfavorable weather may also contribute to battery failure—prompting the need for a replacement. Here, recognizing the type of battery used in the camping light is crucial; understanding whether it is lithium-ion or lead-acid can help inform repair decisions.
TOOLS REQUIRED FOR REPAIR
Successful repairs to solar camping lights usually involve various tools. The specific equipment needed may differ depending on the extent of the damage. However, some essential tools typically include screwdrivers, multimeters, replacement batteries, soldering equipment, and cleaning materials. These items facilitate various tasks such as disassembly, electrical testing, and component replacement.
A multimeter is particularly useful in diagnosing electrical issues. It measures voltage, current, and resistance, allowing individuals to ascertain whether the solar panel, battery, or LEDs are functioning within expected parameters. For instance, by testing the voltage output of the solar panel, one can determine if it is effectively converting sunlight into electricity.
Additionally, cleaning materials like a soft cloth can be employed to wash the solar panel, ensuring that dirt and debris do not hinder its performance. If any connections or solder points appear compromised, soldering equipment can help secure them back in place. Having these tools available makes the repair process more efficient and effective.
REPAIRING THE SOLAR PANEL
If the solar panel is found to be defective, meticulous attention should be applied to its repair. In situations where dirt and grime have accumulated, cleaning the glass surface thoroughly can often restore functionality. Use a mixture of water and mild detergent for optimal results. Ensure that the panel is dry before reassembling the camping light.
However, if physical damage exists, replacement may be necessary. Carefully evaluate the solar panel’s specifications, including its voltage and dimensions, ensuring compatibility with your specific camping light model. Removing the damaged panel can involve unscrewing or unclipping it from the casing, taking care not to harm other components in the process.
Once removed, secure the new panel in place, making sure it fits snugly within the allocated space. Test it by connecting the wiring according to the manufacturer’s guidelines before fully assembling the unit. Completing this step allows the solar light to efficiently collect sunlight for energizing the batteries.
ADDRESSING BATTERY ISSUES
If the battery appears to be the main culprit behind the failure, handling the situation delicately is necessary. Start by determining if the battery holds a charge using a multimeter. If the readings indicate that it has lost its ability to retain energy, replacing it is essential. When selecting a new battery, refer to the camping light’s specifications to select the appropriate type.
While replacing the battery, ensure that all safety guidelines are followed. Verify that the camping light’s power is disconnected to prevent any electrical shocks. Remove the old battery gently, taking care to observe how it is connected in terms of terminals. Then, insert the new battery in the same orientation as the old one, ensuring the connections are secure and appropriately aligned to avoid creating shorts.
In scenarios where the battery is operational but not charging, consider checking for obstructions in the solar panel or any corroded connections. Regular maintenance, including cleaning contacts and checking connections, can prolong the battery’s life.
FIXING LED LIGHTS
LED lights can occasionally fail due to manufacturing defects, damage from impacts, or excessive heat. If the LED bulbs are not lighting up even when the solar panel is charging correctly, testing their connection should be the next step. This may involve applying a multimeter to ascertain whether power is reaching the LEDs. If voltage levels are present but the lamps do not illuminate, they may need replacement.
Replacing LED bulbs involves removing the defective components cautiously. Typically, they are soldered onto a circuit board, so having soldering equipment ready is crucial. After desoldering the faulty LED, substitute it with a new, compatible component. Make sure to follow proper soldering techniques to ensure secure connections.
In situations where multiple LED lights are part of a fixture and one is defective, consider replacing all of them for uniformity and reliability. This practice may prevent further breakdowns and support the long-term functionality of the camping light.
REASSEMBLY AND TEST
After addressing the key issues concerning the solar panel, battery, and LED lights, it’s time to reassemble the solar camping light. Ensuring that all parts are correctly positioned and secured is imperative to the overall performance of the fixture. Carefully place components back into their respective slots, making sure there are no leftover parts that could lead to mechanical issues.
Tighten screws and ensure that all clips are secure, paying close attention to the casing where the solar panel is housed. It should maintain a weatherproof seal to protect internal components from moisture and dirt when used outdoors. Make sure that wires are not pinched or overly stretched during this reassembly phase, as damage here can lead to future electrical failures.
Once fully assembled, proceed to test the solar light by placing it in an area with adequate sunlight for several hours. After exposure, switch it on to observe whether it illuminates effectively during the night. Performing this final check ensures that the repairs were successful and the camping light is now ready for use.
MAINTENANCE TIPS FOR SOLAR CAMPING LIGHTS
To extend the lifespan of solar camping lights, adopting regular maintenance practices is beneficial. Periodically cleaning the solar panel helps maximize sunlight absorption, improving the charging efficiency of the battery. Ideally, this cleaning should take place every few months, especially if the lights are frequently used in dusty or dirty environments.
Furthermore, regularly inspecting the battery for corrosion or damage can assist in early detection of potential issues. Replacing faulty components promptly minimizes the risk of more significant problems developing in the future.
Additionally, storing the camping lights properly during off-seasons is crucial. Keeping them in a cool, dry place safeguards against extreme weather conditions and ensures the internal components remain functional. By incorporating these maintenance practices, the durability and efficiency of solar camping lights can be significantly enhanced.
FREQUENTLY ASKED QUESTIONS
WHAT IS THE AVERAGE LIFESPAN OF A SOLAR CAMPING LIGHT?
The average lifespan of a solar camping light typically ranges from 3 to 5 years, influenced by various factors such as LED quality, battery type, and exposure to environmental conditions. LED bulbs are renowned for their longevity, often outlasting traditional bulb types by several times. Therefore, with proper maintenance and usage, many solar lights can continue to operate efficiently even after their expected lifespan.
Batteries, especially rechargeable varieties, are subject to wear and tear, often requiring replacements within this timeframe. Additionally, harsh weather elements—extreme heat, moisture, and dust—can contribute to decreased performance and longevity. Therefore, ensuring these lights are maintained and stored correctly can positively impact their lifespan. Overall, thoughtful care will help to maximize both performance and durability of solar lights.
CAN I USE SOLAR CAMPING LIGHTS IN WINTER CONDITIONS?
Yes, solar camping lights can be used in winter conditions, but some considerations should be taken into account. Solar lights rely on sunlight to charge their batteries, and in winter months, days are shorter, and sunlight may be less accessible due to cloud cover or snow. As a result, their performance might be limited compared to warmer seasons. Ensuring the devices receive sufficient sunlight exposure is crucial for continued functionality.
In snowy environments, accumulation on the solar panels can obstruct light absorption. Frequently clearing snow off the panels ensures optimal charging. Additionally, it is wise to verify the durability of your solar camping lights in extreme cold as certain components, particularly batteries, may have limitations at low temperatures. Selecting high-quality solar lights with winter resilience will yield better performance in such conditions.
HOW CAN I IMPROVE THE BRIGHTNESS OF MY SOLAR CAMPING LIGHT?
Improving the brightness of solar camping lights can be achieved through several methods. One effective way is to upgrade the quality of the LED bulbs used. Opting for higher lumens or more efficient LED lights can significantly enhance illumination levels. Furthermore, ensuring that the solar panel is clean and receives ample sunlight during the day positively impacts the brightness, as it improves battery charging efficiency.
Another approach is to check if the battery is functioning correctly and holding its charge. Replacing an old or degraded battery with a newer model can enhance performance, thereby allowing the lights to shine brighter during the night. Additionally, positioning solar lights strategically to maximize exposure to sunlight and prevent obstructions can facilitate brighter output.
SOLAR CAMPING LIGHT CONNECTION REVISITED
Repairing a broken solar camping light necessitates meticulous attention to detail. Utilizing the right tools, identifying component failure, and ensuring proper maintenance all contribute to enhancing its functionality. By addressing issues concerning the solar panel, battery, and LED lights, outdoor enthusiasts can effectively restore their lighting solutions with relative ease. A proactive approach to maintenance, along with thorough troubleshooting, allows for prolonged use and efficiency of these essential outdoor gear. By integrating sustainable practices through fixed solar camping lights, individuals not only benefit personally but also support environmental conservation efforts. Therefore, taking the time to care for these devices establishes a solution for reliable lighting during camping trips, ensuring safety and enjoyment in outdoor adventures.
Original article by NenPower, If reposted, please credit the source: https://nenpower.com/blog/how-to-connect-a-broken-solar-camping-light/


