
1. To successfully connect 4 wires of solar light, follow these essential steps: 1. Identify wire types, 2. Understand the connection scheme, 3. Use appropriate tools, 4. Ensure weather resistance. Each connection requires careful adherence to color coding and wire purpose. For example, typically, one wire is for the positive charge from the solar panel, while another is for the negative connection. It is imperative to connect these wires correctly to ensure functional performance and safety. When dealing with outdoor installations, selecting tools like waterproof connectors becomes crucial for durability and reliability.
UNDERSTANDING SOLAR LIGHT WIRING SCHEMES
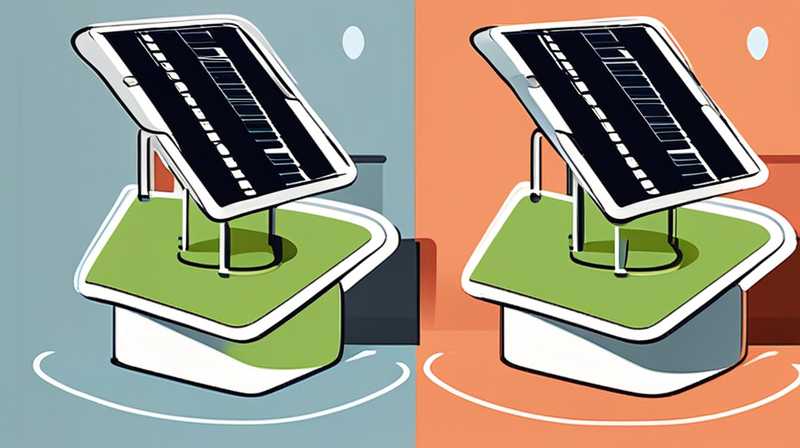
Before diving into the practical aspects of connecting wires, one must grasp the underlying principles of solar light systems. Solar lights generally function through a series of components, including solar panels, batteries, LED lights, and control circuits. Knowledge of how each component interacts is vital for successful installation. Solar panels convert sunlight into direct current (DC) electricity, which is then stored in rechargeable batteries. This process enables solar lights to function autonomously during dark hours.
Color coding serves as a universal standard for wire identification in solar lighting systems. Typically, one will encounter black, red, and sometimes green or yellow wires. The red wire often signifies the positive terminal, while the black wire signifies the negative terminal. Understanding these colors is crucial, as the incorrect connections can lead to system failures or even hazards such as short circuits.
GATHERING THE NECESSARY TOOLS
An essential aspect of connecting wires involves utilizing the appropriate tools. While the actual wiring might seem simple at first glance, having the right equipment ensures a smoother process and enhances safety protocols. Some standard tools required include wire strippers, crimping pliers, electrical tape, and waterproof connectors. Each of these tools serves a specific purpose in the installation task.
Wire strippers facilitate the removal of insulation around the wires without damaging the copper strands inside. Properly exposed wires are critical for secure and effective connections. Crimping pliers further assist in affixing connectors to the wire ends, ensuring a solid bond. Electrical tape serves a crucial role in insulating connections once they are made, preventing moisture penetration and subsequent corrosion.
PROPER CONNECTION METHODS
When establishing connections among the four wires, comprehension of the specific configuration becomes essential. Typically, there will be a positive and negative wire coming from both the solar panel and the battery. The objective is to connect the positive wires and the negative wires correspondingly. For example, the positive of the solar panel must link to the positive of the battery. The same applies to the negative connections.
During this phase, careful evaluation of the connected wires is paramount. Double-checking the connections can preempt potential issues, including reverse polarity problems. Proper soldering techniques or crimping can secure a long-lasting connection. After establishing connections, test the circuits before finalizing any installations. Testing ensures that both the solar panel and battery are functioning correctly and that the output is adequate for the lights.
ENSURING WEATHER RESISTANCE AND DURABILITY
Weatherproofing the connections is crucial for outdoor installations, especially since solar lights are typically exposed to various environmental elements including rain, snow, and extreme temperatures. The use of waterproof connectors can significantly increase the longevity of the installation. These connectors are designed to prevent moisture ingress, thereby avoiding potential electrical failures.
Additionally, it is advisable to take protective measures regarding wire placement. Using conduits or protective casings can shield wires from damage due to wildlife, sharp objects, or harsh weather conditions. Choosing high-quality materials enhances durability and helps avoid unnecessary maintenance issues in the future.
TROUBLESHOOTING COMMON CONNECTION ISSUES
Despite thorough preparations and careful execution, issues may arise post-installation. Understanding common pitfalls is vital for effective troubleshooting. One prevalent issue is the failure of solar lights to illuminate at night, often caused by improper connections. Ensuring that connections are securely made and verifying polarity can help remedy this issue.
Moreover, if the lights flicker intermittently or do not respond as expected, examining battery charge levels is advisable. A drained battery may hinder functionality even with correct wiring. Additionally, review the connections for corrosion, especially in regions with high humidity or flooding, as moisture can compromise electrical integrity.
MAINTAINING SOLAR LIGHT SYSTEMS
To maximize the lifespan of solar lighting systems, regular maintenance becomes necessary. Periodically inspecting connections, cleaning solar panels, and examining batteries are essential tasks that ensure optimal performance. Cleaning solar panels prevents dirt and debris from obstructing sunlight, which is imperative for effective energy absorption. Likewise, checking for frayed wires or corrosion will allow for timely repairs.
Establishing a maintenance schedule can simplify these tasks, ensuring that solar lights function effectively throughout their lifespan. Conducting these checks bi-annually can prevent minor issues from escalating into major malfunctions.
FREQUENTLY ASKED QUESTIONS
WHAT TYPES OF WIRE ARE COMMONLY USED IN SOLAR LIGHTS?
Wiring in solar lighting systems can significantly vary based on the model and manufacturer, but a few types are commonly used. Typically, stranded copper wire is favored, as it offers excellent conductivity and flexibility, making installations easier. For specific applications, such as underground or difficult-to-access areas, thicker gauge wires like 14 or 16 AWG may be utilized to reduce voltage drop over distance. Furthermore, some installations may also use multi-stranded wire for enhanced flexibility, particularly in portable or adjustable lighting systems. It’s crucial to refer to the manufacturer’s specifications to select wires that meet both power requirements and environmental conditions.
Another critical consideration in choosing the right wire type involves insulation. Weather-resistant insulation is paramount, particularly for outdoor applications where exposure to moisture can lead to corrosion or short circuits. UV-resistant materials help prolong the lifespan of wires under direct sunlight, ensuring that the solar lighting systems remain functional throughout varying environmental conditions. Therefore, understanding wire types and their properties is vital for successful solar light installations.
HOW LONG DOES THE BATTERY USUALLY LAST IN SOLAR LIGHTS?
The longevity of batteries utilized for solar lights is contingent upon several factors, including the type of battery, environmental conditions, and usage patterns. Typical solar lights utilize either nickel-metal hydride (NiMH) or lithium-ion batteries, both of which offer distinct advantages. NiMH batteries generally have a lifespan of approximately 2 to 5 years, depending on usage and charging cycles. They are known for good performance but may lose capacity over time, especially with frequent deep discharges.
On the other hand, lithium-ion batteries generally boast a longer lifespan, often ranging from 5 to 15 years, thanks to their ability to retain charge and resist memory effects. However, factors such as temperature fluctuations, harsh weather, and frequent overcharging can adversely affect battery life. Additionally, solar panels’ efficiency in charging also plays a pivotal role in a battery’s longevity. To maximize battery lifespan, opt for high-quality batteries and perform regular maintenance checks on both the batteries and solar panels.
CAN I USE REGULAR ELECTRICAL WIRE FOR SOLAR LIGHT CONNECTIONS?
Using standard electrical wire for connecting solar lights is generally not advisable. While it may seem convenient, regular wiring may not possess necessary weatherproofing or insulation quality to handle outdoor conditions. Solar lighting systems demand wiring that is UV-resistant and designed to withstand moisture exposure, as failure to do so can lead to safety hazards, including short circuits or fires.
Moreover, regular electrical wires may also differ in gauge, which is crucial for maintaining the required voltage over a distance. Utilizing wires unsuitable for solar applications might lead to performance issues, such as inadequate charging of batteries or insufficient power supply. Therefore, relying on wires specifically designed for solar applications is highly recommended in ensuring proper functionality and safety.
When connecting four wires of solar light systems, meticulous attention to detail and adherence to recommended guidelines is imperative. Understanding the essential aspects from identification of wires to selection of tools creates a robust foundation for successful installations. The installation process entails a safe and systematic approach, involving proper connection methods and weatherproofing measures to ensure longevity and performance. Solutions for troubleshooting potential electrical issues and conducting regular maintenance checks further enhance the operational efficiency of solar lights. Notably, an in-depth comprehension of the specific requirements for wiring and battery maintenance fosters a successful solar lighting system. Ultimately, a commitment to quality, functionality, and safety will lead to effective implementations of solar lighting systems that are sustainable and resilient in the face of environmental challenges.
Original article by NenPower, If reposted, please credit the source: https://nenpower.com/blog/how-to-connect-4-wires-of-solar-light/
