
To successfully assemble solar panel lights, it’s essential to follow several key steps. 1. Gather all necessary components, including the solar panel, LED lights, battery, and wiring. 2. Identify the optimal location for installation, ensuring exposure to sunlight. 3. Connect the solar panel to the battery, followed by linking the LED lights. 4. Secure all parts responsibly to prevent damage and ensure longevity. The most complex task often involves the electrical connections, where careful attention is required to avoid short circuits or connection failures.
1. GATHERING THE COMPONENTS
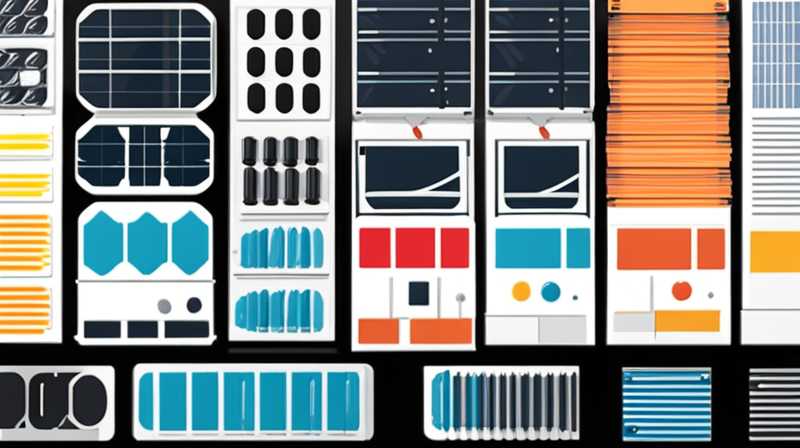
When embarking on the assembly of solar panel lights, the first task involves collecting all essential parts. The primary components include solar panels, rechargeable batteries (usually lithium or nickel-metal hydride), LED bulbs, wiring harnesses, and sometimes a control circuit to regulate the power flow. Depending on the type and model of solar light being assembled, these components may vary slightly.
Each component plays a crucial role in the overall functionality of the lighting system. The solar panel converts sunlight into electricity, the battery stores this energy for use during non-sunny hours like nighttime, and the LED lights provide the illumination. In some advanced systems, a control circuit may be included to manage the charge cycles and ensure efficient power usage. Understanding the purpose of each component can aid significantly in the assembly process.
2. LOCATING THE IDEAL INSTALLATION SITE
Successful installation significantly hinges on selecting the right location. Ideally, the solar panel should be positioned in a spot where it can receive maximum sunlight exposure throughout the day. Areas that are shaded by trees, buildings, or overhead structures should be avoided, as they can diminish the efficiency of the solar panel’s energy collection capabilities.
Another factor to consider is the angle at which the solar panel is installed. Positioning the panel at the correct angle can greatly enhance its performance. In most cases, tilting the panel to face south (in the Northern Hemisphere) or north (in the Southern Hemisphere) usually maximizes sunlight capture. Moreover, ensuring that the solar panel is not obstructed at different times of the year by obstacles that may block sunlight—such as trees with seasonal foliage—is imperative for consistent performance.
3. CONNECTING THE COMPONENTS
Following the selection of the installation site, the subsequent step involves the actual assembly of components. The first connection typically made is between the solar panel and the rechargeable battery. These two elements usually come with wiring harnesses that facilitate easy consolidation. It’s essential to ensure that the positive terminal of the solar panel is connected to the positive terminal of the battery and the same for the negative sides. Often, connectors are color-coded to aid in the correct arrangement.
After establishing this connection, the next task is to wire the LED lights to the battery. It’s vital to ensure the LEDs are rated for the voltage supplied by the battery to prevent any potential damage. The connecting wires should be securely fastened to minimize the risk of disconnection over time. Depending on the configuration, additional elements may be included, such as a motion sensor, timer, or other control circuitry, to enrich the functionality of the lights.
4. SECURING AND TESTING THE ASSEMBLY
The final step in the assembly progression pertains to securing and testing the complete setup. Properly anchoring all components is crucial. Solar panels should be mounted using brackets to keep them stable against winds and other environmental factors. Similarly, the LED lights may need to be attached to fixtures that can withstand external conditions.
After securely assembling everything, conducting a test run becomes essential. Activation of the solar panel lights at nighttime will help verify the effectiveness of the assembly. If functioning correctly, the lights should illuminate once it gets dark outside. Should any discrepancies arise, retracing steps to check connections and component functionality is advisable to ensure that each part is working harmoniously.
5. MAINTAINING YOUR SOLAR PANEL LIGHTS
Maintenance is a critical aspect that should not be overlooked. Regular cleaning of the solar panels will be required to ensure that dirt, dust, and debris do not obstruct sunlight. This can simply be done with a damp cloth or sponge. Regular checking of the batteries and LED bulbs also forms part of maintenance, where one must ensure these components remain functional to keep the system running smoothly.
Additionally, it’s beneficial to periodically assess the performance of the installed lights over time. If there are any noticeable drops in brightness, or if the lights do not function as expected, revisiting the connections and functionality of the battery and LED lights will provide insights into any potential issues. Such diligence prolongs the lifespan of the assembly and ensures optimal functionality.
COMMONLY ASKED QUESTIONS
WHAT TYPE OF SOLAR PANEL IS BEST FOR LIGHTING?
The ideal solar panel for lighting applications typically falls within the range of monocrystalline or polycrystalline panels. Monocrystalline panels are well-known for their high efficiency and space-saving characteristics, making them suitable for smaller applications like garden lights, while polycrystalline panels are generally more affordable and can also produce adequate energy for outdoor lighting systems in broader settings. It’s essential to consider the wattage requirements of the LED lights when selecting the appropriate solar panels.
The wattage of the solar panels should align with the consumption rate of the LED fixtures to ensure that the system can be fully charged. For instance, if an LED bulb consumes 5 watts, the solar panel should ideally have a higher wattage than 5 watts. Ultimately, the choice depends on specific lighting needs, available space for installation, and budget constraints, all of which are worthwhile considerations before making a purchase.
HOW LONG DOES IT TAKE TO CHARGE SOLAR LIGHTS?
The charging duration for solar lights primarily depends on several factors including the size of the solar panel, the intensity of sunlight, and the initial charge level of the battery. Typically, under good sunlight conditions, a solar panel can fully charge a battery in 6 to 8 hours. However, if cloud cover or bad weather conditions persist, it may take longer.
Furthermore, the battery type also influences the charging time. For example, lithium-ion batteries generally have shorter charging times compared to traditional nickel-metal hydride batteries. It’s crucial for users to be mindful of varied environmental conditions and to allow adequate charging time to ensure that lights can function optimally through the night and into the following day.
CAN SOLAR LIGHTS WORK DURING WINTER OR CLOUDY WEATHER?
While solar lights are designed to harness sunlight during all seasons, their efficiency may be reduced during winter months or overcast conditions. The angle of sunlight is less direct during the winter, leading to a decrease in solar energy absorption. However, many modern solar lights are equipped with higher efficiency panels that can still generate sufficient energy even when sunlight intensity is lower.
It’s essential that users adapt the setup of their solar lights to optimize exposure during these periods. For example, clearing snow off solar panels and positioning them to capture direct sunlight as much as possible can enhance their performance. In summary, they remain a viable option year-round, but users should anticipate reduced illumination during prolonged winter or cloudy spells.
The process of assembling solar panel lights encapsulates a series of deliberate and systematic actions aimed at achieving efficient illumination powered by renewable energy. Ensuring that all components are collected beforehand contributes to a smoother assembly experience. Choosing an ideal installation site where the solar panel can absorb adequate sunlight is imperative for optimizing energy collection.
Subsequently, establishing the correct connections between the solar panel, battery, and LED lights forms the basis for a functional setup. Finally, securing all components and ensuring they undergo regular maintenance bolsters the system’s longevity and effectiveness. Users are encouraged to engage regularly with their solar lighting systems, troubleshooting, cleaning, and assessing performance to reap maximum benefit from this sustainable energy alternative. By adhering to these practices, individuals can not only enjoy reliable lighting but also contribute to a more sustainable future through the use of renewable energy sources.
Original article by NenPower, If reposted, please credit the source: https://nenpower.com/blog/how-to-assemble-solar-panel-lights/
