To assemble a solar light bulb effectively, follow these key steps: 1. Gather necessary materials, 2. Understand the components, 3. Connect the wiring properly, 4. Test the assembly. Assembling a solar light bulb requires comprehension of various components, including the solar panel, light-emitting diode (LED), and rechargeable battery. Firstly, ensure you have all the required tools and materials at hand such as a soldering iron, wires, and the bulb casing. A detailed understanding of how each component interacts within the assembly is vital for a successful build. When connecting parts, adhere strictly to polarity and established connections to avoid faults. Finally, testing the completed assembly before use will ensure everything functions correctly and efficiently.
1. GATHERING NECESSARY MATERIALS
To initiate the assembly of a solar light bulb, the first step involves gathering all essential materials. This includes the solar panel, which is crucial for converting sunlight into electrical energy, a rechargeable battery to store this energy, an LED to provide illumination, and switches to control the lighting. Furthermore, other necessary tools such as a soldering iron, solder wire, wires of various lengths, a multimeter for testing connections, and a housing unit for the light bulb will also be required.
Choosing quality components is imperative, ensuring longevity and efficiency in the functioning of the assembled bulb. For instance, selecting a solar panel that offers a higher wattage will significantly enhance energy collection, while opting for an efficient LED can maximize brightness and minimize energy consumption. Furthermore, the type of rechargeable battery used plays a significant role in how effectively power is stored and utilized. A deep-cycle battery often provides better performance compared to standard batteries, thereby allowing longer usage between charges. Understanding the specifications of each component is essential to ensure compatibility and optimal performance.
2. UNDERSTANDING THE COMPONENTS
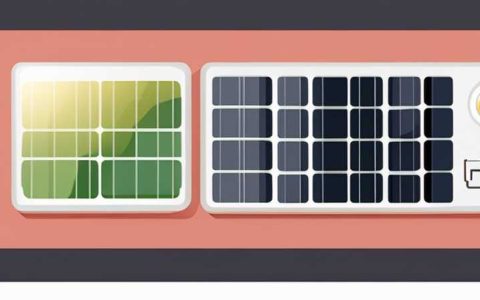
A thorough understanding of each component is essential in assembling a solar light bulb. Solar panels primarily consist of photovoltaic cells that absorb sunlight and convert it into electrical energy. These cells typically come as monocrystalline or polycrystalline types, each with its own benefits and efficiency levels. Monocrystalline solar panels may be more efficient and space-saving, however, polycrystalline panels generally have a lower price point but may take up more space for a similar output.
The rechargeable battery serves as the storage unit for the energy collected from the solar panel. Lithium-ion batteries are often preferred due to their longevity and ability to discharge slowly, ensuring a longer lifespan and consistent performance. Understanding the required voltage and amp-hour rating of the battery is crucial for proper functioning. The LED bulb, which is responsible for producing light, offers a variety of options in terms of color temperature and brightness, allowing for customization based on personal preference or specific usage requirements.
3. CONNECTING THE WIRING PROPERLY
Once all necessary materials and components are prepared, the next critical phase involves connecting the wiring with precision. Each component must be connected in a way that allows for smooth flow of electricity while ensuring safety protocols are adhered to. Start by connecting the solar panel to the rechargeable battery, usually involving positive to positive and negative to negative connections. Ensuring these connections are secure is essential; this often requires soldering.
Warm the soldering iron adequately and apply solder to the wires, securing them firmly to the terminals. It is imperative to ensure that connections are not loose, as this can lead to energy loss and inefficient operation. After the connections between the solar panel and the battery are established, the next task is to connect the LED. Wiring should follow the same polarity principles, connecting the positive lead from the battery to the positive lead of the LED and the negative to the negative. After all wiring is completed, utilize a multimeter to verify that all connections are made properly and that the electric flow is as intended.
4. TESTING THE ASSEMBLY
The final phase of assembling a solar light bulb entails testing the assembly to ensure functionality. Prior to any full-scale usage, take a moment to assess the entire system. Begin by placing the solar panel in direct sunlight to charge the battery. Monitoring the charging time can provide insight into the efficiency of the solar panel and the capability of the battery to absorb and store energy. After allowing adequate time for charging, the next step is to activate the light.
This can usually be done through a simple switch connected to your LED. Observe the brightness of the LED and ensure there are no flickers or inconsistencies in the light output. If issues occur, reevaluating the connections and component compatibility is essential. Furthermore, it’s advisable to conduct additional tests under various lighting conditions to ensure the solar light bulb performs optimally upon transitioning to real-world use. Thorough testing will also help identify any potential faults early on, saving time and resources in future endeavors.
FREQUENTLY ASKED QUESTIONS
WHAT TYPE OF SOLAR PANEL IS BEST FOR A LIGHT BULB?
Selecting the ideal solar panel for a light bulb depends on several factors. Monocrystalline solar panels are often regarded as the most efficient option due to their high energy conversion rate, allowing them to produce more energy per square foot. This makes them particularly suitable for areas with limited sunlight exposure. On the other hand, polycrystalline solar panels are typically less expensive and may work better for larger installations where space is not as limited. Each type has its own pros and cons, and the choice should align with the intended application, budget constraints, and available installation space.
Besides efficiency, compatibility with the rechargeable battery and LED bulb must be considered. Panels should provide sufficient voltage to charge the battery effectively. It’s also crucial to evaluate the environmental conditions where the bulbs will be used. For instance, areas with frequent cloudy days may benefit more from higher-quality panels, while sunnier regions can optimize performance with more cost-effective options. Ensuring that all components work harmoniously will yield a well-functioning solar light system.
HOW LONG DOES A SOLAR LIGHT BULB LAST?
The lifespan of a solar light bulb can be influenced by several factors including the quality of components used, environmental conditions, and maintenance practices. High-quality components will generally enhance the longevity of the assembly. For instance, LED bulbs can last anywhere from 25,000 to 50,000 hours, significantly outlasting traditional incandescent bulbs. Conversely, the rechargeable battery, which is critical for storing energy, typically lasts between 2 to 5 years depending on usage frequency and charging cycles.
Additionally, environmental factors play a role; harsh weather conditions such as extreme temperatures, high humidity, or direct exposure to moisture can impact the overall lifespan adversely. To maximize longevity, it is advisable to regularly check connections, replace batteries when necessary, and ensure proper charging conditions. Cleaning the solar panel periodically to remove dirt and debris will also contribute to maintaining efficiency and extending operational life.
CAN SOLAR LIGHT BULBS WORK DURING CLOUDY WEATHER?
Solar light bulbs can operate during cloudy weather, albeit with reduced efficiency. Solar panels are designed to capture diffuse sunlight, which still reaches the Earth on overcast days. However, energy generation diminishes under cloudy conditions, resulting in shorter operation times. It is important to note that as long as there is any level of sunlight, solar panels will still generate some power and charge their batteries, though significantly less than on clear days.
The degree to which a solar light bulb can function during cloudy weather ultimately depends on several factors, including the panel’s efficiency, the size of the battery, and the design of the light system. For locations frequently subjected to cloudy weather, investing in higher quality or larger capacity solar panels may be beneficial. Additionally, using energy-efficient LEDs will maximize the available power, allowing for longer illumination periods even when solar energy collection is compromised.
Assembling a solar light bulb encompasses a systematic approach involving various crucial steps. The effectiveness of this assembly hinges not solely on technical skill but also on comprehension regarding component specifications, proper connections, and practical testing. Beyond the assembly, ongoing maintenance, periodic checks of individual components, and environmental consideration play a vital role in ensuring longevity and optimal performance. Education and awareness about solar technology are integral as individuals increasingly transition to renewable energy solutions. Empowering oneself with knowledge regarding component choices, assembly tactics, and usage practices fosters a sustainable mindset that ultimately reaps environmental benefits while encouraging innovation in personal projects. The journey of assembling solar-powered solutions advocates for eco-friendliness while instilling satisfaction from mastering a unique expertise.
Original article by NenPower, If reposted, please credit the source: https://nenpower.com/blog/how-to-assemble-a-solar-light-bulb-tutorial/


