
To effectively replace solar panel wires, 1. Gather necessary tools, 2. Disconnect the system safely, 3. Remove the old wires, 4. Install new wires, 5. Test functionality. Each step must be executed with care to ensure safety and efficiency.
1. INTRODUCTION TO SOLAR PANEL WIRE REPLACEMENT
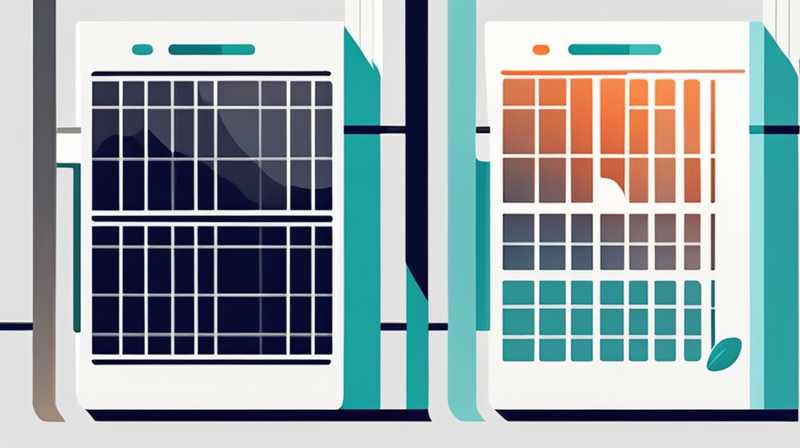
Handling solar panel wiring involves meticulous attention to detail and a deep understanding of electrical systems. Over time, wires connecting solar panels to the inverter or battery can degrade due to environmental factors or physical wear and tear. Such deterioration can lead to inefficiencies, reduced power generation, and safety hazards.
In most cases, a malfunctioning solar system will exhibit clear symptoms, such as diminished performance or error codes on the inverter. Essentially, wires that carry the direct current (DC) from solar panels to an inverter must remain in optimal condition for the overall system to function effectively. Understanding what is necessary for wire replacement can spare homeowners from potential issues down the line.
2. IMPORTANCE OF PROPER TOOLS AND SAFETY PRECAUTIONS
Prior to initiating the replacement process, it is imperative to assemble all required tools. The tools for replacing solar panel wires generally include wire cutters, wire strippers, crimping tools, and insulated gloves. Additionally, safety goggles are essential to protect the eyes from accidental splashes of debris during work.
Safety precautions cannot be overstated. Working with electrical systems entails a risk of electrocution or short-circuiting. First and foremost, it is essential to disconnect the solar power system from its energy source. This action not only protects the individual performing the task but also safeguards equipment from potential damage. Adequately preparing the workspace contributes significantly to ensuring a secure environment.
3. DISCONNECTING THE SOLAR SYSTEM
Once the tools are gathered, the initial step to embark on is disconnecting the solar system. Before undertaking this action, it is vital to examine the inverter and associated components to identify specific shutdown procedures. Generally speaking, users should locate the DC disconnect switch and switch it off. Doing so cuts off the solar panels’ output current and ensures an electrified state does not exist.
Taking this step helps prevent unintentional shock. In addition to disabling the inverter, it might be necessary to disconnect batteries, especially if the solar system is grid-tied or utilizes battery storage. Certain systems have multiple disconnects, and each must be handled according to the manufacturer’s guidelines.
4. REMOVING OLD WIRES
After safely disconnecting the solar system, it is time to remove the existing wires. Begin this segment by assessing how wiring was previously installed. In most scenarios, wires are affixed using clips or ties to secure them against environmental factors. These restraints should be removed carefully.
Given wires can be exposed to various outdoor elements, they might appear oxidized or frayed. Inspection of wires during this process can reveal more significant issues beyond simple wire replacement. Damaged connectors or junction boxes may call for additional interventions. As such, it is crucial to document the current wiring configuration before proceeding to replace any components, which will serve as a helpful reference when reinstalling.
5. INSTALLING NEW WIRES
The next crucial part involves installing new wires, which must be appropriately rated for the application. Typically, used solar wiring is recommended to be solar-rated and UV resistant, ensuring longevity and performance. The wires should maintain the appropriate gauge according to both the amperage and distance from the solar panels to the inverter. An undersized wire can lead to overheating, voltage drop, and system inefficiencies.
As the new wires are being installed, meticulous attention to routing them securely is necessary. Ensure the new wires are free from any sharp edges or other hazards. Fastening them appropriately using clips or straps not only helps with aesthetics but also maintains their integrity through various weather conditions. Ensure sound connections at both terminals, as a loose connection can lead to excessive heat build-up, failure, or even fire hazards.
6. TESTING FUNCTIONALITY
After completing the wire installation, rigorous testing to ensure the system functions correctly is essential. With the wires securely in place, reconnection to the inverter can commence. At this stage, it is prudent to refer back to the documentation created earlier, aligning the terminals accurately to avoid any operational issues.
Following reconnection, turn on the inverter. Most inverters feature a built-in diagnostics display that will indicate whether the installation is functioning correctly. Users should carefully note the performance metrics, confirming that both voltage levels and currents remain stable. Regular monitoring during the first few days ensures that any latent issues can be identified early.
7. PREVENTATIVE MEASURES AND MAINTENANCE
Adopting reliable preventative measures can significantly extend the life span of solar panel wires. Regular inspections should be part of any maintenance routine to identify any signs of wear and tear. Keeping all components clean fends off debris accumulation, preventing potential electrical shorts.
Furthermore, it is advisable to periodically test the output of the solar system to ensure optimal performance. This proactive approach allows homeowners to identify issues before they escalate into more serious problems. Access to proper documentation and records of performances can serve as a reference for understanding when to consider replacing solar panel wires again.
FREQUENTLY ASKED QUESTIONS
1. HOW OFTEN SHOULD I REPLACE MY SOLAR PANEL WIRES?
The timeline for replacing solar panel wires will vary based on several variables, including wire quality, installation conditions, and environmental factors. Typical lifespan estimates for good-quality wires range around 25 years. However, frequent inspection is crucial, especially if the system is exposed to harsh conditions such as extreme temperatures or humid environments. Regular maintenance checks can identify problems early and prolong the lifespan of wiring within a solar power system.
2. CAN I REPLACE SOLAR PANEL WIRES MYSELF, OR SHOULD I HIRE A PROFESSIONAL?
While replacing solar panel wires can be a do-it-yourself task, it necessitates a working knowledge of electrical systems and safety precautions. For those who lack experience or confidence, enlisting a certified professional can ensure the replacement is performed correctly and minimizes risks. A licensed technician has the expertise to assess the entire system, providing peace of mind compared to handling the task independently, which may involve unknowingly creating unsafe conditions.
3. WHAT SIGNS INDICATE THAT MY SOLAR PANEL WIRES NEED REPLACEMENT?
Several indications could signify that solar panel wires require replacement. Common signs include visible deterioration like fraying or corrosion, which can reduce efficiency and increase the risk of failure. Moreover, if the inverter is reporting errors or production drops, diminished performance may also be hinted at through other symptoms such as inconsistent output voltage. Spotting these signs early ensures safe and effective intervention before more significant issues develop.
4. CAN POORLY INSTALLED WIRE CONNECTIONS AFFECT SYSTEM PERFORMANCE?
Yes, poorly installed wire connections can dramatically affect overall system performance. Loose connections can lead to increased resistance, resulting in overheating and wattage loss. Additionally, they can lead to arcing, a condition that not only decreases efficiency but also poses an elevated risk of fire. Ensuring well-structured connections provides both safety and maximal energy efficiency.
5. IS IT MANDATORY TO HAVE A CERTIFICATE FOR INSTALLING SOLAR PANEL WIRING?
While regulations may vary by location, many regions do require permits or certification for electrical work, particularly when it involves renewable energy systems. Homeowners should familiarize themselves with local codes. This could include hiring licensed professionals to avoid penalties, ensure compliance, and ultimately safeguard property and inhabitants by properly handling potentially hazardous electrical installations.
FINAL THOUGHTS ON SOLAR PANEL WIRE REPLACEMENT
Engaging in solar panel wire replacement demands attention to detail, safety measures, and a thorough understanding of electrical systems. Gathering appropriate tools and knowledge about how to safely disconnect equipment ensures a successful process. Replacing old or worn wires can greatly enhance overall system performance, facilitating optimal energy generation and efficiency.
Conducting inspections throughout the lifespan of solar wiring helps identify issues needing addressal long before they become problematic. Homeowners can opt for professional assistance to ensure tasks are correctly executed, especially considering regulatory compliance.
Ultimately, a robust solar power system’s reliability hinges not only on panel quality but significantly on proper wiring. A seamless transition from old to new reduces downtime and contributes to the prolonged efficacy of solar installations. By adhering to best practices during the replacement process, homeowners can derive better returns from their solar investments, paving the way for a greener and more secure energy future.
Original article by NenPower, If reposted, please credit the source: https://nenpower.com/blog/how-to-replace-solar-panel-wires/
