
1. To replace solar glass tube silicone, follow these steps: 1) Gather necessary tools, including silicone sealant, a caulking gun, a utility knife, and cleaning supplies. 2) Carefully remove the old silicone using the utility knife, ensuring to avoid damaging the solar tubes. 3) Clean the surface thoroughly to ensure proper adhesion of the new silicone. 4) Apply a new layer of silicone evenly around the edge of the tubes. 5) Smooth the silicone to create a watertight seal.
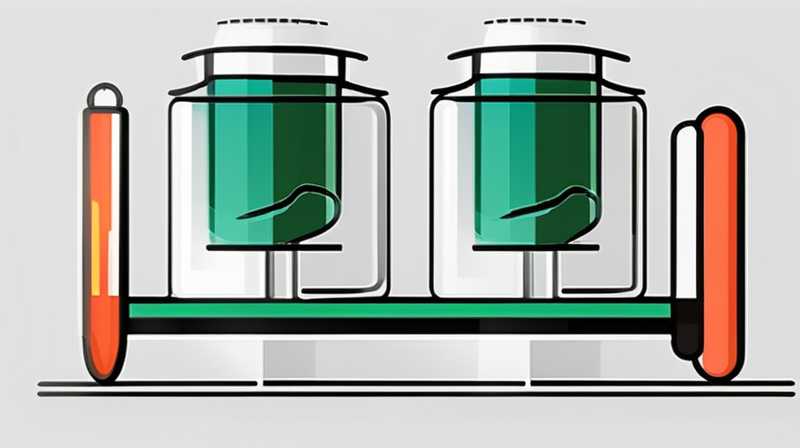
Replacing the silicone around solar glass tubes is essential for maintaining the efficiency and lifespan of solar thermal systems. Old or damaged silicone can lead to leaks, reduced performance, and the potential for moisture damage within the system. Properly sealing these tubes protects the internal components from environmental factors and enhances the overall energy efficiency of solar installations.
1, TOOLS AND MATERIALS NEEDED
Replacing the silicone on solar glass tubes entails specific tools and materials to execute the task effectively and ensure a long-lasting seal. The primary tools required for this task include a utility knife, caulking gun, and some cleaning supplies, such as isopropyl alcohol or a similar solvent.
Utility knives are ideal for scraping away old silicone with precision. They allow users to control the depth and force applied, crucial for preventing damage to the solar glass or underlying structures. A caulking gun is essential for dispensing the new silicone sealant. It provides even application pressure and enhances the ease of use, making the project more efficient.
Moreover, one must select quality silicone sealant specifically designed for outdoor applications and capable of withstanding temperature fluctuations. Silicone designed for solar applications may contain additives that enhance ultraviolet (UV) stability and resistance to mold or mildew, which can significantly improve the longevity of the seal.
Another often-overlooked material is tape that can help create a clean and crisp edge when applying the new silicone. Using painter’s tape to mask areas around the tubes can ensure that the silicone application does not become messy.
In summary, having the right tools and materials at hand is crucial before commencing work on replacing the silicone for solar glass tubes. A well-prepared workspace not only aids efficiency but also increases the final outcome’s professionalism and durability.
2, PREPARATION FOR REPLACEMENT
Preparation significantly influences the quality of the silicone application around solar glass tubes. Proper steps prior to actual sealing can make the entire replacement process smooth and successful.
Firstly, examining the current condition of the silicone sealant is vital. Inspect the existing seal for any signs of wear, degradation, or mold presence. Locate areas where the seal has broken down or is visibly damaged, allowing you to prioritize areas that require immediate attention during replacement. Recognizing these signs helps prevent further issues and ensures effective sealing.
Next, ensure a safe working environment. If the solar installation is on the roof or another high area, it is crucial to set up proper safety equipment such as harnesses or ladders. Clear the workspace from debris, and ensure that all tools are within reach to minimize accidents and enhance efficiency during the process. It is also fundamental to check weather conditions; dry weather is usually optimal for silicone application, as moisture can compromise the seal.
After ensuring your workspace is ready, gather your materials, and familiarize yourself with each tool’s functionality, helping streamline the operational flow. Proper preparation can save time, bolster safety, and result in a more effective outcome when replacing solar glass tube silicone.
3, REMOVAL OF OLD SILICONE
Removing the old silicone is perhaps the most critical part of the replacement process. This step lays the foundation for a strong and effective new seal. The utility knife serves as the primary tool in this phase, as it provides precision cutting to remove the old material without harming the surrounding components.
Begin by carefully cutting along the edges of the old silicone layer. Ensure that the blade is angled correctly to avoid slicing into the solar tube or associated structures. Take your time and apply steady pressure to avoid slippage. As you cut, you may need to pull away old silicone gently. If the seal does not come off easily, reinsert the knife and try a different angle.
Once most of the old silicone is removed, use cleaning supplies like isopropyl alcohol to clean the surface thoroughly. This step is critical; any residue left behind can interfere with the new silicone adhering properly. Take extra care to remove dust, debris, and old adhesive remnants. A microfiber cloth works well for this purpose, given its ability to trap particles effectively without leaving lint behind.
Tackling the removal process efficiently can make a significant difference in achieving a durable and effective new sealing layer around the solar glass tubes.
4, CLEANING AND PREPPING FOR NEW SILICONE
After successfully detaching the old silicone, preparing the surface is paramount. Cleaning the area is essential to ensure the new silicone adheres correctly and forms a watertight seal. Utilize isopropyl alcohol or specialized adhesive removers to erase any lingering residue that could compromise adhesion.
In addition to cleaning, it’s advisable to thoroughly inspect the underlying surfaces for any signs of damage. Check for cracks or corrosion, particularly common in outdoor installations exposed to the elements. Any underlying damage should be repaired before applying new silicone. This ensures that the surface onto which the silicone is applied is sound and secure.
Once the area is cleaned and checked, wait for it to dry completely. Silicone works best on dry surfaces, allowing it to bond effectively. Taking the extra time during the cleaning and preparation phase is indispensable, as this often determines the longevity and quality of the new seal.
5, APPLYING NEW SILICONE SEALANT
When ready, you can confidently proceed to apply the new silicone sealant. Using the caulking gun simplifies this process, allowing for controlled and steady applications along the edges of the tubes. Start at one end of the joint and slowly squeeze the trigger while moving along the length of the seam. This technique creates a consistent bead and reduces the chances of gaps or inconsistencies.
As you apply the silicone, check for air bubbles or irregularities. These can weaken the seal and lead to moisture infiltration. If you notice any imperfections, don’t hesitate to smooth the silicone immediately. A moistened finger or a specialized smoothing tool works well for this purpose. Gently run it along the edge, ensuring the silicone fills all the gaps effectively.
Remember to be generous with the silicone; a thicker layer typically equates to better sealing capabilities. After application, do not disturb the seal for at least 24 hours to ensure it cures completely and effectively. Allowing the silicone to set undisturbed fortifies its adhesion and longevity, ultimately leading to better protection for the solar tubes.
6, FINISHING TOUCHES
Once the new silicone cured fully, take some time to inspect the areas you worked on. Look for any spots that may require additional silicone or smoothing to ensure a consistent, professional finish. Any areas that seem uneven or improperly sealed can be addressed promptly, as it’s far easier to correct issues immediately instead of waiting until after the installation resumes operation.
Moreover, clean any excess silicone that may have inadvertently spread beyond the intended application area. Using a utility knife or even a specialized silicone removal tool can help remove this easily, maintaining the aesthetic appeal of your installation.
After ensuring all finishing touches are complete, clean your tools and workspace. A tidy setup can prevent accidents in the future and enhances the longevity of your tools. Properly storing items such as knives and caulking guns contributes to a safer working environment, mitigating risks on future projects.
In conclusion, implementing these crucial steps when replacing solar glass tube silicone ensures the long-term efficiency and functionality of solar heating systems. Each phase, from preparation to finishing touches, plays a significant role in creating a durable and watertight seal.
FAQs
WHAT TYPE OF SILICONE IS BEST FOR SOLAR TUBES?
Choosing the right silicone sealant for solar tubes is crucial for long-lasting performance. It is advisable to opt for silicone specifically designed for outdoor use, as it typically includes additives that enhance UV resistance, mold resistance, and temperature tolerance. Additionally, check for products labeled as “high-temperature” to ensure they can withstand the thermal fluctuations characteristic of solar energy systems. Products such as RTV silicone are popular choices due to their durability and resistance to degradation when exposed to harsh environmental conditions.
Another essential factor to consider is the application method. Some silicones come in ready-to-use tubes or cartridges designed for caulking guns, making them easier to apply. Researching and selecting silicone compatible with solar tubes can save time and money, preventing the need for repairs in the future.
CAN I USE A GENERAL-PURPOSE SILICONE FOR SOLAR APPLICATIONS?
Utilizing a general-purpose silicone for solar applications is not advisable. While regular silicone may provide short-term sealing, it often lacks the special properties required for solar installations. General-purpose silicones usually do not possess the resistance to UV radiation, moisture, or extreme temperatures that specific solar-grade silicones offer. Consequently, using a low-quality sealant can result in premature degradation, breakdown, or leakage, leading to costly repairs and potential damage to the solar system.
Moreover, using general-purpose silicone can also void warranties or compliance with specific installation standards set by solar equipment manufacturers. Therefore, opting for a specialized silicone designed for solar applications is crucial to ensure optimal performance and longevity of the system.
HOW OFTEN SHOULD I REPLACE SILICONE SEALANTS ON SOLAR TUBES?
The frequency of silicone sealant replacement on solar tubes can vary widely based on several factors. Environmental conditions, such as exposure to extreme weather, ultraviolet (UV) rays, and the overall quality of the original sealant, play critical roles in determining how often replacements are needed. Generally, a well-applied, high-quality silicone seal should last between 3 to 5 years.
To maintain optimal performance, conduct regular inspections of your solar tubes, especially after severe weather events. If you notice any signs of degradation, such as cracking, peeling, or noticeable gaps, it’s vital to make necessary repairs promptly. Keeping a maintenance schedule can help you avoid major issues and ensure the longevity of your solar system.
In summary, replacing silicone on solar glass tubes requires careful preparation, precise execution, and using the right materials. Properly addressing each aspect of the process minimizes the risk of future leaks and problems, greatly enhancing the system’s efficiency and durability.
Original article by NenPower, If reposted, please credit the source: https://nenpower.com/blog/how-to-replace-solar-glass-tube-silicone/
