
To address the leakage of a solar solenoid valve effectively, certain steps and considerations are required. 1. Identify the source of the leak, 2. Check for damage or wear, 3. Replace or repair the valve as needed, 4. Ensure proper installation and sealing. Focusing on the identification aspect is crucial. Often, leakage stems from improper sealing or wear and tear on the components. A careful examination should be performed to pinpoint the exact location of the leak, which could involve visual inspection and the use of pressure testing to gauge integrity. Understanding the necessary repair or replacement options will save time and resources in the long run.
1. UNDERSTANDING THE SOLENOID VALVE IN SOLAR SYSTEMS
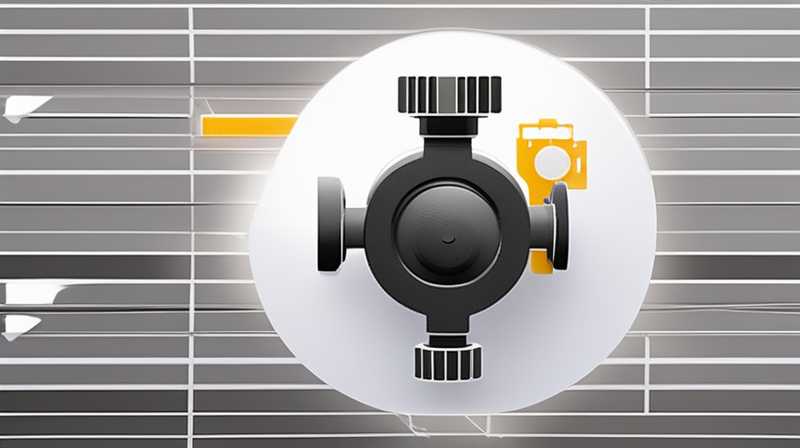
Understanding the role of a solenoid valve within solar systems is paramount for effective maintenance and repair. In solar energy applications, solenoid valves play a critical role in controlling fluid flow, ensuring optimal operation of heating systems. These valves serve as gateways, allowing or stopping the flow of working fluids based on electrical signals. In solar thermal applications, solenoid valves can regulate the movement of heat transfer fluids, which carry heat from the solar collectors to storage tanks.
The design of a solenoid valve consists of two main components: an electromagnetic solenoid and a valve body. When electric current passes through the coil, it creates a magnetic field that moves a plunger within the valve body, opening or closing the passage for the fluid. Understanding this functionality is essential for troubleshooting leakage issues, as any malfunction in the solenoid or valve body can lead to various operational problems. Recognizing how the solenoid interacts with the entire system helps technicians diagnose issues more effectively and makes sourcing suitable replacement parts easier.
2. IDENTIFYING THE LEAKAGE SOURCE
When faced with the challenge of repair, the first objective is to identify the exact source of the leak. Common leakage points include manual connections, joints, and the solenoid valve itself. Conducting a thorough inspection will often reveal whether the leak is due to old seals, incorrect installation, or physical damage to the valve assembly. It is critical to first observe any visible signs of leakage, such as water pooling around the valve, corrosion, or degradation of nearby materials.
In conducting this inspection, using a pressure gauge can provide valuable data. Pressure readings can indicate whether the system is operating within its designed parameters. A significant drop can confirm the presence of a leak. However, experience and keen observation are also vital. Many issues arise from seemingly minor problems, such as loose fittings or worn-out O-rings, which can often be overlooked in more invasive diagnostics. By honing in on these common culprits, repairing can be both efficient and effective.
3. ASSESSING DAMAGE AND WEAR
Once the source is identified, assessing the extent of damage and wear is crucial. Visual inspections can reveal cracks, material fatigue, or corrosion on the valve surfaces. Such deterioration can compromise the valve’s functionality and lead to further failures if left unaddressed. Taking note of these signs allows technicians to decide whether a simple repair will suffice or if replacement is necessary.
Additionally, it is important to evaluate the compatibility of replacement parts with existing valves. Using non-compatible parts can lead to improper sealing, exacerbating the initial problem. Manufacturers often provide part specifications that should be adhered to when sourcing replacements. Proper assessment thus serves as a guide not only for repair but also for ensuring the longevity and efficiency of the entire solar system. Ultimately, thorough evaluation minimizes future repair needs, establishing a robust system that operates optimally.
4. REPAIRING OR REPLACING THE VALVE
Repairing the valve involves a series of steps that require care and precision. After securing all necessary tools and parts, one must isolate the valve by turning off the system and draining any residual fluids. During disassembly, it is essential to document the arrangement of components for accurate reassembly. This kind of care ensures that replacing seals or O-rings can be executed correctly without confusion.
Should the damage be extensive, replacement becomes the preferred option. Replacing a valve usually involves choosing a model that meets the system’s specifications for flow rates and pressure tolerances. It is advisable to cross-check with the manufacturer’s guidelines to ensure optimal performance. Moreover, during installation, the focus should be on ensuring proper sealing and alignment, as misalignment can lead to leaks even in a new component.
Proper reinstallation requires careful attention to torque specifications for threaded components. Over-tightening or under-tightening can both lead to issues in operation. Once installation is complete, restoring fluid circulation and testing the system under pressure can confirm the success of the repair or replacement. Any errant leaks can be addressed immediately through adjustments, ensuring the integrity of the system is maintained.
5. ENSURING INSTALLATION AND SEALING PROTOCOLS
Ensuring that installation and sealing protocols are adhered to is vital in preventing future leaks. Using high-quality sealing compounds and gaskets tailored for solar applications can significantly improve the lifespan of a valve. Standard materials may not withstand the high temperatures or chemical properties of heat transfer fluids used in solar systems. Thus, understanding the specific environment in which the valve operates is critical for selecting suitable materials.
In addition, thorough training on installation techniques is crucial for technicians involved in maintenance. Conducting workshops or certification programs enhances the capabilities of the workforce, leading to better results in the field. A well-informed team can forego many common pitfalls that lead to leakage, resulting in reduced operational downtime. Furthermore, after installation, periodic monitoring and maintenance checks can identify potential issues before they escalate into significant leaks, ultimately safeguarding the entire solar energy system and ensuring long-term efficiency.
6. PREVENTIVE MAINTENANCE STRATEGIES
Preventive maintenance strategies are integral for the longevity of solar solenoid valves. Establishing a regular maintenance schedule can significantly reduce the risk of leaks, ensuring frequent inspections and timely replacements of worn components. For instance, quarterly checks can identify wear and tear on seals and connections.
Incorporating technology for monitoring performance can also yield significant benefits. Using sensors to track pressure and temperature fluctuations allows for real-time evaluations of system integrity. Any anomalies detected can trigger alerts, prompting immediate attention and preventing further deterioration.
Educating users on best practices, such as recognizing unusual sounds or leaks, creates a more proactive approach to maintenance as well. This can help in addressing minor issues before they develop into major failures. By focusing on preventive measures, operators can maintain optimal solenoid valve function, enhancing the overall reliability of solar systems.
FAQs
WHAT CAUSES A SOLENOID VALVE TO LEAK?
A solenoid valve can exhibit leakage for several reasons, including worn seals, damaged components, or misalignments during installation. As the valve ages, the rubber seals or O-rings can degrade due to thermal expansion and contraction, leading to compromised sealing. Additionally, if there is physical damage to the valve components, such as cracks or corrosion, liquid can escape from the valve’s body. Misalignment during installation can create gaps that also allow for leakage, emphasizing the importance of correct installation protocols. Regular maintenance checks can reveal such vulnerabilities before they escalate into significant issues.
HOW DO I KNOW IF MY SOLENOID VALVE NEEDS REPLACEMENT?
Determining the necessity for replacement involves a combination of visual and functional assessments. Signs of deterioration, consistent leakage, or failure to actuate are primary indicators that replacement may be necessary. If a valve frequently leaks despite replacing seals or O-rings, or if it struggles to open or close at the prescribed electrical inputs, these symptoms indicate that internal mechanisms may be compromised. Additionally, if the valve has experienced physical damage or corrosion that alters its operation, moving towards replacement becomes a prudent choice. Regular monitoring and timely assessments can save costs and ensure efficiency before serious issues arise.
CAN I REPAIR A SOLENOID VALVE MYSELF?
While some solenoid valve issues can be addressed through DIY methods, each situation is unique. Complexities of internal components and the necessity for specialized tools mean a thorough understanding of valve mechanics is required. If one possesses the knowledge and equipment, minor repairs such as changing seals or O-rings can often be performed successfully. However, identifying and replacing more integral parts of the valve may necessitate professional intervention, especially if the valve is integrated into a critical system like solar energy. Moreover, ensuring safety protocols are followed is crucial when dealing with pressurized systems. Therefore, assess your skill level and the specific nature of the issue before deciding on self-repair versus professional assistance.
In summary, the task of repairing a leaking solar solenoid valve requires a systematic and professional approach. The journey begins by identifying the root of the leakage, which usually stems from wear and tear or improper installation. After identifying the source, assessing the extent of damage enables you to determine the next steps—whether to repair or replace the solenoid valve. Adhering to installation and sealing protocols can significantly extend the life of the valve, while regular maintenance can help preemptively identify potential issues before they escalate.
Preventive strategies should be a priority to maintain the integrity of the entire solar energy system. Construction materials and techniques must be selected based on compatibility with the fluids involved. Establishing a routine for checks and using modern technology for monitoring can significantly decrease the risk of operational failures. This holistic understanding enables experts and technicians to ensure ongoing efficient operation, minimize leaks, and secure the reliability of solar energy setups for years to come. The careful execution of these steps fosters a robust system capable of delivering uninterrupted sustainable energy.
Original article by NenPower, If reposted, please credit the source: https://nenpower.com/blog/how-to-repair-the-leakage-of-solar-solenoid-valve/
