
1. Creating small solar panels involves several key steps: 1, Selecting the appropriate solar cells, 2, Preparing the materials and equipment, 3, Assembling the solar panel, 4, Testing the panel’s output, 5, Installing the panel efficiently. The core element in crafting miniature solar panels is the choice of solar cells, which should be both efficient and suitable for the intended application. One of the most commonly utilized types for small projects is monocrystalline or polycrystalline cells, as they generally provide a high efficiency-to-cost ratio. These cells can be purchased from various suppliers online and usually come in standard sizes, making them easier to work with. Once the cells have been obtained, one should focus on proper installation techniques to ensure that the final product operates effectively.
1. SELECTING THE APPROPRIATE SOLAR CELLS
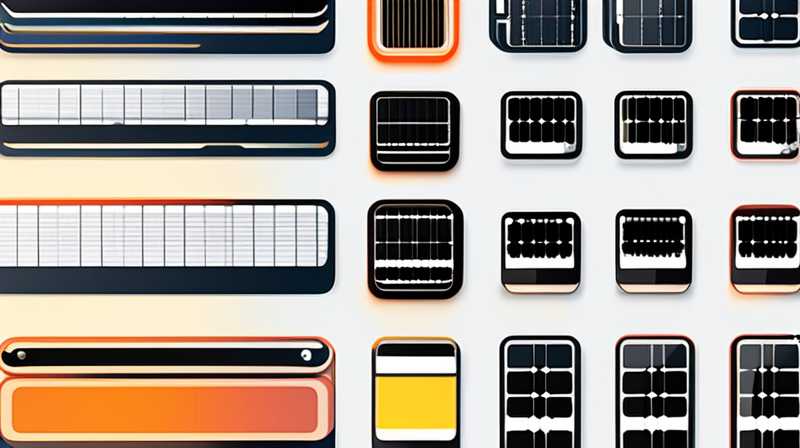
Selecting the right solar cells is fundamental to the success of building small solar panels. Solar cells are available in various types, including monocrystalline, polycrystalline, and thin-film solar cells. Each type has its own attributes that cater to different requirements and applications. Monocrystalline cells, recognized for their efficiency, are constructed from a single crystal structure, allowing for maximized energy absorption. They typically boast an efficiency rate between 15% to 22%, translating to more electricity generation per square foot. This makes them an excellent choice for constrained spaces where size efficiency is paramount. Conversely, polycrystalline cells are made from multiple crystal fragments and are often less expensive but come with slightly lower efficiencies, ranging from 13% to 16%.
Another alternative is thin-film solar cells, which are lightweight and flexible, making them suitable for unconventional surfaces. However, they usually have lower efficiency levels, generally between 10% to 13%, which might require larger installation areas to meet energy needs. Analyzing the intended usage is crucial—if space is limited, high-efficiency solar cells should be prioritized, while if weight and flexibility are critical factors, exploring thin-film options might be advisable. Considering the specific context of usage, whether for home energy solutions, small electronic devices, or hobby projects, will inform this selection process significantly.
2. PREPARING THE MATERIALS AND EQUIPMENT
Before embarking on the assembly of the solar panel, thorough preparations involving the required materials and tools are essential. The list of materials includes solar cells, a substrate or backing material, soldering equipment, and wiring. The substrate can be made of durable options like plywood or plastic, which not only protect the solar cells but also provide structural integrity. Selecting a backing material that provides insulation and weather resistance can extend the lifespan of the panels, especially if they are intended for outdoor use. It’s also advisable to identify an appropriate protective coating to shield the panels from environmental damage, dust, and moisture.
In terms of tools, having the right soldering iron is important because connecting solar cells requires precise soldering to ensure reliable electrical connections. A multimeter will help measure voltage and ensure that the connections are properly made. Safety equipment, such as goggles and gloves, should not be overlooked during this process to guard against accidental injuries. Ensuring that everything is organized and ready before commencing the building process can streamline the entire project and enhance efficacy. An environment free from distractions will facilitate concentration during the construction phase, reducing the likelihood of mistakes.
3. ASSEMBLING THE SOLAR PANEL
The process of assembling the small solar panels demands meticulous attention to detail, as any mishaps can lead to inefficiency or malfunction. Start by laying out the solar cells according to the desired configuration, often arranged in a series or parallel setup, depending on the required voltage and current outcomes. It is crucial to ensure that the cells are oriented correctly, facing the same direction, to maximize sunlight exposure.
Once the layout is established, the next step involves soldering the electrical connections between each solar cell. Using a soldering iron with a fine tip can aid in connecting the positive and negative terminals. Care must be taken to avoid overheating the solar cells; excessive heat can damage their ability to convert sunlight into electricity. Regularly checking the connections with a multimeter during the process can ensure that everything is proceeding accurately and efficiently, allowing immediate adjustments if necessary.
After the individual cells have been soldered, they should be secured to the backing material using waterproof adhesive or silicone. This step is vital to protect the cells from adverse weather while maintaining their performance. Lastly, encasing the entire assembly with a transparent, UV-resistant material, like polycarbonate or acrylic, will serve to protect the cells from debris and moisture. This encapsulation process also aids in optimizing the sunlight absorbed by the panel, thereby enhancing efficiency and longevity.
4. TESTING THE PANEL’S OUTPUT
Once the assembly is complete, conducting tests to gauge the solar panel’s output becomes imperative. The first stage of testing involves measuring the open-circuit voltage using a multimeter. This measure entails disconnecting any loads and checking the voltage that the panel generates when exposed to sunlight. A reading that falls within the expected range indicates that the solar cells are functioning correctly.
Following the initial voltage test, it’s vital to connect a resistive load, such as a small light bulb or resistor, to evaluate how well the panel powers devices. This test mimics real-world applications where the system will be utilized. Monitoring the output under varying sunlight conditions allows for the assessment of efficiency and performance stability across different situations. Documenting these results can assist in making future enhancements or adjustments to optimize performance.
It’s also necessary to consider factors such as shade, the angle of sunlight, and panel orientation, all of which significantly influence the solar panel’s energy output. Fine-tuning the position and angle towards the sun will maximize exposure, resulting in better energy production. A thorough testing phase not only verifies functionality but also provides essential data to refine the assembly or adopt different configurations for improved outcomes.
5. INSTALLING THE PANEL EFFICIENTLY
With the solar panel fully assembled and tested, the final act is correctly installing it for maximum efficiency. Opting for a location that receives direct sunlight throughout most of the day is paramount. This means avoiding shaded areas from trees, buildings, or other obstructions. Ideally, the panel should be installed at an angle that corresponds to the latitude of the location, as this will improve exposure to sunlight year-round.
Secure mounting is another critical aspect to consider during installation. Utilizing brackets or frames for stability will prevent damage from high winds or extreme weather conditions. Ensuring that the wiring is also protected and complies with local installation codes is crucial. Furthermore, utilizing charge controllers or inverters may be necessary depending on the energy system’s complexity and requirements, especially if connecting to batteries or larger applications.
In addition to physical installation, ongoing maintenance is vital for sustained performance. Regular cleaning to remove dirt and debris will help maintain the panel’s exposure to sunlight and enhance its lifetime. Making periodic checks on the wiring and connections will also ensure consistent electrical performance. Dedicating time toward monitoring and maintaining the system reiterates a commitment to maximizing energy production and optimizing the solar panel’s functionality.
FREQUENTLY ASKED QUESTIONS
WHAT TYPE OF SOLAR CELLS SHOULD I USE FOR SMALL PANELS?
Choosing between monocrystalline, polycrystalline, and thin-film solar cells hinges on individual project requirements. Monocrystalline cells excel in efficiency, typically ranging from 15% to 22%, making them ideal for limited spaces, although they tend to be costlier. Conversely, polycrystalline cells, while slightly less efficient at 13% to 16%, offer a more budget-friendly option without sacrificing too much performance. Thin-film cells provide flexibility and less weight but have lower efficiencies of 10% to 13%, which may necessitate larger surface areas for installation.
Evaluating the intended application for the solar panel is crucial—if a project requires portability or installation on a non-traditional surface, thin-film may be advisable, while projects demanding compactness might benefit from monocrystalline cells. Assessing budget constraints, efficiency needs, and physical space will guide the most optimal choice.
HOW CAN I ENSURE MY SMALL SOLAR PANEL IS WATERPROOF?
Ensuring the waterproofing of a small solar panel greatly contributes to its longevity and effectiveness. Using a sturdy backing material, such as treated plywood or plastic, establishes a solid foundation that resists moisture intrusion. Additionally, applying a waterproof adhesive or silicone sealant around the edges of the solar cells helps to prevent water from penetrating vulnerable areas.
Encapsulating the assembly with a transparent, UV-resistant layer also serves to protect the components from environmental factors. For enhanced waterproofing, one can implement drainage techniques by tilting the panel slightly to allow rainwater to run off rather than pool on its surface. Periodically inspecting the panel for signs of water damage or sealant degradation will help maintain its waterproof integrity over time.
HOW DO I CONNECT A SMALL SOLAR PANEL TO A BATTERY?
To connect a small solar panel to a battery, one must first confirm the specifications of the solar panel and battery to ensure compatibility. Typically, the panel output voltage should match the battery’s voltage rating. Ensuring that you have the proper charge controller is also essential, as it regulates the electricity flowing to the battery and protects it from overcharging.
Once the specifications match, begin by mounting the charge controller, then connect the solar panel’s positive and negative leads to the charge controller’s respective terminals. Next, connect the battery’s positive and negative terminals to the output terminals of the charge controller. This setup enables the solar panel to charge the battery safely and efficiently. Always monitor the system during its initial operation to confirm that it’s functioning correctly and that the battery receives an appropriate charge rate.
In closing, crafting small solar panels presents unique possibilities and rewards individuals with increased energy autonomy. Each integral step—from cell selection to assembly and installation—significantly impacts the panel’s overall performance. Comprehensively understanding the principles of solar technology will enhance the effectiveness of your project and yield tangible benefits. By emphasizing proper preparation, thoughtful assembly, and ongoing maintenance, one can create a functional and reliable energy solution tailored to specific needs. Furthermore, exploring the interplay of solar technology and renewable energy creates awareness and promotes sustainability at a broader level. Being engaged in this process cultivates a deeper understanding of energy resources and affirms a commitment toward a greener future, thus ensuring that projects are not only a source of power but also serve as expressions of ecological responsibility.
Original article by NenPower, If reposted, please credit the source: https://nenpower.com/blog/how-to-make-small-solar-panels/
