
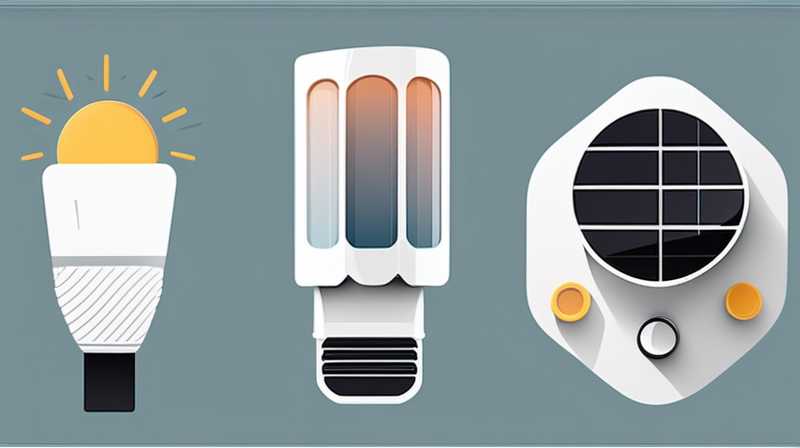
1. Two solar lights can be installed through a series of clear steps: selecting an appropriate location, ensuring proper mounting, connecting solar components, and testing functionality.
2. Selecting an appropriate location requires assessing sunlight exposure, ensuring minimal obstruction, and considering aesthetics. Positioning solar lights in areas where they will receive direct sunlight for most of the day maximizes their efficiency. Any surrounding trees, buildings, or objects that could cast shadows over the lights should be taken into account. Alongside functionality, the visual aspect is paramount. The lights should complement the landscape or architectural design without appearing intrusive. Dominant colors and styles of the outdoor area should guide these decisions, focusing on harmony rather than chaos.
3. Proper mounting involves using stable supports and the right fastening tools, paying attention to both safety and durability. Ground-mounted lights often require careful digging for bases or spikes that secure the units firmly in place. Wall-mounted variations may need brackets that align perfectly with the solar light’s design. Additionally, using the appropriate screws and anchors for the chosen surface will prevent descents or malfunctions over time. Whether ground or wall-mounted, ensure all units are level and properly aligned; discrepancies may affect light distribution.
4. Connecting solar components entails linking the solar panel to the battery and ensuring a seamless flow of energy. Understanding different wiring techniques is essential, as poorly connected components may lead to insufficient power generation. Most solar lights come with pre-installed wiring that simplifies this process, although consumers should still double-check connections to avoid any hazards. Moreover, ensuring all components remain weather-resistant will prolong the lifespan and functionality of the unit.
5. Testing functionality is crucial to ensure the newly installed solar lights operate as intended. This includes monitoring their performance at night to check brightness levels and adjusting angles or placements if necessary. Importantly, observing any fluctuations in performance can provide insights into solar power efficacy and potential maintenance requirements. A series of checks in the initial days following installation will also help identify any issues that may require immediate attention.
INSTALLATION LOCATION
The choice of site for solar light installation extends beyond mere preference; it plays an influential role in operational efficiency. Direct sunlight access is paramount. To optimize performance, it is recommended that solar lights be placed in areas that receive full sun without obstruction for at least six to eight hours daily. Areas like gardens, pathways, or driveways are typically ideal, as they not only enhance visibility in the evening but also spark a sense of safety.
Furthermore, obstructions such as walls, trees, or other structures can impede solar efficiency. Analyzing the surrounding environment and identifying potential obstacles will contribute significantly to maximizing illumination levels. Residents should familiarize themselves with their surroundings throughout different seasons, keeping in mind that tree canopies might shade lights during particular times of the year.
MOUNTING TECHNIQUES
The method of mounting solar lights varies depending on the model. Ground-mounted units are straightforward as they often come with stakes designed to plant directly into the soil, providing stability. However, when installing in harder surfaces, such as gravel or clay, additional tools might be necessary to create a secure foundation. Maintaining a vertical position is crucial; any tilt can lead to uneven light distribution.
On the other hand, wall-mounted alternatives require more precision. Utilizing mounting brackets is essential for securing the light fixtures against walls or fences. Before installation, consider the material type and ensure that the correct screws and anchors are employed. Plastic anchors may not be adequate for heavier fixtures; pre-drilling is often advisable to assist in securing bolts firmly.
COMPONENT CONNECTION
Understanding how to connect various components within solar lights can seem daunting. Most modern solar lights have simplified wiring systems, requiring minimal expertise. The primary components include solar panels, the battery, and the LED light itself. Often, these components come pre-wired, allowing for quicker installation. Nonetheless, checking connections for corrosion or wear over time is vital, as poor connections can lead to energy losses.
Weather-proofing is another consideration. Solar lights are often designed for outdoor conditions; however, ensuring that connections remain sealed against moisture is essential. Silicone sealants can be employed to reinforce connections and protect them from environmental elements. When connecting components, users should strive for quality above all, seeking compatible batteries and panels that work harmoniously to create a consistent energy source.
FUNCTIONALITY EVALUATION
Testing solar lights after installation not only monitors effectiveness but also assesses any potential adjustments that may be necessary. Monitoring illumination during nighttime will establish whether the lights are functioning optimally. Users should evaluate the brightness levels; inadequate lighting might indicate placement issues or faulty connections.
In addition, establishing a routine for performance checks can greatly enhance the longevity of solar lights. Observing the lights across varying weather conditions is particularly critical. Extreme conditions—such as heavy rain or snowfall—can impact performance. Observations can help determine whether relocation or temporary adjustment is warranted.
FAQS
WHY ARE MY SOLAR LIGHTS NOT WORKING AT NIGHT?
Several factors could contribute to inadequate nighttime illumination in solar lights. Firstly, insufficient sunlight exposure during the day could lead to inadequate energy storage. If lights are placed in shaded areas or are obstructed, their battery will not charge effectively. Furthermore, old or defective batteries can fail to hold a charge, demanding replacement. Regular cleaning of solar panels is also essential, as dirt and debris can significantly hinder sunlight absorption. Lastly, check to see if the lights are set to “on,” as some models may have manual settings that need adjustment.
HOW LONG DOES A SOLAR LIGHT BATTERY LAST?
The lifespan of solar light batteries depends on multiple factors including usage patterns, quality, and environmental conditions. Typically, lithium-ion batteries—common in solar devices—can last between two to three years. However, environmental aspects like temperature fluctuations and moisture levels can impact longevity. Regular maintenance is crucial. Cleaning solar panels ensures optimal performance, preventing drained batteries. When the battery becomes inefficient, it is important to replace it promptly to maintain the efficacy of the solar lighting system.
CAN SOLAR LIGHTS BE USED IN WINTER?
Yes, solar lights can operate efficiently in winter, but their effectiveness may fluctuate based on sunlight availability. Despite shorter daylight hours, solar lights can still harness energy during clear, sunny days. Nevertheless, extreme cold can affect battery functionality, reducing the energy reserve they store. Users should prioritize location selection to ensure maximum sunlight access and consider purchasing solar lights specifically designed to withstand colder temperatures. Proper maintenance, including ensuring snow doesn’t cover panels, is also critical to uphold performance.
FINAL THOUGHTS
Installing two solar lights involves meticulous planning and execution, enabling homeowners to achieve optimum performance while enhancing aesthetic value. Choosing the perfect location is a fundamental consideration, necessitating a clear understanding of sunlight patterns and potential obstructions. The installation phase presents various mounting techniques—each step, whether ground- or wall-mounted, should prioritize stability and alignment for optimal aesthetic integration.
After the lights are securely in place, attention shifts to component connections. Confidently linking parts ensures seamless energy flow and hones functionality. Regular assessments for weatherproofing further ensure longevity and efficiency. Each element contributes toward a successful installation that not only illuminates the outdoors but also showcases an understanding of renewable energy behaviors.
Committing to a routine of functionality evaluation leads to sustained performance. Homeowners who engage actively with their solar light systems not only promote energy efficiency but also express care for their investments. Investing in quality solar lights reaps long-term benefits, ultimately contributing to both environmental sustainability and personal satisfaction. Exploring diverse solar lighting options and committing to proper installation practices will surely yield impressive results, creating inviting outdoor spaces filled with inviting light.
Original article by NenPower, If reposted, please credit the source: https://nenpower.com/blog/how-to-install-two-solar-lights/
