
Installing solar panels for charging involves several specific steps and considerations. 1. Conduct a Site Assessment, carefully evaluate the location for adequate sunlight exposure throughout the day. 2. Choose Appropriate Equipment, select panels and inverters that align with your energy needs and budget. 3. Understand Local Regulations, ensure compliance with zoning and electrical codes before beginning installation. 4. Install Mounting Hardware, securely affix brackets and mounts to handle the solar panels. 5. Connect the Panels, wire the solar panels to the charge controller or inverter efficiently. 6. Test Your Setup, monitor performance to confirm everything functions as intended. A well-executed installation will result in a reliable solar-powered charging system, offering energy independence and environmental sustainability.
1. UNDERSTANDING SOLAR ENERGY TECHNOLOGY
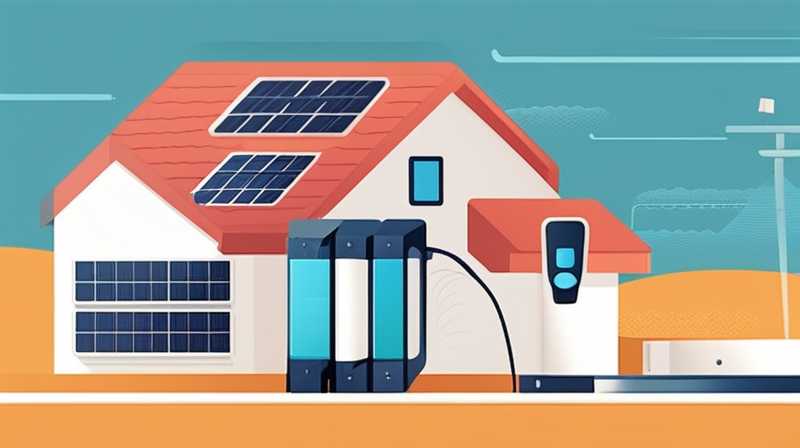
Solar energy technology harnesses the power of sunlight to generate usable electricity. A deep comprehension of photovoltaic (PV) systems is crucial for anyone intending to install solar panels. A PV system comprises solar panels, an inverter, a battery bank (if applicable), and a charge controller. The solar panels absorb sunlight and convert it into direct current (DC) electricity, which is then transformed into alternating current (AC) by the inverter for home usage or storage in batteries for later use.
Moreover, the efficiency of solar panels can vary significantly based on their construction and the quality of materials used. It’s essential to investigate the different types of solar panels, such as monocrystalline, polycrystalline, and thin-film, each having distinct characteristics and efficiencies. Understanding these factors will better enable individuals to make informed choices, optimizing their return on investment.
2. PLANNING YOUR INSTALLATION
Prior to proceeding with any installation, thorough planning is indispensable. This stage involves conducting a detailed assessment of the installation site. Factors such as roof orientation, shading from nearby trees or buildings, and wind exposure must be meticulously analyzed to maximize solar energy absorption. Ideally, a roof that faces south in the northern hemisphere (or north in the southern hemisphere) will capture the most sunlight.
Additionally, determining the total energy needs of your household or setup is critical. Calculate energy consumption by examining utility bills and understanding the power requirements of devices and appliances that will utilize the solar energy. This step not only helps size the installation adequately but also facilitates selecting the right battery storage options if off-grid capabilities are desired. It can also inform adjustments to energy usage patterns, thereby increasing overall efficiency.
3. SELECTING THE RIGHT COMPONENTS
Choosing the right solar panels, inverters, and batteries directly affects the performance and output of the solar energy system. Researching various manufacturers and designs is advisable, paying close attention to the warranties and efficiency ratings of the products. For example, monocrystalline panels, although generally more expensive, offer higher efficiency rates compared to their polycrystalline counterparts in limited space situations.
Inverters are another vital component, as they convert the DC electricity generated by solar panels into AC electricity. It’s essential to assess the different types of inverters available, such as string inverters, microinverters, and power optimizers. Each inverter type has distinct advantages that cater to various installation environments. The same careful selection process applies to batteries when opting for energy storage, as the capacity and discharge rates can significantly influence performance during periods of low sunlight or increased energy consumption.
4. NAVIGATING LOCAL REGULATIONS
Navigating the myriad of local regulations is crucial to the successful installation of solar panels. Before commencing installation, it’s paramount to familiarize yourself with any necessary permits, local zoning laws, and safety requirements. Each locality may have different standards governing how and where solar systems can be installed, particularly for residential roofs and solar farms.
Meeting electrical codes and acquiring building permits is paramount for ensuring safety and complying with local regulations. Consulting with local government offices or seeking guidance from solar installers experienced in your region can facilitate this process. Additionally, understanding incentive programs such as tax credits or grants can significantly reduce the overall installation cost, further promoting the adoption of solar technologies.
5. INSTALLATION PROCESS
The actual installation of the solar panels involves several methodical steps. First, gather all necessary tools and equipment, which may include drills, wrenches, wire strippers, and safety equipment such as gloves and goggles.
Once the site is prepared and cleared of debris, the installation of mounting hardware begins. This involves securely fastening the mounting brackets to the roof or ground, ensuring they are level to prevent issues with panel placement. Aligning the brackets properly is vital not only for aesthetics but to maximize energy capture.
Next, the solar panels are carefully placed on the mounts. Secure the panels according to the manufacturer’s directions, which typically involve locking mechanisms or bolts. Precision in this process will prevent potential issues such as damage during wind or adverse weather conditions.
Following the panel installation, the electrical connections are made. Connecting the solar panels to the charge controller or inverter must be carried out with precision, maintaining proper polarity and ensuring connections are tight and secure. This electric work is critical and may require professional assistance if one is not familiar with electrical systems.
6. MONITORING AND MAINTENANCE
Once the installation is complete, ongoing monitoring and maintenance ensure the solar system’s efficiency. Regular checks on the system functionality, panel cleanliness, and component health are essential. Dust, debris, and other environmental factors can impede the efficiency of solar panels, resulting in diminished performance over time.
Monitoring systems are often equipped with apps or software that provide real-time data on performance metrics, allowing for easy identification of any issues. If abnormalities in energy production are detected, it is wise to consult with a solar technician. Preventative maintenance such as tightening connections or replacing malfunctioning components can extend the lifespan of the system effectively.
Additionally, understanding the expected lifespan of solar panels—often around 25 years—helps in planning for future upgrades or replacements. Staying informed on technological advancements can enable users to benefit from improved efficiencies and features available in newer models over time, optimizing ongoing energy production.
FREQUENTLY ASKED QUESTIONS
HOW MUCH DOES IT COST TO INSTALL SOLAR PANELS?
The total expenses for installing solar panels can vary significantly based on several factors, including the type and size of the system, installation complexity, and location. On average, residential solar installations range between $15,000 to $30,000 before incentives. This price generally includes solar panels, inverters, mounting systems, and any electrical equipment needed for installation.
Investing in higher-efficiency panels or comprehensive systems may increase upfront costs but can lead to higher energy savings over the lifespan of the installation. Additional expenses may include labor fees for professional installation, which can represent a sizable portion of the costs. Understanding local incentives, such as federal tax credits or rebates, can significantly reduce the overall financial burden. It’s advisable to consult with multiple solar installers to obtain quotes and ensure the best deal for your unique energy needs.
HOW LONG DOES IT TAKE TO INSTALL SOLAR PANELS?
The installation timeline for solar panels can differ based on several influencing factors including system size, installation complexity, and logistical considerations. Typically, residential installations may take as little as one to three days. However, larger or more complex systems might require longer installation times, sometimes extending to weeks.
Preparation phases such as securing permits and waiting on equipment delivery can also affect the overall timeline. Start-to-finish processes encompass planning, designing, permitting, and installation, with each step contributing to the final timeline. Properly aligning expectations and staying in communication with the solar installation company can help ensure that the project progresses smoothly and adheres to a predefined schedule.
CAN SOLAR PANELS WORK IN CLOUDY WEATHER?
While solar panels are most efficient in abundant sunlight, they can still function effectively during cloudy weather. Solar panels generate electricity from both direct sunlight and diffuse sunlight, which occurs even on overcast days. The energy output may be reduced, typically around 10-25% lower than peak sunny day performance, but they continue to produce power.
Cloud cover does not completely halt solar production due to the way sunlight scatters. In fact, certain types of solar technology, such as thin-film panels, perform better in low-light conditions compared to traditional crystalline panels. To optimize performance during less ideal weather, consider features such as battery storage that allow you to utilize excess energy collected on sunnier days during periods of lower production.
The process of installing solar panels for charging requires careful planning and adherence to local guidelines, along with meticulous selection of equipment to ensure maximum efficiency and effectiveness. By effectively assessing the site and understanding personal energy needs, individuals can tailor their system adequately. Ensuring that selected components align with both budgetary constraints and efficiency expectations is crucial.
Thorough knowledge of the installation process, coupled with proper maintenance and monitoring, enhances the longevity and performance of the solar system. Addressing common concerns through FAQs—such as cost, installation duration, and performance in cloudy conditions—equips potential users with vital knowledge and confidence to transition to solar energy.
Investing in solar technology not only offers energy independence and potential savings on utility costs but also significantly contributes to environmental sustainability by reducing reliance on fossil fuels. Transitioning toward solar energy systems symbolizes a commitment to innovation and responsibility, benefitting both individuals and the planet as a whole.
Original article by NenPower, If reposted, please credit the source: https://nenpower.com/blog/how-to-install-solar-panels-for-charging/
