
To install a solar check valve, one must follow a systematic series of steps to ensure proper functionality and efficiency. 1. Understanding the purpose of a solar check valve is essential, as it prevents backflow of liquid in solar water heating systems. 2. Selecting the right size valve for the system’s specifications is crucial for optimal performance. 3. Properly preparing the installation site involves ensuring clean, dry surfaces and accessibility to all necessary components. 4. Following the manufacturer’s instructions during the installation process guarantees that the system operates efficiently.
When installing the valve, ensure that 5. safety protocols are adhered to, preventing any unnecessary hazards. A thorough check after installation will confirm that there are no leaks and that the valve operates smoothly.
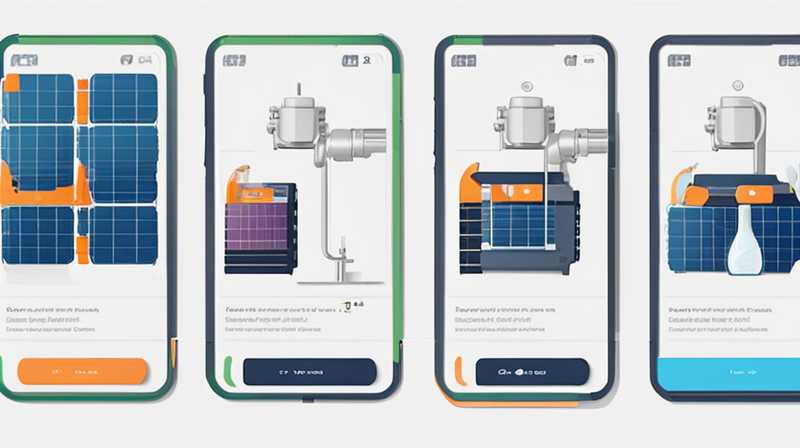
INSTALLATION PREPARATIONS
Before embarking on the task, a detailed preparation phase is necessary, as this lays the foundation for successful installation. Ensuring that the work area is organized becomes paramount. All tools, parts, and safety equipment should be readily available. A clutter-free environment minimizes the risk of accidents, enabling a smooth workflow during installation.
Furthermore, understanding the specific type of solar check valve is crucial, as various models may have different configurations and operational mechanisms. Researching the appropriate specifications ensures compatibility with existing systems, thereby enhancing overall efficiency. For instance, it’s advisable to consult the solar system manual or manufacturer’s guidelines to determine the fitting size and compatibility of valves.
SELECTING THE RIGHT SOLAR CHECK VALVE
The choice of a solar check valve cannot be understated, as it significantly impacts the system’s performance. Choosing the appropriate material for the valve is critical; common materials include brass, plastic, or stainless steel. Each type offers unique advantages and disadvantages that may suit different environments and applications. For example, brass valves are robust and durable but may corrode in aggressive water conditions, whereas plastic valves provide lightweight solutions at the cost of strength.
Another critical component is the valve’s pressure rating. The valve should be capable of handling the significant pressure fluctuations typical in solar systems. Evaluating the specifications of both the valve and the solar system will aid in making an informed decision. Engaging with professionals or experienced installers can also provide insights that further inform the choice of the right valve.
INSTALLATION PROCESS
The actual installation process requires meticulous attention to detail. Shutting off the power source and draining the system is typically the initial step. This precautionary measure safeguards both the installer and the system from potential damages or hazardous situations. Next, removing any existing components in the area where the valve is to be installed is necessary. This clearance paves the way for a straightforward installation.
Upon clearing the site, the next step involves properly aligning the new solar check valve with the designated connection points. Alignment is crucial; even a slight deviation can result in operational inefficiencies or leaks. Securing the valve according to the manufacturer’s guidelines ensures that it remains steadfast during temperature changes and pressure fluctuations common in solar systems.
After attaching the check valve, inspecting all connections becomes paramount. A careful assessment of each joint for signs of leaks and employing appropriate sealants during installation can minimize future maintenance tasks. Using Teflon tape on threaded joints can further enhance sealing effectiveness.
Once everything has been secured, re-energizing the system comes next. Gradual re-pressurizing and checking for any anomalies will highlight any immediate issues that might require attention. Ensuring that the valve opens and closes correctly under operational conditions also confirms that the installation was executed flawlessly.
TESTING AND MAINTENANCE
Following the installation phase, conducting thorough tests to ascertain the valve’s performance is essential. This process includes evaluating the valve’s responsiveness to backflow situations to ensure it operates as intended. A well-functioning valve should seal tightly when backflow occurs, allowing fluid to pass freely in the desired direction under normal conditions.
It is equally important to establish a regular maintenance routine to ensure the check valve operates efficiently throughout its lifespan. This may involve periodic inspections, cleaning of components, and replacement of gaskets or seals as necessary. Since sediments can often accumulate in solar systems, regular maintenance helps in identifying and mitigating potential blockages that could affect the valve or the system.
FREQUENTLY ASKED QUESTIONS
HOW DOES A SOLAR CHECK VALVE WORK?
A solar check valve operates as a one-way device essential for maintaining flow direction in solar heating systems. When fluid flows in the correct direction, the valve opens to allow passage. However, when back pressure occurs, the valve closes tightly, preventing reverse flow. This mechanism safeguards the plumbing system from potential damage and ensures that heated water returns effectively to the storage tank without losing it to unintentional backflow. Check valves typically employ a disc or ball mechanism that activates based on the flow direction and pressure differences.
WHY IS A CHECK VALVE NECESSARY IN A SOLAR SYSTEM?
The necessity of a check valve in a solar system can be attributed to its role in enhancing operational efficiency. Solar thermal systems rely on the effective transfer of heated water, which can be compromised without a check valve. Backflow can lead to loss of heated water, thus reducing the system’s overall energy efficiency. Additionally, unregulated backflow can result in damage to sensitive components within the solar array, leading to costly repairs or reductions in system lifespan.
WHAT MAINTENANCE IS REQUIRED FOR A SOLAR CHECK VALVE?
Maintaining a solar check valve involves periodic inspections and cleaning to ensure functional integrity. Regular checks should focus on detecting any signs of wear or damage, especially to seals and gaskets. If sediment or debris accumulates, cleaning or flushing out the valve may be necessary to maintain optimal flow. It’s advisable to establish a regular maintenance schedule aligned with the seasons to prepare the system for fluctuating environmental conditions, thus preserving efficiency and prolonging the valve’s operational life.
Taking the time to ensure a comprehensive installation of a solar check valve promotes not only the longevity of the valve itself but also the efficiency of the entire solar system. Understanding its integral functions and adhering to meticulous installation processes serve as the cornerstones of successful integration. Following up with diligent maintenance practices will safeguard investments in solar technology, enhancing performance while ensuring sustainable energy utilization.
Original article by NenPower, If reposted, please credit the source: https://nenpower.com/blog/how-to-install-solar-check-valve/
