
1. To disassemble a solar sensor, you should follow these procedures: 1) Power down the device to ensure safety, 2) Identify and remove the outer casing, 3) Detach the circuit board and any connected wires, 4) Carefully pry apart the sensor components, taking care not to damage fragile parts. Elaborating on the first point, always ensure that the solar sensor is powered off to prevent electrical shock or damage to the unit while disassembly occurs. This precautionary measure promotes a safe working environment.
DISASSEMBLING A SOLAR SENSOR
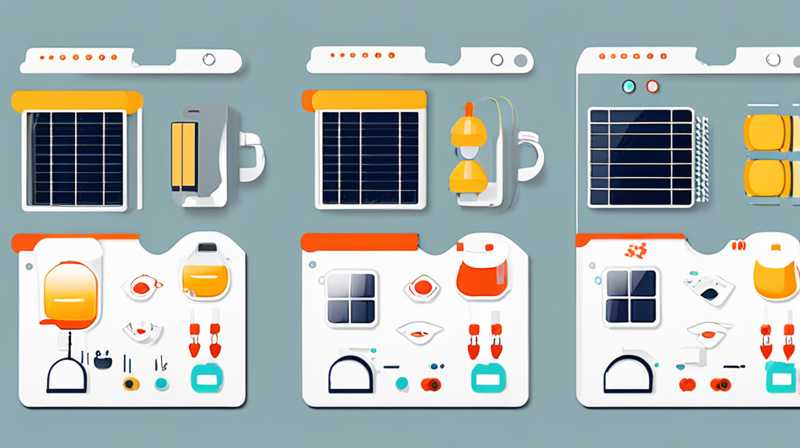
1. UNDERSTANDING THE SOLAR SENSOR
Solar sensors are sophisticated devices designed to detect sunlight and control lighting systems effectively. Comprising several components, these sensors play a vital role in sustainable energy management and automation, especially in outdoor lighting applications. The primary components usually include a light-sensitive photodiode, a microcontroller, and various resistors and capacitors that form the circuit. Each piece works in harmony to ensure that the sensor operates efficiently, responding to changes in natural light levels ensures optimal energy consumption.
In many cases, understanding how each component of the sensor functions is essential prior to attempting disassembly. Knowing the overall structure not only facilitates a more effortless disassembly process but also promotes a greater appreciation for the technology behind the solar sensor itself. Furthermore, this understanding can assist in troubleshooting issues or modifying the sensor for specific applications rather than merely replacing it.
2. PREPARING FOR DISASSEMBLY
Preparation is key before undertaking the disassembly of a solar sensor. First and foremost, one should always gather the necessary tools, which typically include a screwdriver, pliers, and a multimeter for testing purposes. Using the right tools can make the disassembly process smoother and prevent potential damage to sensitive components. Having a clean, organized workspace is equally important, as it allows for efficient handling of parts and minimizes the chances of losing small components.
Additionally, creating a reference diagram or taking photos before starting the disassembly is a prudent practice. This step can provide visual guidance when reassembling the device, ensuring that each component is correctly replaced in its original position. Furthermore, labeling wires and connectors can significantly ease the reassembly process, reducing the likelihood of confusion or error. With careful preparation, the disassembly process becomes more manageable and less intimidating.
3. POWERING DOWN AND GATHERING TOOLS
To commence the disassembly process effectively, always ensure that the solar sensor is powered down properly. This crucial step not only guarantees safety by avoiding electrical shocks but also protects the sensor’s internal components from potential damage during disassembly. Depending on the model, powering down may involve disconnecting batteries or simply turning off an external power source. It’s advisable to consult the user manual or manufacturer’s guidelines beforehand for the proper procedure to ensure that the device is powered down completely.
In conjunction with powering down, assembling the necessary tools is essential. Common tools include Phillips or flat-head screwdrivers, tweezers, and a safety pair of goggles to protect your eyes from any flying debris. Additionally, consider having a multimeter handy to check for electrical continuity as you proceed through the disassembly process. Each tool serves a different purpose, and their collective use will ease the removal of screws and components without causing damage, thus fostering a more effective disassembly experience.
4. IDENTIFYING AND REMOVING THE OUTER CASING
After ensuring that the solar sensor is powered down and having the requisite tools ready, the next phase involves identifying and removing the outer casing. Typically, the outer casing is secured with screws or clips that can be found on the back or sides of the unit. Utilize the correct screwdriver to remove these fastening devices carefully, setting them aside in an organized manner to avoid misplacement.
Upon loosening or detaching the outer casing, one can gently pull it off to reveal the internal components. This step must be executed cautiously, as excessive force may damage the housing or internal components. In many designs, the outer casing may also include light-diffusing elements, which should be treated delicately to avoid scratches or alterations that may affect performance when reassembled.
5. DETACHING THE CIRCUIT BOARD AND CONNECTED WIRES
With the outer casing successfully removed, the focus then shifts to detaching the circuit board and any connected wires. Carefully observe the positioning of wires and connectors to ensure correct replication during reassembly. Utilize the multimeter to confirm the absence of power if there are any doubts about electrical safety.
To detach the circuit board, seek out the screws or retaining clips that secure it in place. Unscrew or unclasp these fastening devices carefully; avoid using excessive force as this might compromise the integrity of the board. Once the screws are removed, gently lift the circuit board out of its housing while remaining cautious about any soldered connections that may still be attached. Additionally, use tweezers or small pliers to disconnect any remaining wires, taking care to observe their layout for subsequent reassembly.
6. CAREFULLY PRYING APART SENSOR COMPONENTS
After detaching the circuit board, the next task involves carefully prying apart the sensor components. At this stage, one may encounter the photodiode or other similar components that are critical to the sensor’s function. Using the appropriate precision tools, gently pry apart these parts, taking care not to exert too much pressure on fragile components that could crack or break.
Depending on the model, some sensors may have adhesive connections that could require softer techniques, such as warming them slightly to loosen the bond before attempting to separate them. This approach can reduce the chances of damage significantly compared to forceful pulling. By prioritizing careful disassembly, you not only protect each component but also gather knowledge about the sensor’s assembly, providing valuable insights for future improvements or repairs.
7. REASSEMBLING THE SOLAR SENSOR
When disassembling, one must also consider the process of reassembling the solar sensor. Using the documentation or photographs taken prior to disassembly, return each component to its original position with utmost care. Start with the circuit board, ensuring that all wires are correctly reconnected and securely reseated.
As each component is reinstated, take extra time to ensure that all screws are tightened adequately without over-tightening, which could result in damage. Ensure all seals are appropriately fitted, particularly if the sensor is designed for outdoor use, protecting it from moisture and other environmental factors. Upon completing the reassembly, perform a functional test to verify that the device operates correctly as intended, confirming its readiness for performance in the environment it is intended for.
8. TESTING AND TROUBLESHOOTING
After reassembly, conducting a comprehensive test of the solar sensor is paramount to ascertain its functionality. Commence by reactivating the power source, ensuring that the sensor receives adequate sunlight to function optimally. Monitor the responses of the device, such as its reaction to varying light conditions, to verify that all components work harmoniously.
Should any issues arise, such as the sensor failing to activate or respond as expected, utilizing the multimeter can assist in identifying potential problems, such as disconnections or short circuits within the wiring. Documenting any irregularities can also aid in troubleshooting, enabling necessary adjustments to be made promptly. Emphasizing the importance of this phase, a thorough testing routine ensures reliability, affirming the solar sensor’s suitability for its intended application.
9. COMMON ISSUES AND SOLUTIONS
When dealing with solar sensors, there are common issues that users may encounter, such as incorrect readings or failure to power on. One prevalent issue involves insufficient sunlight exposure to the sensor, leading to false readings. To mitigate this, ensure that the sensor is free from debris or obstructions that could block sunlight. Regular cleaning and proper positioning can significantly enhance performance.
Another frequent concern arises from electrical faults due to damaged wiring. Inspecting wires for frays or breaks is essential, as these can interrupt power flow. Should damage be identified, consider soldering repaired connections or replacing wiring as needed. By recognizing and addressing these common issues, users can greatly extend the operational lifespan and reliability of solar sensors, enhancing their overall efficiency.
10. UPGRADING OR MODIFICATION OF THE SOLAR SENSOR
As technology advances, solar sensors may also benefit from upgrades or modifications. Many individuals explore options for enhancing sensor sensitivity or improving the housing materials for durability against environmental factors. This exploration could involve installing advanced microcontrollers that provide various operational modes or integrating additional sensors for enhanced data collection.
When contemplating upgrades, it is crucial to consider compatibility with existing components. Conducting thorough research and confirming the specifications of any new parts ensures successful modifications without unforeseen complications. With a well-planned approach, users can optimize their solar sensor systems to more effectively meet their specific needs and performance expectations.
FREQUENTLY ASKED QUESTIONS
WHAT TOOLS DO I NEED TO DISASSEMBLE A SOLAR SENSOR?
Disassembling a solar sensor requires specific tools to ensure the process is efficient and safe. Essential tools typically include precision screwdrivers (both Phillips and flat-head), pliers, and tweezers to assist in the manipulation of small components. Additionally, having a multimeter on hand is crucial for testing electrical continuity and confirming that the device is powered down properly before beginning the disassembly process.
Creating a tidy workspace is advised, as it aids in organizing tools and parts during disassembly. A magnetized tray can be useful for holding screws and small components, preventing loss during the process. Safety goggles may also be recommended to shield your eyes from any debris that may result during the disassembly. Attaining the right tools contributes significantly to a successful and damage-free disassembly experience.
HOW DO I KNOW IF MY SOLAR SENSOR NEEDS REPAIR?
Identifying whether a solar sensor requires repair usually revolves around monitoring its performance and reliability. Common indicators include the sensor failing to activate lights when it should or behaving erratically in response to changing light conditions. If significant discrepancies arise in its performance, it may be prudent to initiate a diagnostic assessment.
Another red flag is any physical damage to the unit, such as cracked components, frayed wires, or a compromised outer casing. If the solar panel feels excessively hot or displays signs of wear, this could signal inefficiency or malfunction. Consulting the user manual for troubleshooting common issues can be beneficial, and in cases of persistent problems, considering more in-depth inspections may be warranted to determine whether repairs are necessary or if replacement is a more viable option.
CAN I MODIFY MY SOLAR SENSOR FOR BETTER PERFORMANCE?
Modifying a solar sensor for enhanced performance is certainly an option for those with a background in electronics or DIY projects. Many users consider upgrading components like the microcontroller or photodiode to improve sensitivity or responsiveness. Additionally, modifications can include tailoring the housing or enclosure materials for added durability in adverse weather conditions.
Before proceeding with any modifications, it is vital to ensure compatibility between the existing components and any new parts being considered. Assessing specifications and understanding how each element interacts fosters successful upgrades without compromising functionality. Ultimately, a well-planned modification effort can significantly boost the performance of a solar sensor, ensuring it meets the evolving needs of its application.
In summation, disassembling a solar sensor necessitates meticulous preparation and an understanding of the device’s components. By following a systematic approach that prioritizes safety and efficiency, one can successfully complete the disassembly process. Not only does this enable repairs or modifications, but it also fosters a deeper understanding of solar sensor technology. Addressing common concerns post-disassembly, such as potential upgrades and common issues, further enhances a user’s ability to maintain and optimize their solar sensor. A proactive approach to identifying performance indicators helps prolong the lifespan of the device and ensures peak functionality, ultimately contributing to energy savings and effective automation in lighting systems.
Original article by NenPower, If reposted, please credit the source: https://nenpower.com/blog/how-to-disassemble-the-solar-sensor/
