
To successfully disassemble a solar light pipe joint, one must follow a systematic approach that ensures the integrity of the components is maintained while keeping safety paramount. 1. Gather necessary tools and materials, 2. Ensure the solar light is powered off, 3. Identify the connection points, 4. Carefully detach components to avoid damage.
1. GATHERING TOOLS AND MATERIALS
Before embarking on the disassembly process, gathering the proper tools is crucial. Essential tools typically include a screwdriver set tailored for various screw types, pliers, and possibly a utility knife for any adhesive. It is also wise to have a clean workspace, preferably a table or flat surface, to avoid losing small parts.
Preparation involves ensuring that all components are accounted for. Doing this allows for smooth execution without interruptions. Having a checklist can assist in ensuring nothing important is overlooked. In addition, wearing safety goggles and gloves is advisable to protect oneself from potential sharp edges or debris that may arise during disassembly.
The presence of a manual or guide specific to the solar light model acts as a precious resource. It provides insights into intricate components and their functions, thus aiding the disassembly process significantly. Some models may have different assembly methods, so consulting these resources can prevent unnecessary complications.
2. POWERING OFF THE SOLAR LIGHT
Next, ensuring that the solar light is completely powered off is non-negotiable. Most solar lights can be turned off using a simple switch, often located on the bottom or side of the unit. This step is particularly important as solar lights operate on batteries, and mishandling them while active could lead to short circuits or accidents.
Disconnecting the rechargeable batteries, if possible, adds an extra layer of security. If the solar light utilizes built-in batteries, ensuring that they are out of the circuit mitigates the risk of electrical hazards. In some cases, lights equipped with sensors may react if exposed to sudden motion or light while disassembled.
Upon confirming that the unit is indeed off, make a mental or written note of the order in which components will be removed. Documenting the arrangement can be beneficial during reassembly. Additionally, familiarize yourself with the function of each part to ensure a comfortable and efficient disassembly journey.
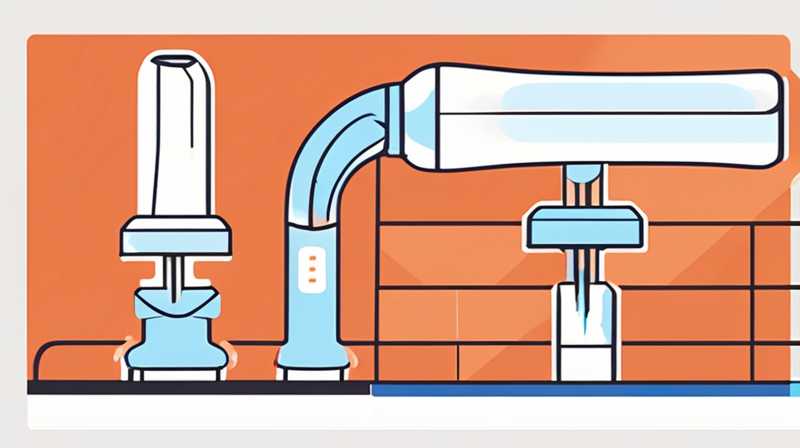
3. IDENTIFYING CONNECTION POINTS
With the solar light powered off, the next step is identifying the connection points of the joint. Typically, these joints may consist of screws, clips, or even adhesive materials. Recognizing how these connections are made is vital for efficient disassembly. Screws often indicate the need for a screwdriver, while clips might require gentle prying.
Taking a moment to examine the entire joint and its assembly can save a considerable amount of time. Isolate different sections and determine the best approach for removal. Understanding how the components fit together helps to prevent damage during disassembly. Some disassembly processes might necessitate lifting gently or twisting parts to free them from their locked positions.
If adhesives are present, be cautious. Some might require heat or a solvent to soften before removal. In these cases, applying only a small amount of the solvent to the edges will lessen the risks of damaging the other components. The careful identification of each connection point will enable a more methodical approach to disassembling the solar light pipe joint, ensuring no components are harmed in the process.
4. CAREFUL DETACHING OF COMPONENTS
Having gathered the appropriate tools and successfully identified the connection points, one can now begin the disassembly process. Proceeding with caution is key—disassembling requires a gentle touch, especially with joints that may be tightly secured. Start by loosening and removing screws before attempting to detach clips or pry components apart.
Patience plays a catalytic role in this step; forcing components apart may lead to breakage. If a piece appears stuck, re-check the connection points for any screws that may have been overlooked. As components become free, placing them in a designated area will help maintain organization and facilitate the reassembly process later.
By accomplishing this carefully, assembling the respective parts in their original order will be a smoother process. Taking photographs or notes during disassembly could also aid significantly in the understanding of the correct reassembly order. Employing this strategy allows individuals to feel confident in handling the components, leading to successful disassembly of the solar light pipe joint.
FREQUENTLY ASKED QUESTIONS
WHAT SHOULD I DO IF I BREAK A COMPONENT DURING DISASSEMBLY?
Accidents happen, and breaking a component during disassembly is not uncommon. When faced with this situation, the first step is to assess the extent of the damage. In some cases, it may be a minor break that can be repaired with adhesive or tape. However, if a critical piece, such as a battery holder or circuit board, is damaged, replacing the broken part may be necessary.
Identify if the broken part is still under warranty or if replacement parts are available from the manufacturer. Many companies offer spare parts for their solar lights, which can be ordered online or through local retailers. Genuinely considering available resources will help restore functionality to the solar light pipe quickly.
Additionally, keeping spare components can be beneficial, as it mitigates the chances of prolonged downtime should another incident occur in the future.
CAN I REPLACE COMPONENTS AFTER DISASSEMBLY?
Absolutely, replacing components following disassembly is not only feasible but is often a key reason for such maintenance. For instance, if the batteries become depleted or the LED lights burn out, disassembly grants access to these components for replacement.
Moreover, individuals may opt for upgrades, such as using higher-capacity batteries or higher-lumen LEDs. Ensuring that replacements are compatible with the specific solar light model can significantly enhance performance.
After identifying suitable replacements, following the manufacturer’s guidelines for installation is paramount. If uncertain, it might be beneficial to seek professional assistance or check online forums for insights from experienced users.
HOW OFTEN SHOULD I DISASSEMBLE MY SOLAR LIGHT FOR MAINTENANCE?
The frequency of disassembly for maintenance purposes largely depends on the environmental conditions to which the solar lights are exposed. Generally, conducting a thorough inspection at least once a year is advisable for proper upkeep. Regular checks help ensure optimal performance and address any emerging issues before they escalate.
For solar lights placed in areas with heavy debris, such as near trees or gardens, more frequent inspections may be necessary. Debris can obstruct solar panels, diminishing energy absorption and performance effectiveness.
While some individuals may be inclined to perform complete disassembly each time, routine maintenance, such as cleaning solar panels and checking battery health, may suffice more often. Monitoring the operational efficiency of your solar light will guide maintenance decisions.
5. MAINTAINING YOUR SOLAR LIGHT AFTER DISASSEMBLY
Post-disassembly, maintaining the solar light becomes crucial for minimizing future issues. Cleaning the solar panels eliminates dirt and debris that can accumulate over time. Utilizing a gentle cloth and mild detergent ensures no damage occurs during this tedious task.
Also, regular inspection of the internal components is highly beneficial. Look for signs of corrosion, especially around the battery contacts, and clean these areas if necessary. More importantly, keeping the physical connections well-maintained preserves functionality and extends operational lifespan.
Being proactive regarding maintenance contributes significantly to the efficiency of solar lights. Monitoring performance and promptly addressing any arising issues will ensure that outdoor spaces are illuminated consistently. It can help avoid confrontations with advanced disassembly in the future.
FINAL REMARKS ON DISASSEMBLING SOLAR LIGHT PIPE JOINTS
Engaging in the disassembly of solar light pipe joints presents an opportunity to understand the inner workings of these increasingly popular outdoor lighting solutions. While caution and patience are fundamental, documenting steps during the process could yield benefits. Gathering the correct tools and understanding how components fit together will lay the groundwork for successful disassembly.
Furthermore, replacing damaged components can be an enriching experience for individuals, offering insights into upgrading existing setups. Regular inspections and maintenance play essential roles in preserving solar lights in peak condition for years to come, ensuring an efficient light source throughout.
Investing time to grasp the methodical disassembly approach is worthwhile. It not only empowers users to manage their solar lighting systems, but it also fosters a deeper appreciation for solar technology and its benefits. Whether for repairs or simple maintenance, developing skills to disassemble and reassemble solar light pipes positions one favorably in an era increasingly focused on sustainability and self-sufficiency.
Original article by NenPower, If reposted, please credit the source: https://nenpower.com/blog/how-to-disassemble-the-solar-light-pipe-joint/
