
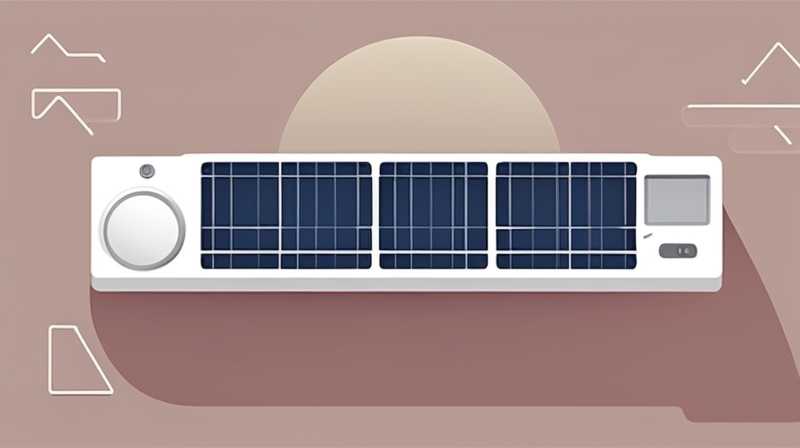
To successfully disassemble a Midea solar panel, one must carefully follow precisely outlined procedures and take necessary precautions. 1. Gather essential tools such as screwdrivers, a multimeter, and safety gear. It is crucial to ensure that the panel is disconnected from any power sources before commencing with disassembly. 2. Examine the physical layout and identify vulnerable components. Panels often have tempered glass on the top and layers of various materials, which require gentle handling.** 3. Follow the manufacturer’s instructions as provided in the user manual.** This can provide insights specific to the model, ensuring a smoother disassembly process. 4. Handle all components with care to prevent damage. Clear storage and organization of removed parts can facilitate reassembly or disposal later.
In-depth familiarity with these aspects can enhance safety and efficiency throughout the undertaking.
1. PREPARATIONS AND TOOLS
Before embarking on the disassembly of a Midea solar panel, certain preparations must be meticulously undertaken. A comprehensive understanding of the tools required is essential. Basic tools typically include a Phillips head screwdriver, flat-head screwdriver, pliers, and a multimeter for testing. Additionally, having a work surface that is clean and clutter-free will keep the task orderly. Safety attire, including gloves and goggles, plays a critical role in reducing the risk of injury. It is advisable to wear non-slip shoes to maintain good footing, especially since the process may involve reaching and bending.
Proper lighting is also imperative during disassembly. Good illumination will ensure that all components are visible, allowing for a more efficient examination of the panel. Depending on your specific model, some unique additional tools may be necessary. Researching the particular assembly of your Midea solar panel can guide you to what is needed. Adequate preparations lay the groundwork for a successful disassembly.
2. DISCONNECTING THE SYSTEM
Prior to disassembling the panel, it is essential to disconnect it from any power sources. This includes turning off the main circuit and ensuring that the solar inverter is also shut down. Components within solar technology can retain electrical energy even when turned off, leading to potential shock hazards. Disconnecting properly involves ensuring that all wiring is dismantled from the inverter and the junction box. This step should not be overlooked, as it is a critical safety measure.
Once the power system is disconnected, inspect the solar panel visually. Look for signs of damage or corrosion on wiring, connectors, and the frame. If any components appear to be compromised, further precautions may be necessary before proceeding. Detailed evaluation ensures that no unforeseen issues arise during disassembly. This preparatory stage sets a solid foundation for navigating the disassembly process in a methodical manner.
3. REMOVING THE BACK COVER
With the system disconnected and assessed, the next phase involves removing the back cover of the solar panel. Most Midea panels are designed with a protective casing that shelters sensitive components from environmental damage. Typically, this casing is secured with screws tightly fastened to withstand various weather elements. A Phillips screwdriver generally suffices to unscrew these. Dedicate attention to how many screws there are and where they are located to avoid losing them during disassembly.
Once loosened, gently lift away the back cover. Depending on the model, it may be securely fitted, requiring careful manipulation to disengage. Pay close attention to any wiring or components connected to the back cover; snapping or pulling away forcefully can cause damage. For models that include a junction box attached to the back cover, ensure it remains intact without disconnecting wires prematurely. This step is crucial as it protects the integrity of both the junction box and the internal wiring of the panel.
4. INSPECTING INTERNAL COMPONENTS
Upon removing the back cover, a careful inspection of the internal components is warranted. Midea solar panels typically contain important elements such as the solar cells, junction box, and bypass diodes. Each component serves a specific purpose in the functionality of solar technology. Solar cells are the heart of the panel, converting sunlight into electricity; thus, they require careful handling.
Evaluate the condition of solar cells for any signs of damage, such as cracks or discoloration. If damage is evident, it may require prompt and careful replacement or repair. Beyond visual inspection, utilizing a multimeter can help test the functionality of solar cells and determine if they are operational. Issues identified at this juncture should be documented for potential future repairs or replacements. This thorough approach to internal inspection guarantees that any hidden problems do not hinder the efficient use of solar technology.
5. REMOVING SOLAR CELLS
The next critical step involves the removal of solar cells, which demands meticulous effort. Typically, solar cells are encapsulated within a protective layer of glass and resin, which can be quite delicate. Using a flat-head screwdriver can help gently pry the cells away from their encasement. Special attention must be paid to how the cells are adhered; applying too much force may result in breaking the glass or damaging the cells.
Once loosened, carefully lift the solar cells from their mounts. It is advisable to remove them one at a time to maintain organization. Ensure that each solar cell is stored safely to prevent damage, keeping them free from dust and scratches. Considering that these cells are fragile, handling them with care mitigates the risks associated with disassembly.
6. DISMANTLING OTHER COMPONENTS
With solar cells removed, attention shifts to other components of the solar panel. This often includes the junction box, bypass diodes, and additional wiring harnesses. Each of these parts serves critical roles in the overall functionality of the solar panel. Begin by carefully detaching any connectors that link the junction box to the solar cells and other parts of the panel.
Pry open the junction box without using excessive force. Inside, bypass diodes will typically be housed, and examining these can reveal whether they are functioning efficiently. If necessary, use the multimeter to assess their operational status. Understanding each part’s function and condition can aid in making informed decisions about the replacement or repair process. This ongoing analytical approach aligns with best practices in maintaining solar technology.
7. REASSEMBLY OR DISPOSAL
As the disassembly process nears completion, thoughts may turn to what comes next—reassembly or disposal of removed components. If components are functioning effectively upon inspection and testing, it may be worthwhile to consider reassembly. Each piece should be meticulously cleaned prior to reinstallation for optimal performance.
Conversely, if components are damaged and non-functional, proper disposal methods should be followed. Recycling solar panel components is often an environmentally responsible choice. Investigation into local recycling programs that specialize in solar technology can provide guidance on effective disposal options. Evaluating the condition and usability of parts post-disassembly ensures thoughtful and responsible actions, ultimately supporting sustainability efforts in the community.
8. MAINTENANCE AFTER DISASSEMBLY
Regardless of whether the goal is reassembly or disposal, ensuring the longevity and efficiency of solar technology requires ongoing maintenance. Establishing a routine inspection schedule is advisable to monitor the health of solar panels. Conducting thorough inspections can help identify issues before they escalate into larger problems, minimizing downtime and repair costs.
Regular cleaning of solar panels is also essential, as debris can impede efficiency. This is especially vital for areas prone to dust accumulation, bird droppings, or other obstructions. The more proactive a maintenance approach is, the better the solar panel performance. Ultimately, maintaining vigilance contributes to maximizing the return on investment associated with solar energy systems.
FREQUENTLY ASKED QUESTIONS
WHAT SAFETY MEASURES SHOULD I TAKE WHEN DISASSEMBLING MY SOLAR PANEL?
Before engaging in the disassembly process, adhering to a strict safety protocol is paramount. Disconnecting the solar panel from any electrical sources stands as the primary measure to avoid hazards. Turn off the main circuit breaker and ensure that all components, including the inverter, are inactive before proceeding. Wearing protective gear, such as gloves and goggles, significantly reduces the risk of injury.
Additionally, ensure the workspace is free of clutter and well-lit to prevent accidents. Familiarizing yourself with the disassembly process in advance can also enhance safety as knowledge always equips individuals to anticipate potential challenges better. Following these safety protocols can significantly mitigate risks involved in the task ahead.
CAN I REASSEMBLE SOLAR PANELS ON MY OWN?
Reassembling solar panels post-disassembly is feasible provided that an individual possesses the requisite skills and knowledge. A detailed understanding of the original assembly can significantly ease the reassembly process. Documentation of removed components and their respective order can provide guidance during reconnection.
It is vital to ensure that all components are functioning properly before reinstalling them. Should any parts be damaged, professional assistance may be advisable to avoid compromising efficiency and safety. In essence, while personal reassembly is achievable, one must weigh their comfort level with complex electrical systems against the option of seeking expert help.
WHAT SHOULD I DO IF I FIND DAMAGED COMPONENTS DURING DISASSEMBLY?
Encountering damaged components throughout disassembly can pose operational challenges; however, this does not mean that all is lost. First, assess the extent of the damage—some components may be easily replaceable, while others may need professional attention. If solar cells are cracked or broken, consider sourcing replacements from the manufacturer or authorized dealers.
Should major components, such as the junction box or inverter, exhibit failure, reaching out to a solar energy professional is often the best course of action. Understanding when to engage experts will help ensure the repair or replacement process is executed correctly and safely. These considerations can equip individuals faced with damage during disassembly to take appropriate action moving forward.
In summary, essentials regarding the disassembly of Midea solar panels involve systematic steps that encapsulate safety, assessment, and maintenance. Each phase, from gathering tools to inspecting and making decisions about reassembly or disposal, contributes substantially to the larger task. Comprehensively examining components and ensuring protocols are followed are pivotal in optimizing the performance and longevity of solar technology. Empowerment through knowledge and preparation leads to superior outcomes when managing disassembly and its subsequent stages.
Original article by NenPower, If reposted, please credit the source: https://nenpower.com/blog/how-to-disassemble-midea-solar-panel-2/
