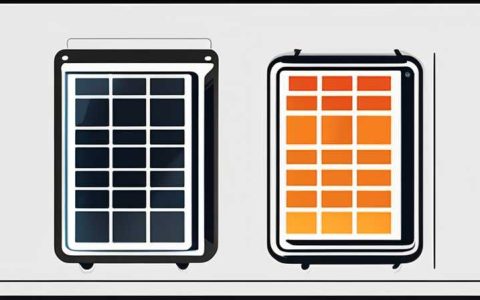
To connect two ordinary solar cells in series, ensure that the positive terminal of the first cell is connected to the negative terminal of the second cell. This configuration results in a higher output voltage equal to the sum of the individual cells’ voltages, creating a more powerful system. 1. Ensure the solar cells share compatible voltage ratings, 2. Properly connect terminals to form a series circuit, 3. Use appropriate connectors and wiring for safe electricity flow, 4. Test the output to verify correct functionality. When forming connections, it is important to use proper insulations and protective measures to prevent any shorts, as well as ensuring that the cells are placed in sunlight for optimal performance.
Now, let’s explore the topic further.
1. UNDERSTANDING SOLAR CELLS
Solar cells, the foundation of photovoltaic technology, convert sunlight into electricity using semiconductor materials, commonly silicon. The functioning of these cells depends primarily on their exposure to sunlight and the inherent properties of the materials used. When light strikes the solar cell, it excites electrons, generating an electric current. Two solar cells connected in series form a significant advantage in the production of electricity.
In a series connection, the voltage output of each cell adds together. For instance, if one solar cell produces 0.5 volts and another also produces 0.5 volts, the cumulative output will be 1 volt. This configuration is essential in applications requiring higher voltages, such as powering small appliances or charging batteries. In addition to voltage enhancement, series connections are vital in maintaining a stable power supply, combating fluctuating conditions typically associated with renewable energy systems.
2. MATERIALS REQUIRED FOR CONNECTION
Before embarking on the task of connecting two solar cells, ensuring that all necessary tools and materials are available is crucial. The fundamental components required include solar cells, connecting wires, a soldering iron, solder, and electric connectors. Let’s explore their significance in detail.
The solarncells should ideally be of the same type and rating to ensure compatibility in performance and efficiency. Mixing different manufacturers or power ratings can lead to inefficiencies, as the weaker cell will likely limit the performance of the stronger one. Good quality connecting wires are essential to minimize power losses during transmission. Furthermore, soldering iron and solder are required to create robust and secure connections between the terminals of the cells.
Lastly, utilizing electric connectors offers ease of connection and disconnection, facilitating maintenance or replacement. In summary, proper preparation involves securing all necessary materials and understanding their roles in the connection process before proceeding to the actual task.
3. STEP-BY-STEP GUIDE TO CONNECT SOLAR CELLS IN SERIES
Preparing the Workspace: The workspace should be clean, well-lit, and organized to minimize distractions and accidents. It’s essential to ensure that all tools are easily accessible to facilitate a smooth working process. Moreover, it is advisable to work in a static-free environment where there’s minimal risk of damaging the electronic components.
Following Safety Protocols: Safety should always be the top priority when working with electrical components. Ensure you wear safety glasses and gloves to protect yourself from potential injuries. If you are unfamiliar with electrical work, seeking guidance from a professional or experienced individual can be a prudent approach to avoid unforeseen problems.
Inspect the Solar Cells: Before making connections, thoroughly inspect each solar cell for any visible damage or defects. Cells should be free of cracks or chips and have clean surfaces. If any debris or dirt is present on the solar cells, use a soft cloth or gentle brush to ensure they are clean, as impurities can hinder electrical efficiency.
Connecting the Solar Cells: Start with the first solar cell. Identify its positive terminal, typically marked with a symbol like “+”, and the negative terminal indicated by “-”. Using your connecting wire, attach one end to the positive terminal of the first cell. The other end of the wire will later connect to the negative terminal of the second cell.
Next, take the second solar cell and connect a wire to its negative terminal; the other end of that wire should connect back to the positive terminal of the first cell, completing the series circuit. Ensure the connections are tight and secure, using solder if necessary to create a permanent bond.
Testing the Connections: After completing the wiring, it is imperative to test the connections to ensure everything is functioning correctly. Use a multimeter to check the voltage output of the series connection. This step confirms that the solar cells are connected appropriately and that the voltage output meets expectations based on individual cell ratings.
4. TROUBLESHOOTING COMMON ISSUES
Even with meticulous care taken during installation, issues may arise in connecting solar cells. Identifying and addressing these problems is paramount in achieving optimal performance.
Low Voltage Output: One common problem encountered is insufficient voltage output. This could occur due to incorrect wiring or faulty solar cells. To troubleshoot, double-check all connections ensuring that no wires are loose or improperly positioned. Testing each cell individually can help determine if one is underperforming.
Intermittent Performance: Another concern is irregular performance of the solar cells, which can be associated with environmental factors such as shading, dirt accumulation, or damaged cells affecting the entire setup. Regular maintenance and cleaning of the solar panels can mitigate these issues. Additionally, ensure that the solar cells receive maximum sunlight exposure by positioning them at the right angle.
Overheating Issues: Electrical components can sometimes overheat, especially if they are not rated for the power they are conducting. Ensure that the wires used are of adequate quality and that the connections are secure, providing minimal resistance which can cause heat buildup. If overheating persists, consult an expert to assess the wiring and load demand.
FAQs
WHICH TYPE OF SOLAR CELLS ARE MOST SUITABLE FOR SERIES CONNECTION?
When connecting solar cells in series, it is vital to utilize cells of the same type and voltage rating. Typically, most connections use monocrystalline or polycrystalline silicon solar cells, as they provide efficient energy conversion. Monocrystalline cells tend to have higher efficiency and better performance in low-light conditions, while polycrystalline cells are often more affordable. Mixing different types can lead to inefficiencies, as the weaker cell’s output limits the stronger cell. Furthermore, being consistent with voltage ratings ensures the best performance and maximizes the system’s capability, making it crucial to adhere to these guidelines for optimal output.
CAN I CONNECT MORE THAN TWO SOLAR CELLS IN SERIES?
Yes, connecting more than two solar cells in series is entirely feasible. In fact, creating longer series of cells can significantly increase the voltage output required for specific applications. However, when deciding to add more cells, one must consider the overall voltage requirements of the system and ensure all cells are compatible in terms of voltage ratings and specifications. Additionally, the physical space available for installation should be taken into account. When connecting multiple cells, any faulty cell in the series can adversely affect the overall performance, hence it is crucial to regularly monitor and maintain the system.
HOW DOES SHADING AFFECT SOLAR CELLS IN SERIES?
When solar cells are connected in series, shading effects can severely compromise the entire output of the series circuit. This is due to the fact that the current flowing through each solar cell must be the same; thus, a shaded cell will limit the amount of current produced across the series. As a result, even if some cells are fully illuminated and generating optimal power, the entire output will depend on the performance of the least productive cell. Therefore, it is crucial to place solar panels in locations with maximum sunlight exposure and remove any objects that could cast shadows onto the cells. Using bypass diodes can also help mitigate shading issues by allowing current to bypass shaded sections.
INFORMATION RELEVANT TO CONNECTING SOLAR CELLS IN SERIES IS CRUCIAL.
The pursuit of renewable energy sources and innovative solutions for sustainability has made connecting solar cells in series an increasingly valuable skill. By enhancing voltage output and ensuring stable power supply systems, individuals and organizations can leverage the benefits of solar technology for varied applications. Proper understanding of solar cell mechanics, meticulous attention to connection protocols, thorough inspections, and troubleshooting common issues will empower you towards achieving an efficient solar energy system.
Familiarity with the tools, components, and safety protocols lays the groundwork for this mechanical endeavor. Proper notation of each step not only helps in execution but also serves as a trusted guide for maintaining the system over time. The appreciation for renewable energy is not just about empowerment through knowledge; it is also about fostering a mindset geared towards sustainable solutions. Through diligence and innovation, the world progresses towards a greener future, wherein individual efforts contribute to greater ecological harmony. The connection of solar cells represents just one of many steps towards achieving this global objective.
Original article by NenPower, If reposted, please credit the source: https://nenpower.com/blog/how-to-connect-two-ordinary-solar-cells-in-series/


