
Connecting a PE solar tube requires several precise steps to ensure effective functionality. 1. Understand the components, including the solar tube, connectors, and brackets. 2. Select the appropriate mounting location that receives adequate sunlight exposure. 3. Install brackets securely, ensuring they can withstand environmental factors. 4. Connect the solar tube to the existing plumbing system, taking care to seal all joints properly to prevent leaks. 5. Test the system after installation to ensure optimal performance. One critical point is the proper sealing of connections; any leakage can reduce efficiency and cause damage to other system components, making it vital for durability.
1. UNDERSTANDING PE SOLAR TUBES
To successfully connect a PE solar tube, it is imperative to first understand its components and their functions. PE solar tubes, often crafted from polyethylene, are designed to harness solar energy efficiently. They are used in various applications, such as heating water or providing space heating. The primary components include the solar tube itself, connectors that facilitate the linking of different sections, and additional mounting brackets that secure the assembly to existing structures. Each element plays a vital role in the overall efficiency and ease of installation of the solar tube system.
Solar heating systems generally function by absorbing sunlight through the transparent exterior of the tube. The absorbed energy then heats the fluid circulating inside. Proper installation ensures that maximum solar exposure is obtained, which in turn boosts the efficiency of heating or energy generation processes. Furthermore, familiarity with these components aids in troubleshooting any issues that may arise during or after installation.
2. SELECTING MOUNTING LOCATIONS
Choosing an appropriate site for installation is crucial for the efficiency and functionality of the solar tube. Ideal locations typically include roofs or areas with full sun exposure; they should be free from obstructions such as trees or buildings that cast shadows. The angle and orientation of alignment also play significant roles in absorption efficiency, with angles usually varying based on geographic location and seasonal changes.
When considering placement, be mindful of potential structural issues. Ensure that the chosen site can support the weight of the solar tube equipment and is compliant with local building regulations. Many solar tube systems benefit from an angle between 30 to 60 degrees, which increases sun exposure throughout the day. Evaluation of these parameters will lay a solid foundation for a successful installation.
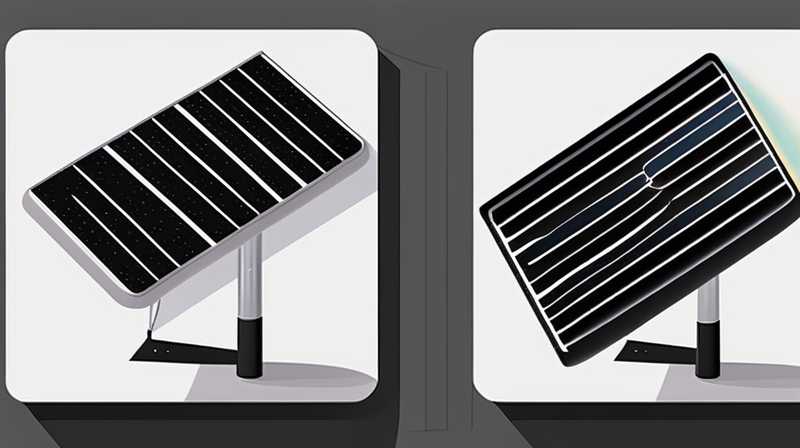
3. INSTALLING MOUNTING BRACKETS
Once an appropriate location is determined, the installation of mounting brackets follows. Brackets must be secured firmly to prevent any movement during extreme weather conditions. This aspect of the installation process not only affects the efficiency of the solar tube system but also ensures its longevity. Begin by drilling pilot holes based on the mounting bracket specifications and securing them with the appropriate fasteners.
Consider using stainless steel or corrosion-resistant materials for the brackets to ensure durability over time. Once the brackets are firmly in place, check for levelness. A level installation guarantees that rainwater does not accumulate on the solar tubes, which can lead to premature wear or damage. Properly mounted brackets are instrumental in ensuring the stability of the installation throughout the seasons.
4. CONNECTING THE SOLAR TUBE
With brackets securely in place, the process of connecting the solar tube can commence. Begin by carefully aligning the solar tube with the mounting brackets, ensuring that all components fit snugly. This step is crucial for minimizing heat loss and maximizing solar energy absorption. Attach the solar tubes to the installed brackets, using the required fasteners, ensuring that everything is aligned properly.
Two primary methods can be employed for connecting solar tubes: using flexible connectors or rigid connections. Flexible connectors allow for slight adjustments after installation, which is particularly useful in situations where precise alignment may be challenging. Rigidity, on the other hand, often affords increased durability and reduced maintenance needs. Regardless of the method employed, make certain that all connections are secure and tight to avert potential leaks.
5. SEALING CONNECTIONS
One of the most critical aspects of connecting a PE solar tube includes properly sealing all connections. Failures in sealing can lead to energy loss due to heat dissipation, thereby negating the energy efficiency that the system purports to deliver. Use high-quality sealants that are designed for solar and plumbing applications. Focus on key joints and connections where heat transfer may occur, ensuring that these points are well-protected.
Regular checks on the connections post-installation can help detect any signs of wear or leaks. Such vigilance ensures that performance remains optimal and mitigates potential issues before they escalate. Consider employing hose clamps or other fastening devices to further secure connections, enhancing reliability over time.
6. INTEGRATING WITH EXISTING PLUMBING SYSTEMS
Another essential step involves connecting the solar tube to the pre-existing plumbing system. Utilize appropriate adapters that fit both the solar tube and the plumbing system, ensuring compatibility and maintaining efficiency. Thorough knowledge of local building codes and regulations is vital during this stage, as improper connections can lead to plumbing failures or inefficiencies.
It is advisable to consult with a licensed plumber or a solar installation expert to guarantee that connections are made securely and comply with all regulatory standards. A well-configured connection to the plumbing system allows for effective fluid circulation and optimizes the energy transfer from the solar tube to the heating system.
7. TESTING SYSTEM PERFORMANCE
Upon completing the installation of the solar tube, testing the entire system is crucial to confirm operational effectiveness. Begin testing by checking for leaks at connection points, ensuring that all joints are adequately sealed. During the testing phase, monitor the temperature of the water being heated to gauge efficiency.
Regular performance checks can help to identify any early signs of failure. If any irregularities are noted, they can be addressed before they develop into more significant issues, ensuring the longevity of the system. Consider implementing a monitoring system that tracks efficiency over time, ultimately leading to improved performance and problem-solving capacity.
FREQUENTLY ASKED QUESTIONS
WHAT ARE THE BENEFITS OF USING PE SOLAR TUBES?
The benefits of employing PE solar tubes extend beyond efficiency; they also include environmental sustainability and reduced energy bills. By harnessing solar energy, these tubes provide a renewable source of energy. The long lifespan of PE materials contributes to their effectiveness, as does their ability to perform efficiently in various climates. Moreover, their lightweight nature simplifies installation, while their durable construction ensures that maintenance is minimal. Cost savings on energy bills can be substantial over time as well, making them an attractive option for homeowners and businesses alike.
HOW LONG DO PE SOLAR TUBES LAST?
The longevity of PE solar tubes can vary based on several components, including the quality of materials used and environmental factors. Generally, well-maintained tubes can last anywhere between 15 to 30 years. Regular inspections and proactive maintenance practices can significantly enhance their lifespan, preventing costly repairs or replacements in the long term. Factors such as weather conditions, exposure to UV rays, and installation quality play essential roles in determining the tube’s durability and overall operational efficiency.
ARE THERE ANY SPECIFIC MAINTENANCE REQUIREMENTS FOR PE SOLAR TUBES?
Maintenance requirements for PE solar tubes are relatively low, but some practices can enhance their efficiency. Routine checks for leaks, ensuring all connections remain secure, and cleaning the tube surface from debris can enhance performance. Minimizing obstructions that could hinder sunlight exposure is also advisable. Solar tubes should ideally be inspected annually to catch any potential issues early, allowing for timely repairs. With minimal upkeep, these systems can provide robust performance, thereby maximizing energy production and sustainability over their lifespans.
The complex interplay of components, proper practices, and routine maintenance signifies the importance of diligence in connecting and maintaining PE solar tubes. Emphasizing specific stages ranging from understanding components to ensuring seamless connections with existing systems facilitates a robust approach to installation. Adequate sealing not only prevents leaks but also optimizes energy absorption, enhancing system efficiency. Truly, the alignment of all these critical elements underscores the overall success of the installation process. With proactive measures and regular performance checks, any potential complications can be mitigated early on. Properly connected and maintained, a PE solar tube system can yield significant benefits, from energy cost savings to reduced environmental impact, paving the way for future advancements in sustainable energy systems. Continual learning and adaptation to new practices are essential to maintain efficiency and reliability, ensuring the effectiveness of solar technology in everyday applications.
Original article by NenPower, If reposted, please credit the source: https://nenpower.com/blog/how-to-connect-pe-solar-tube/
