
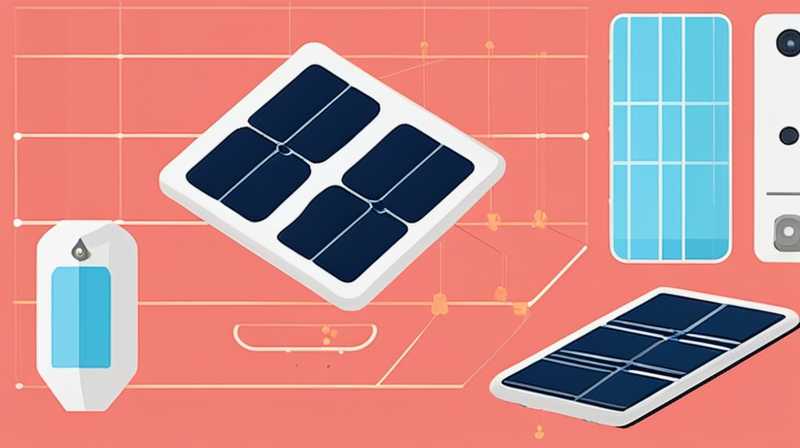
To connect 10 solar cells effectively, you need to consider several key aspects to ensure optimal performance, including 1. Choosing the correct configuration for desired voltage and current output, 2. Understanding series versus parallel connections, 3. Using appropriate wiring and connectors to maintain efficiency, 4. Paying attention to safety precautions during assembly. The configuration for connecting solar cells can have a significant impact on the system’s overall performance and efficiency. For instance, connecting the cells in series increases the voltage output while maintaining the same current, which can be beneficial for certain applications, whereas connecting in parallel keeps the voltage constant but increases the current capacity.
1. UNDERSTANDING SOLAR CELL CONFIGURATIONS
Solar cells can be connected in various methods, making it crucial to grasp the principles underpinning these configurations. The two primary methods involve series and parallel arrangements, each with distinct advantages depending on the intended application and available space.
In a series connection, the negative terminal of one solar cell connects to the positive terminal of the next. This arrangement raises the voltage while the current remains constant, which can be particularly advantageous for systems that require higher voltage inputs. A typical example includes residential applications where higher voltage modules are preferable. However, if one cell becomes shaded or compromised, the entire string’s performance may decrease, highlighting a potential disadvantage in specific scenarios.
Conversely, in a parallel connection, solar cells are connected by linking all positive terminals together and all negative terminals. This method maintains the same voltage output while increasing the total current. This setup could prove beneficial in situations where maximizing current is essential, such as charging batteries that require higher current levels. A parallel connection also provides redundancy; if one cell fails, the rest continue to operate effectively.
In summary, both series and parallel configurations have unique benefits and drawbacks, depending largely on the specific application. Therefore, a comprehensive understanding of these concepts is the foundation for successfully connecting solar cells.
2. COMPONENTS REQUIRED FOR A SOLAR CELL CONNECTION
Before embarking on connecting solar cells, secure all components necessary for completing the setup effectively. It’s crucial to gather not only the solar cells but also various essential elements that will facilitate a smooth connection process and ensure maximum efficiency.
Begin by obtaining high-quality solar cells, which are typically made from monocrystalline or polycrystalline silicon. The choice between these types can influence both the efficiency and cost; monocrystalline cells generally provide higher efficiency and hence more power per square foot, but they come at a premium price. Polycrystalline cells, while often less expensive, may have lower overall efficiency. Careful consideration of space and budget will influence the selection of the appropriate type.
In addition to the cells themselves, wiring is crucial for a successful connection. Use wires that can handle the expected current without overheating. Typically, gauge size is inversely proportional to wire diameter, with smaller gauge numbers signifying thicker wire capable of carrying higher currents. Using connectors designed for solar applications will also ensure that connections remain secure and efficient over time. It’s advisable to include some form of protection against environmental factors, such as UV exposure.
By gathering these components and ensuring their suitability, you will set the stage for a successful assembly of the solar setup.
3. INSULATING AND SAFEGUARDING CONNECTIONS
Understanding how to properly insulate and safeguard connections is paramount for both performance and safety during the assembly process. Correct measures can minimize the risk of damage and enhance the longevity of the solar array.
Begin with effective insulation of connections, primarily achieved through heat shrink tubing or electrical tape. Heat shrink tubing provides a robust and weather-resistant seal that can protect against moisture and physical damage, which is especially important for cells exposed to outdoor elements. Applying heat will cause the tubing to contract tightly around the connection, ensuring that no moisture or debris can infiltrate.
Additionally, it’s vital to implement proper safety measures throughout the assembly process. Always work with solar cells in a shaded area, as direct exposure to sunlight may result in unexpected voltage outputs that can cause shocks. Wearing insulated gloves can provide an essential safety barrier during handling and connecting. Furthermore, ensure there are no loose strands of wire that can cause shorts, leading to the degradation of performance or risk of fire. Incorporating fuses can also protect against overcurrent situations, preserving both hardware and safety.
These precautionary steps will provide reassurance not only regarding the efficiency of the solar array but also concerning the safety of those handling the installation.
4. TESTING AND TROUBLESHOOTING THE CONNECTION
After successfully connecting the solar cells, it’s imperative to engage in thorough testing to ensure everything functions as expected. This final verification encompasses both performance measures and troubleshooting potential issues that could arise.
Initial testing involves measuring the output voltage and current under direct sunlight conditions. Use a multimeter to verify these parameters, and compare them against expected outputs based on the configuration used (series or parallel). If the output does not meet expectations, further investigation is required to pinpoint issues, which may include faulty cells or improper connections.
If problems are encountered, troubleshooting should focus on systematically assessing each connection. Check for loose or corroded terminals, as these can create significant resistance, impacting performance. Using an appropriate method such as thermal imaging may help identify hot spots, which are an indication of wiring or cell failures.
Connecting solar cells is not only a technical task but also one that requires meticulous attention to the details of assembly, testing, and optimization. Successful completion will lead to enhanced energy production, directly contributing to sustainability efforts available in various sectors.
FREQUENTLY ASKED QUESTIONS
WHAT IS THE BEST CONFIGURATION FOR CONNECTING SOLAR CELLS?
The optimal configuration for connecting solar cells largely depends on the specific application and desired voltage and current output. Series connections are typically preferred when higher voltage is necessary; for example, multiple cells can achieve a voltage level suitable for solar panel systems that connect directly to inverters. On the other hand, parallel connections are beneficial for applications requiring higher current capacity without raising the total voltage above what a battery can safely handle. Ultimately, the choice between series and parallel arrangements will hinge on factors such as the voltage requirements of the system, available space, and the total energy output desired.
HOW DO I DETERMINE THE WIRE GAUGE FOR MY SOLAR CELLS?
Determining the proper wire gauge for solar cell connections takes into account the predicted current and the distance between the cells and the load. An essential factor to remember is that wire resistance increases with length, which can lead to power loss. As a general rule of thumb, use a wire gauge that minimizes voltage drop over the distance the electricity needs to travel. Resources such as wire gauge charts specific for solar applications can provide guidance based on current and length. It’s prudent to opt for a wire that can carry more current than needed to account for any fluctuations in power generation, ensuring safety and efficiency within the system.
HOW CAN I ENSURE THE LONGEVITY OF MY SOLAR CELL CONNECTIONS?
To maintain the longevity of solar cell connections, implement various best practices throughout assembly and operation. Begin with high-quality materials, including robust wires and connectors designed for outdoor usage. Proper insulating techniques must be applied to protect against environmental elements that can cause corrosion or damage. Routine maintenance checks are advisable, examining connections for signs of wear or damage, such as frayed wires or loose connectors. Additionally, keeping the solar array clean and free of debris can enhance performance and extend the durability of the entire setup. By prioritizing quality, safe practices, and routine maintenance, you can ensure more extended operational life for your solar cells.
FINAL THOUGHTS
The process of connecting 10 solar cells demands a thorough understanding of configurations, safety, and testing. Deciding between series and parallel arrangements is inextricably linked to the specific needs of the application, while the assembly requires careful attention to component quality and connection integrity. Adequate insulation and protective measures are critical in this endeavor, coupled with routine testing and troubleshooting to identify and rectify any emerging issues. To encapsulate this journey, leveraging high-quality materials, adopting rigorous safety and maintenance practices, and continuously enhancing knowledge will significantly contribute towards a successful solar energy system that offers sustainability and energy independence.
Original article by NenPower, If reposted, please credit the source: https://nenpower.com/blog/how-to-connect-10-solar-cells/
