
1. Assembling a solar lantern is a straightforward process that enables individuals to utilize renewable energy for illumination. 2. Begin by gathering all necessary components, including the solar panel, LED light, battery, wiring, and housing material. 3. Ensure that all parts are in good condition and compatible. 4. Follow the manufacturer’s instructions carefully while connecting the components, as this will guarantee a functional end product. 5. Once assembled, allow the solar panel to charge in sunlight for several hours before usage.
1. INTRODUCTION TO SOLAR LANTERNS
The incorporation of solar technology in lighting has transformed how individuals approach energy solutions. Solar lanterns, in particular, offer an eco-friendly alternative to traditional sources of illumination. The assembly of these units comprises well-designed elements that harness sunlight during the day for use at night. Not only do they provide light, but they also promote sustainability by reducing dependence on fossil fuels.
Modern solar lanterns can serve various purposes, including camping, emergency use, and home illumination. Their ability to perform without reliance on the grid makes them particularly appealing. Understanding the assembly process enhances users’ capability to ensure the lantern operates efficiently and lasts for an extended period.
2. GATHERING MATERIALS
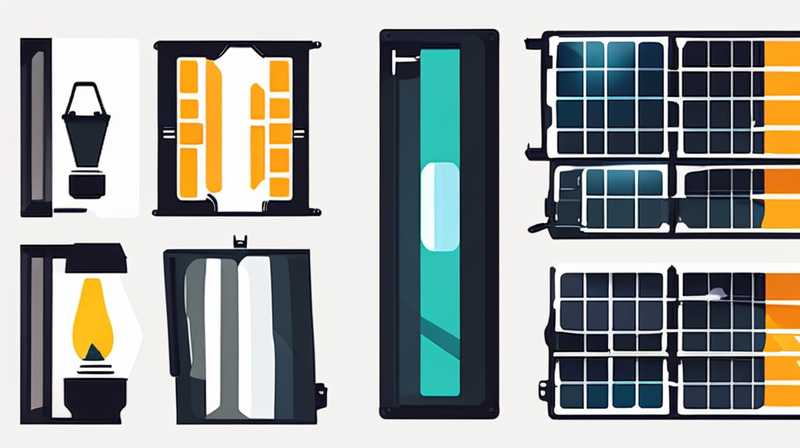
Before embarking on the assembly journey, one must gather all the essential materials required to build a solar lantern. Essential components typically include a solar panel, LED light, rechargeable battery, wiring, and a housing unit. The quality of these materials plays a significant role in the performance of the finished product.
Selecting a solar panel is a crucial step, as it converts sunlight into electricity. Panels vary in size and power output, so individuals should consider their specific illumination needs. The LED light, known for its efficiency and longevity, should also be compatible with the solar panel and battery configuration to ensure optimal output. Furthermore, the battery must have appropriate capacity levels to store sufficient energy for nighttime use.
3. COMPONENT CONNECTIONS
With all necessary materials collected, attention shifts to the vital process of connections. This stage is fundamental to the overall functionality of the solar lantern. Connecting components involves linking the solar panel, battery, and LED light appropriately. Each connection must adhere to the manufacturer’s guidelines to avoid mishaps during usage.
Wiring serves as the life-force of the lantern, directing electrical flow from the solar panel to the battery and subsequently to the LED light. Ensuring the connections are secure and insulated reduces the risk of short-circuits or energy loss. Once assembled, it is advisable to double-check connections for accuracy and safety before proceeding to the next steps.
4. HOUSING AND PROTECTION
Appropriate housing of the solar lantern is imperative for durability and functionality. The housing protects the internal components from environmental elements such as moisture, dust, and physical damage. Choosing suitable materials for housing will contribute significantly to the lantern’s longevity and performance.
A well-designed housing should facilitate easy access to the solar panel for optimal sunlight exposure while providing protection during harsh weather. Ventilation is also essential to prevent overheating of electrical components. Users must ensure that the housing allows for natural airflow while securely enclosing the internal assembly.
5. CHARGING THE LANTERN
Once assembly is complete and the housing is in place, charging the solar lantern is the next logical step. Optimal sunlight exposure is crucial for efficient charging, and users should place the lantern in a sunny location for several hours. The duration of charging can vary depending on the solar panel’s size and efficiency.
It’s advisable to check the battery’s charge indicator, if available, to ensure the lantern receives adequate sunlight. During the charging phase, it’s wise to assess the integrity of all connections and the housing. Ensuring that everything functions correctly will prevent potential issues when utilizing the lantern in low-light conditions.
6. TESTING AND TROUBLESHOOTING
The post-assembly testing phase offers users a chance to ensure their solar lantern functions as intended. This process involves turning on the LED light after sufficient charging to confirm operational readiness. Observing how bright and long the light lasts can serve as an indicator of the assembly’s success.
In case the lantern fails to illuminate or exhibits dim lighting, troubleshooting is necessary. Common issues might include faulty connections, insufficient charging, or defective components. Identifying and rectifying these problems early on ensures long-lasting performance and reliability of the lantern.
FREQUENTLY ASKED QUESTIONS (FAQs)
WHAT IS A SOLAR LANTERN?
Solar lanterns are portable lighting devices that utilize solar energy, converting sunlight into electrical power through the use of solar panels. These lanterns consist of key components, such as a solar panel, rechargeable battery, and LED light. The solar panel captures sunlight during the day, charging the battery, which subsequently provides energy to the LED light when darkness falls. With rising interests in sustainable living, solar lanterns have become increasingly popular for outdoor activities, emergency situations, and even household lighting solutions. They offer an eco-friendly alternative to traditional electric lamps and can greatly reduce energy expenditures while promoting independence from fossil fuels.
HOW LONG DOES IT TAKE TO CHARGE A SOLAR LANTERN?
The time required to charge a solar lantern can vary significantly depending on multiple factors, including the capacity of the solar panel, the battery’s storage capacity, weather conditions, and geographical location. On a sunny day, most solar lanterns can achieve a full charge within 6 to 8 hours, making them suitable for everyday use. However, on cloudy or rainy days, charging could take considerably longer. Users should also consider that efficiency decreases during winter months due to shorter daylight hours. It is crucial to place the lantern in direct sunlight for optimal charging, as shaded areas will inhibit energy absorption, leading to inadequate power for evening illumination.
HOW DO I MAINTAIN MY SOLAR LANTERN?
Maintenance of solar lanterns is essential for extending their lifespan and ensuring optimal performance. Regularly inspect all components for signs of wear, including the solar panel, which should be kept clean and free of obstructions such as dust and debris. Users can clean the panel with a soft cloth and mild detergent to enhance solar energy absorption. Checking the battery periodically is also important, as batteries can degrade over time and may require replacement every few years, depending on usage. Additionally, keeping the housing intact and free from leaks can significantly affect the function and safety of the lantern. Ensuring ventilation can help prevent heat buildup, which could damage the internal components over time.
Achieving expertise in assembling solar lanterns may seem daunting, yet it is a rewarding endeavor that fosters independence and sustainability. Proper comprehension and execution of the assembly process can effectively lead to the creation of a reliable solar lantern. By diligently gathering materials, meticulously connecting components, thus ensuring robust housing, individuals set the stage for energy-efficient lighting solutions. The meticulous nature of assembling such important tools cannot be overstated, as it has far-reaching implications beyond immediate illumination.
Automatic charging and testing of the lantern solidifies the assembly process and assures that the lantern meets energy needs when darkness descends. Through understanding the intricacies of solar technology, consumers learn the importance of reliable energy sources while experiencing the benefits of renewable energy first-hand. Prioritizing maintenance ensures long-lasting functionality and affirms a commitment to sustainability in today’s marred by environmental concerns. Everyone who undertakes this venture can contribute to a greener planet by adopting renewable sources such as these illuminating devices.
In embracing solar lantern assembly, individuals not only beautify their surroundings with light but also empower themselves through knowledge and self-sufficiency. The steps outlined serve to nurture an understanding of this technology, which is a small but significant part of greater ecological conservation efforts. Embracing innovation in energy solutions facilitates a brighter, more sustainable future.
Original article by NenPower, If reposted, please credit the source: https://nenpower.com/blog/how-to-assemble-a-solar-lantern/
