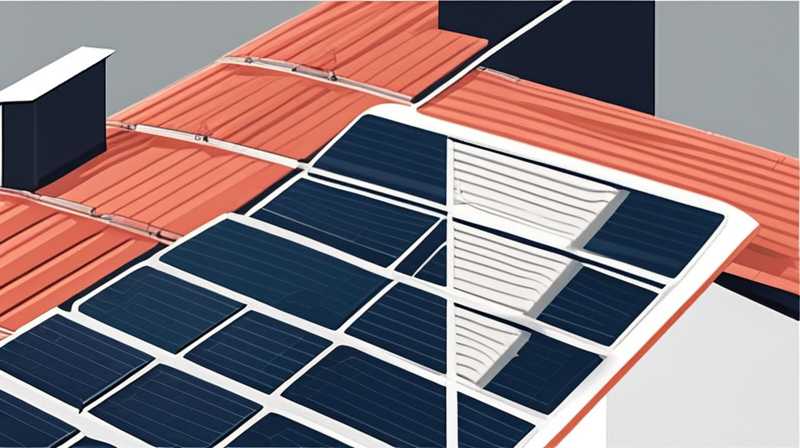
1. Understanding the Basics of Solar Panel Placement on Tile Roofs, 2. Evaluating Structural Integrity, 3. Selecting the Right Mounting System, 4. Installation Techniques
Installing solar panels on a large tile roof requires careful consideration and planning. 1. Understanding the Basics of Solar Panel Placement on Tile Roofs entails evaluating the orientation and pitch of the roof to maximize sunlight capture. 2. Evaluating Structural Integrity ensures that the roof can support the weight of the panels and mounting hardware. 3. Selecting the Right Mounting System is crucial for securing panels without compromising the integrity of the roof. 4. Installation Techniques should also focus on employing correct methods for sealing any penetrations made during installation.
Adopting solar energy not only contributes positively to the environment but also reduces energy costs over time. However, the installation process, especially on large tile roofs, can be complex and requires a skilled approach.
1. UNDERSTANDING THE BASICS OF SOLAR PANEL PLACEMENT ON TILE ROOFS
The initial stage in the journey of implementing solar energy involves understanding the optimal placement of solar panels on a tile roof. A successful installation hinges on the roof’s orientation and pitch. Orienting the panels towards the sun’s trajectory allows for maximum energy capture. The pitch of the roof also plays a pivotal role, influencing how much sunlight can reach the panels throughout the day.
Conducting a site survey becomes essential, wherein the installer should assess shading from nearby structures, trees, or other obstacles. Properly analyzing the roof’s exposure to sunlight can directly correlate to the system’s efficiency. Additional factors such as the local climate and seasonal sunlight variability should also be taken into account. The ideal scenario features a south-facing roof that receives unobstructed sunlight for the majority of the day.
Moreover, understanding the tile material is vital since different types—such as clay and concrete—exhibit varied weights and structural strengths. For example, clay tiles may require a distinct approach compared to heavier concrete tiles, especially concerning weight distribution and the potential for damage during mounting.
2. EVALUATING STRUCTURAL INTEGRITY
Once the basics of solar panel placement are established, a thorough evaluation of structural integrity is paramount. Assessing the roof’s condition serves as a critical step before installation commences. Inspecting for any signs of wear, sagging, or water damage ensures the roof can adequately support the additional weight of solar panels without risking long-term issues.
It’s advisable to conduct a detailed inspection involving both visual assessments and possibly even third-party evaluations by roofing professionals. These experts can provide insights into the remaining lifespan of the roof and whether any repairs or reinforcements are necessary. Should the existing roof show signs of significant wear, it may be prudent to consider replacing or repairing it prior to installing solar panels.
Furthermore, analyzing the roof’s structural components, such as rafters and trusses, offers insight into whether they can bear the additional load. Understanding local building codes and regulations is also essential; these codes often require adherence to certain weight limits and safety standards that can affect installation practices.
3. SELECTING THE RIGHT MOUNTING SYSTEM
Choosing the right mounting system is integral to a successful solar panel installation on a tile roof. Various mounting options are available, and the decision typically hinges on factors like roof design and the specific type of tiles being used. Low-profile mounts, for instance, enhance aesthetics and reduce potential wind resistance. Ballasted systems, while easier on the roof, might not be feasible in locations with heavy snowfall or extreme winds, necessitating a more secure approach.
To implement a robust mounting solution, it is essential to consider the mounting hardware as well. Using stainless steel or aluminum attachments can provide durability against the elements, ensuring longevity. Proper flashing and waterproofing techniques must also be employed to prevent moisture intrusion at penetration points and to maintain the roof’s integrity.
Each mounting system presents unique advantages and disadvantages. For instance, while flush mounts may limit water pooling, they may also result in slightly reduced cooling effects. Understanding these trade-offs helps in selecting a system that not only fits the physical characteristics of the roof but also aligns with the homeowner’s expectations in terms of aesthetics and performance.
4. INSTALLATION TECHNIQUES
The installation phase of placing solar panels on tile roofs is complex and requires meticulous attention to detail. Proper techniques must be executed to ensure both functionality and the preservation of the roof’s structure. The initial step involves securely anchoring the mounting hardware to the roof rafters, which provides the necessary support for the panels. This process often requires specialized tools and expertise to ensure that everything aligns properly and is securely fastened.
Sealing penetrations made in the tiles is critical, as improper sealing can lead to leaks and subsequent water damage. Using high-quality sealants designed specifically for roofing applications ensures that these areas remain watertight. Additionally, it is wise to consider applying protective barriers, such as rubber washers or gaskets, around bolts to mitigate any contact that may lead to tile cracking.
Teamwork and coordination are also essential during the installation process, especially given the weight and positioning of the panels. Ensuring that all team members understand their roles keeps the workflow efficient and minimizes risks. Once the panels are placed, rigorous testing should be conducted to confirm their performance and security.
FREQUENTLY ASKED QUESTIONS
WHAT TYPE OF SOLAR PANELS IS BEST FOR TILE ROOFS?
When considering solar panels for tile roofs, it’s essential to evaluate the type of tiles and the weight capacity of the roof. Typically, monocrystalline solar panels are preferred due to their efficiency and performance in limited space. Given their high energy output, they require less surface area than their polycrystalline counterparts. However, it’s crucial to consider installation requirements, as some mounting systems work better with certain types of panels and roof structures. Additionally, the aesthetic factors and interactions with specific tile materials can influence the choice. Engaging a professional installer who can assess your unique tile roof can further guide a homeowner in selecting the proper type of solar panel.
WHAT ARE THE COSTS ASSOCIATED WITH INSTALLING SOLAR PANELS ON A TILE ROOF?
The costs of installing solar panels on tile roofs can vary based on several factors, including the size of the installation, the type of solar panels selected, and the specific roof characteristics. On average, homeowners can expect to invest between $15,000 to $30,000 for a whole-system installation. This price usually includes the panels, inverters, mounting systems, and installation labor. Furthermore, roofing repairs or reinforcements may incur additional expenses. Local market conditions, incentives, and rebates available can also influence overall costs and can vary significantly by region. Therefore, obtaining multiple estimates from different solar installers is vital for discovering the most accurate and cost-effective options specific to your situation.
HOW CAN I MAINTAIN MY SOLAR PANELS ON A TILE ROOF?
Proper maintenance is essential for ensuring that solar panels on tile roofs continue to function efficiently. Routine inspections every six months should be performed to identify any debris buildup, such as leaves or bird droppings, that may obstruct sunlight. In regions with significant weather changes, such as heavy rainfall or snow, additional checks after these events are advisable to ensure that no damage has occurred. Cleaning the panels using filtered water and a soft cloth or sponge can help eliminate any dirt without scratching the surface. Furthermore, checking mounting systems for corrosion or looseness safeguards against unexpected failures. Engaging professional services periodically can assure optimal performance and longevity.
To encapsulate the entire process of installing solar panels on a large tile roof, several critical considerations and steps come into play. Understanding the intricacies of placement, evaluating structural integrity, selecting an appropriate mounting system, and employing the correct installation techniques are vital aspects that contribute to a successful installation. Each phase necessitates not only technical knowledge but also a meticulous approach to execution to ensure both performance and safety.
Moreover, the overall process extends beyond mere installation; it encompasses financial aspects, ongoing maintenance, and long-term efficiency. Solar technology continues to evolve, and regular communication with installers about best practices and advancements in the industry furthers the potential for maximized benefits. By remaining proactive and informed, homeowners can enjoy a sustainable energy solution that ultimately contributes positively to the environment and offers significant savings over time.
Original article by NenPower, If reposted, please credit the source: https://nenpower.com/blog/how-to-place-solar-panels-on-a-large-tile-roof-video-2/


