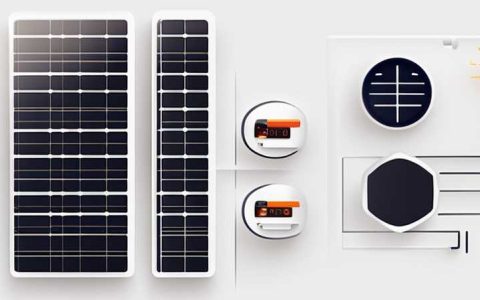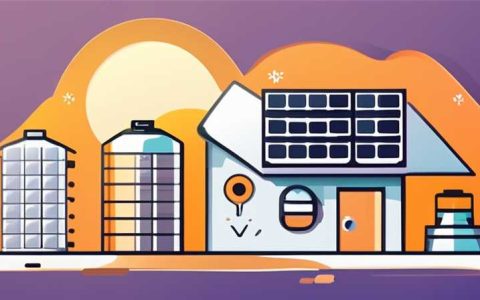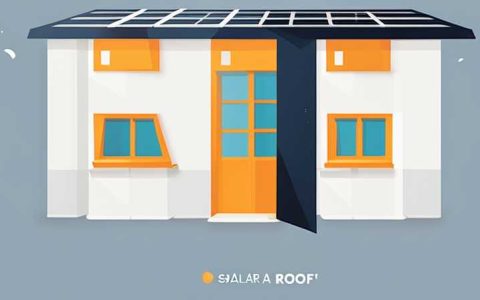
1. ENGAGING WITH WALL MOUNTED SOLAR PANELS ENTAILS MULTIPLE STEPS: 1. ASSESSING ADEQUATE SOLAR EXPOSURE, 2. SELECTING APPROPRIATE MOUNTING HARDWARE, 3. INSTALLING WIRING FOR ELECTRICITY FLOW, 4. CONNECTING TO INVERTER AND POWER SYSTEMS. Assessing adequate solar exposure involves evaluating the chosen installation site for sunlight availability throughout the day and determining the appropriate angle for maximum energy absorption. It is essential to select robust mounting hardware suitable for the specific wall type and environmental conditions, ensuring stability and longevity. Proper installation of wiring is crucial to facilitate seamless energy flow from the panels to the inverter. Finally, connecting the system to the inverter and existing power infrastructure enables the conversion of solar energy into usable electricity for home or business purposes.
1. ASSESSING ADEQUATE SOLAR EXPOSURE
Understanding where to install wall mounted solar panels is fundamental, as it directly impacts energy generation efficiency. A meticulous assessment of the location should begin with an analysis of its solar exposure. Potential locations must receive direct sunlight for a substantial portion of the day. Factors such as shade from nearby trees, buildings, or even cloud cover can significantly hinder performance. Therefore, conducting a shade analysis during various times throughout the day and different seasons is critical. It ensures that the chosen site will not just yield energy during peak sun hours but throughout various conditions.
Moreover, evaluating the angle at which panels are mounted can enhance their performance dramatically. The optimal angle varies based on geographical location and specific seasonal conditions. For many regions, a tilt angle equal to the latitude can be beneficial, but local climatic conditions should also influence this decision. For instance, areas prone to heavy snowfall may benefit from steeper angles to prevent snow accumulation. Engaging with professional advice or utilizing solar modeling software can provide precise estimations for optimal angles based on historical sunlight data.
2. SELECTING APPROPRIATE MOUNTING HARDWARE
After pinpointing an ideal location, the next step involves selecting mounting hardware designed to fit the characteristics of the chosen wall. Mounting brackets and hardware should be selected based on the materials of both the panel and the wall. When dealing with a brick or stucco surface, bolts need to be utilized to anchor the hardware securely, whereas wooden frames may require lag screws.
Additionally, considerations regarding weather resistance and durability play a significant role. It is prudent to opt for stainless steel or galvanized steel components to resist corrosion, especially in coastal regions. If the environment is particularly harsh, such as areas prone to windy conditions, utilizing heavy-duty mounting systems designed for such conditions will enhance the durability of the installation. The careful selection of hardware can provide peace of mind regarding the long-term survivability and efficiency of the solar panel system.
3. INSTALLING WIRING FOR ELECTRICITY FLOW
Once the panels are securely mounted, attention shifts to the installation of wiring. This aspect is vital as it connects the solar panels to the inverter and ultimately to the electrical system of the building. It’s essential to use high-quality, weather-resistant cables that can withstand environmental exposure, particularly for exterior installations.
Wiring routes should be planned meticulously to ensure minimal distance between the panels and the inverter to reduce energy loss via resistive heating. Conduits can provide additional protection and organization, especially in areas where wiring traverses potentially hazardous zones such as walkways or gardens. Proper labeling of wiring components, including the solar panel input and inverter output, ensures easy identification and troubleshooting in future maintenance endeavors.
For safety and compliance, it’s advisable to follow local electrical codes while making these connections. Engaging a professional electrician with solar installation experience can ensure that wiring is executed safely and effectively, adhering to necessary standards while optimizing system performance.
4. CONNECTING TO INVERTER AND POWER SYSTEMS
The final stage in connecting wall mounted solar panels involves linking the system to the inverter and subsequently integrating it with the home or commercial power grid. The inverter’s primary role is to convert the direct current (DC) output generated by solar panels into alternating current (AC), which is the standard form of electricity used in most homes and businesses.
Choosing the right inverter is critical; options include string inverters, micro-inverters, or power optimizers. String inverters are more common and suitable for systems with multiple panels in similar lighting conditions. However, micro-inverters may perform more efficiently in installations where panels might be shaded at different times.
After installing the inverter, the connection to the electrical panel must be made. This stage should always adhere strictly to local regulations. Ensuring that connection points are secure and voltage levels are correct is paramount. A qualified professional should oversee this final integration step to ensure safety and functionality, as this stage commonly involves interfacing with mains electricity, which can pose risks if not handled correctly.
SOLAR PANEL INSTALLATION FAQs
WHAT SOLAR PANEL SYSTEM SIZE DO I NEED?
Selecting the appropriate size for a solar panel system largely hinges on various factors concerning energy consumption and available space. Begin by analyzing monthly electricity bills to ascertain energy usage patterns. Generally, a standard residential system produces between 300 and 400 watts per panel. Multiply the total wattage requirement by the estimated number of sun hours per day to identify how many panels are necessary. Additionally, geographic location and specific energy constraints should inform the choice of system size. For instance, regions experiencing extended sunlight duration may mitigate the need for extensive panel installation. It is also prudent to consult with solar providers who can evaluate individual needs by performing a comprehensive energy audit and propose a tailored system size.
HOW LONG DO SOLAR PANEL SYSTEMS LAST?
When effectively installed and maintained, solar panel systems can exhibit significant longevity, commonly ranging between 25 to 30 years. Many manufacturers provide warranties ensuring performance within specified efficiency bounds during this period. Factors impacting lifespan include the quality of materials, environmental conditions, and maintenance practices. Panels exposed to extreme weather conditions may age prematurely; thus, ensuring proper installation with adequate ventilation and shading management can enhance performance longevity. Regular inspections can spot wear and damage early on, allowing for timely repairs which preserve efficiency. Additionally, advancements in solar technology continue to improve the resilience and efficiency of newer panels, further extending the potential lifespan of modern solar installations.
WHAT MAINTENANCE DO SOLAR PANELS REQUIRE?
Maintaining solar panels is crucial for optimizing performance and ensuring longevity. Primarily, solar panels require regular cleaning to remove dust, debris, or snow that may obstruct sunlight absorption. Depending on environmental conditions, scheduled cleanings may range from biannually to quarterly. Individuals should consult manufacturer guidelines, as panel materials might dictate specific cleaning methods.
In addition to cleaning, it is vital to conduct periodic inspections to identify any signs of wear or damage. This includes checking mounting hardware, electrical connections, and inverter functionality. Early detection of issues can prevent costly repairs later on. Furthermore, maintaining an unobstructed area around panels not only enhances sunlight exposure but also facilitates easy access for inspection and cleaning, ensuring ongoing efficiency over the life of the solar installation.
IN SUMMARY, CONNECTING WALL MOUNTED SOLAR PANELS INVOLVES CRITICAL STEPS IN PLANNING AND EXECUTION. FROM ASSESSING SOLAR EXPOSURE TO IMPLEMENTING STRONG MOUNTING SOLUTIONS, THIS PROCESS REQUIRES A THOUGHTFUL APPROACH. ENSURING PROPER WIRING INSTALLATION AND INTEGRATING WITH POWER SYSTEMS IS PARAMOUNT TO ACHIEVE DESIRED ENERGY EFFICIENCY. THOROUGH RESEARCH, PROFESSIONAL INPUT, AND ADHERENCE TO SAFETY STANDARDS CAN ALL CONTRIBUTE TO A SUCCESSFUL SOLAR INSTALLATION EXPERIENCE. AS THE WORLD MOVES TOWARDS RENEWABLE ENERGY SOLUTIONS, EMBRACING SOLAR POWER BECOMES AN INCREASINGLY VIABLE AND ESSENTIAL OPTION FOR SUSTAINABLE ENERGY USE.
Original article by NenPower, If reposted, please credit the source: https://nenpower.com/blog/how-to-connect-wall-mounted-solar-panels-2/

